background image

Installation Guide

21

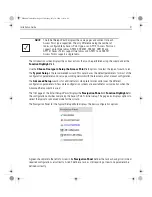
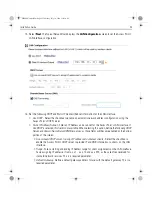
The Introduction screen displays the various actions that can be performed using the wizard under the 

Function Highlight

 field.

Use the 

Choose One type to Setup the Access Point

 field options to select the type of wizard to run. 

The 

Typical Setup

 is the recommended wizard. This wizard uses the default parameters for most of the 

configuration parameters and sets up a working network with the least amount of manual configuration. 

The 

Advanced Setup

 wizard is for administrators who prefer more control over the different 

configuration parameters. A few more configuration screens are available for customization when the 
Advanced Setup wizard is used.

The first page of the 

Initial Setup Wizard

 displays the 

Navigation Panel

 and 

Function Highlights

 for 

the configuration activities comprising the Access Point's initial setup. This page also displays options to 
select the typical or advanced mode for the wizard.

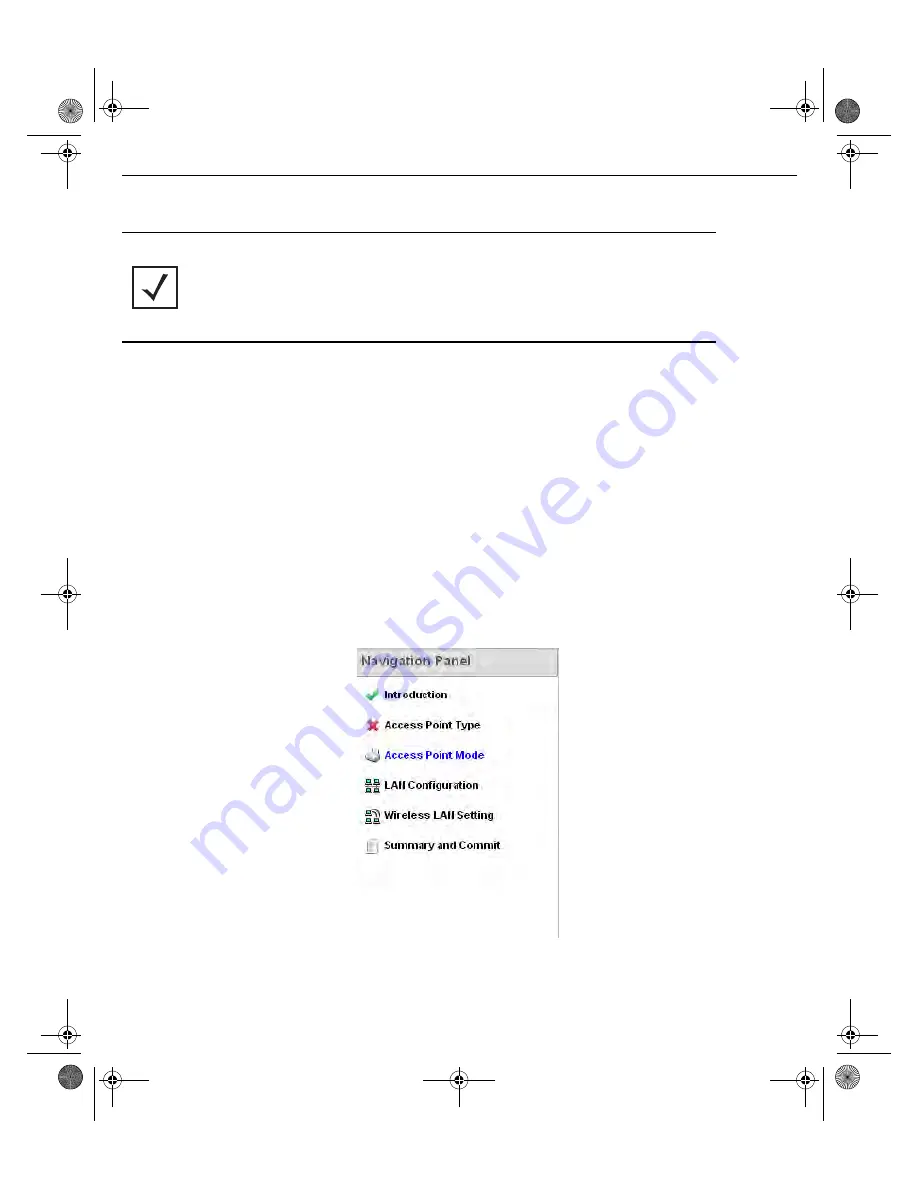
The Navigation Panel for the Typical Setup Wizard displays the basic configuration options.

A green checkmark to the left of an item in the 

Navigation Panel

 defines the task as having its minimum 

required configuration set correctly. A red X defines a task as still requiring at least one parameter be 
defined correctly.

NOTE

The Initial Setup Wizard displays the same pages and content for each 
Access Point type supported. The only difference being the number of 
radios configurable by Access Point type, as an AP7131 Access Point can 
support up to three radios, AP6522, AP6532, AP6562, AP8132 and 
AP7161 Access Points support two radios and AP6511 and AP6521 
Access Points support a single radio.

MN000879A01B.fm  Page 21  Thursday, July 10, 2014  11:01 AM

Summary of Contents for AP-7522

Page 1: ...AP 7522 Access Point INSTALLATION GUIDE MN000879A01B fm Page 1 Thursday July 10 2014 11 01 AM ...

Page 2: ...22 Access Point MOTOROLA SOLUTIONS and the Stylized M Logo are registered in the US Patent Trademark Office Motorola Solutions Inc 2014 All rights reserved MN000879A01B fm Page 2 Thursday July 10 2014 11 01 AM ...

Page 3: ...ocedure Existing Access Point Replacement 13 2 6 Suspended Ceiling T Bar Mount Installation 14 2 7 LED Indicators 17 3 0 Basic Access Point Configuration 19 4 0 AP 7522 Access Point Specifications 30 4 1 Electrical Characteristics 30 4 2 Physical Characteristics 30 4 3 Radio Characteristics 31 5 0 Regulatory Information 32 5 1 Regulatory Information 32 5 2 Wireless Device Country Approvals 32 5 2 ...

Page 4: ...s Part 15 37 5 6 2 Radio Frequency Interference Requirements Canada 37 5 7 CE Marking and European Economic Area EEA 38 5 8 Statement of Compliance 39 5 9 Japan VCCI Voluntary Control Council for Interference 39 5 10 Korea Warning Statement for Class B ITE 39 5 11 Other Countries 39 5 12 Waste Electrical and Electronic Equipment WEEE 41 5 13 Turkish WEEE Statement of Compliance 42 6 0 Motorola Sol...

Page 5: ...ions Access Point technology refer to the WiNG Access Point System Reference Guide to familiarize yourself with Access Point technology and the feature set supported by the WiNG operating system The guide is available at https portal motorolasolutions com Support US EN Wireless Networks This document is written for the qualified network device installer 1 1 Document Conventions The following graph...

Page 6: ...e ventilation to all installed equipment Identify and prepare Ethernet and console port connections Verify cable lengths are within the maximum allowable distances for optimal signal transmission 1 4 AP 7522 Package Contents An AP 7522 Access Point is available in external antenna AP 7522 and internal antenna AP 7522I configurations An AP 7522 ships with the following AP 7522 Access Point AP 7522 ...

Page 7: ...owing dual band antenna Part Number Antenna Type 2 4 GHZ Gain dBi 5 GHZ Gain dBi Impdance Ohms ML 2452 APA2 01 Dipole 3 17 4 6 50 ML 2452 HPA5 036 Dipole 3 5 50 ML 2452 APAG2A1 01 Dipole 2 7 1 7 50 ML 2452 PNA5 01R Panel 5 5 6 50 Part Number Antenna Type 2 4 GHZ Gain dBi 5 GHZ Gain dBi Impedance Ohms BIRCH INT ANT Monopole 4 13 5 92 N A MN000879A01B fm Page 7 Thursday July 10 2014 11 01 AM ...

Page 8: ...ectly rated power solution for the AP 7522 either the AP PSBIAS 2P3 ATR power injector or the PWRS 14000 54R external power supply Motorola Solutions recommends you do not to install the AP 7522 in wet or dusty areas Verify the environment has a continuous temperature range between 4 F to 104 F 20 C to 40 C for external antenna Access Points and 32 F to 104 F 0 C to 40 C for internal antenna Acces...

Page 9: ...ed to the GE1 POE LAN port When users purchase a WLAN solution they often need to place Access Points in obscure locations In the past a dedicated power source was required for each Access Point in addition to the Ethernet infrastructure This often required an electrical contractor to install power drops at each Access Point location The Power Injector merges power and Ethernet into one cable redu...

Page 10: ...ected The Access Point continues to operate with power supplied from the AC adapter without change to the Access Point operating configuration If using AC adapter supplied power and a change to the AP s operating configuration is warranted the Access Point needs to be manually rebooted by the customer A separate Power Injector is required for each AP 7522 Access Point comprising the network CAUTIO...

Page 11: ...ess Point does not exceed 100 meters 333 ft The Power Injector has no On Off power switch The Injector receives power and is ready for device connection and operation as soon as AC power is applied Refer to the Installation Guide shipped with the Power Injector for a description of the device s LEDs 2 5 Wall Mount Instructions A wall mount deployment requires hanging the AP 7522 Access Point with ...

Page 12: ... locations depending on the intended deployment orientation of the unit 3 At each point drill a hole in the wall and attach the mounting bracket 4 Place the Access Point on the mounting bracket 5 Cable the Access Point using either the Power Injector solution AP PSBIAS 2P3 ATR or the approved AP 7522 power supply PWRS 14000 54R NOTE When pre drilling a hole the recommended hole size is 4mm 0 16in ...

Page 13: ...pter cable into the power connector on the Access Point e Attach the power supply line cord to a power supply 6 Verify the Access Point is receiving power by observing the LEDs are lit or flashing For more information on AP 7522 LED behavior see LED Indicators on page 17 7 The Access Point is ready to configure 2 5 2 Wall Mount Procedure Existing Access Point Replacement An existing AP 7131 or AP ...

Page 14: ... T Bar the Access Point mounting kit Part No KT 135628 01 can optionally be used as well 1 First install the mounting bracket on the T bar then attach the mounting plate using the mounting slots on the Access Point 2 Cable the Access Point using either the Power Injector solution AP PSBIAS 2P3 ATR or the approved AP 7522 power supply PWRS 14000 54R For Motorola Power Injector installations MN00087...

Page 15: ...ly line cord to the power adapter d Attach the power adapter cable into the power connector on the Access Point e Attach the power supply line cord to a power supply 3 Verify the unit has power by observing the LEDs For more information on AP 7522 LED behavior see LED Indicators on page 17 4 Align the bottom of the ceiling T bar with the back of the Access Point 5 Orient the Access Point chassis b...

Page 16: ...ccess Point 8 Rotate the Access Point chassis 45 degrees counter clockwise The clips click as they fasten to the T bar 9 The Access Point is ready to configure MN000879A01B fm Page 16 Thursday July 10 2014 11 01 AM ...

Page 17: ...allation Guide 17 2 7 LED Indicators The AP 7522 LED activity indicators are located on the front of the housing and are visible through the enclosure MN000879A01B fm Page 17 Thursday July 10 2014 11 01 AM ...

Page 18: ... on this band Blink interval at 1 time per second If this radio band is enabled Blink at 5 second interval If this radio band is disabled Off If there is activity on this band Blink interval at 1 time per second Firmware Update On Off Locate AP Mode LEDs blink in an alternating green red and amber pattern using an irregular blink rate This LED state in no way resembles normal operating conditions ...

Page 19: ...C address 00 C0 23 00 F0 0A Zero config IP address 169 254 240 10 To derive the Access Point s IP address using its MAC address a Open the Windows calculator by selecting Start All Programs Accessories Calculator This menu path may vary slightly depending on your version of Windows b With the Calculator displayed select View Scientific Select the Hex radio button c Enter a hex byte of the Access P...

Page 20: ...e the management interface has been accessed the Initial Setup Wizard automatically displays NOTE When logging in for the first time you re prompted to change the password to enhance device security in subsequent logins NOTE If you get disconnected when running the wizard you can connect again with the Access Point s actual IP address once obtained and resume the wizard MN000879A01B fm Page 20 Thu...

Page 21: ... Panel and Function Highlights for the configuration activities comprising the Access Point s initial setup This page also displays options to select the typical or advanced mode for the wizard The Navigation Panel for the Typical Setup Wizard displays the basic configuration options A green checkmark to the left of an item in the Navigation Panel defines the task as having its minimum required co...

Page 22: ...t using the Typical Setup Wizard 8 Select Typical Setup from the Choose One type to Setup the Access Point field on the Initial Setup Wizard 9 The Typical Setup Wizard displays the Access Point Settings screen to define the Access Point s Standalone versus Virtual Controller AP functionality This screen also enables selection of the country of operation for the Access Point NOTE While you can navi...

Page 23: ...ng the Access Point as it defines the correct channels of operation and ensures compliance to the regulations of the selected country This field is only available for the Typical Setup Wizard 12 Select Next to set the Access Point s network mode NOTE If wanting to adopt the Access Point to a controller or service platform use the controller or service platform s resident UI to connect to the Acces...

Page 24: ... by just a single Access Point Bridge Mode In Bridge Mode the Access Point depends on an external router for routing LAN and WAN traffic Routing is generally used on one device whereas bridging is typically used in a larger density network Select Bridge Mode when deploying this Access Point with numerous peer Access Points supporting clients on both the 2 4GHz and 5GHz radio bands NOTE When Bridge...

Page 25: ...e the following DHCP Server and Domain Name Server DNS resources as those fields will become enabled on the bottom portion of the screen Use on board DHCP server to assign IP addresses to wireless clients Select the checkbox to enable the Access Point s DHCP server to provide IP and DNS information to clients on the LAN interface Range Enter a starting and ending IP Address range for client assign...

Page 26: ...e Configure the encryption and authentication to use with this WLAN No Authentication and No Encryption Configures a network without any authentication This option also configures the network without encryption This means that any data transmitted through the network is in plain text Any device between end points can see the information transmitted This is the least secure of all network configura...

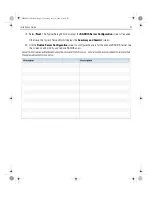
Page 27: ...on screen if required Otherwise the Typical Setup Wizard displays the Summary and Commit screen 20 Use the Radius Server Configuration screen to configure the users for the onboard RADIUS server Use the screen to add modify and remove RADIUS users MN000879A01B fm Page 27 Thursday July 10 2014 11 01 AM ...

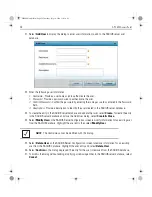
Page 28: ...eate the entry in the RADIUS server database and close the Add User dialog select Create Close 24 Select Modify User on the RADIUS Server Configuration screen to modify information for an existing user from the RADIUS database Highlight the user entry then select Modify User 25 Select Delete User on the RADIUS Server Configuration screen to remove information for an existing user from the RADIUS d...

Page 29: ...r if a screen displays settings not intended as part of the initial configuration then any screen can be selected again from within the Navigation Panel and its settings modified accordingly If the configuration displays as intended select Save Commit to implement these settings to the Access Point s configuration If additional changes are warranted based on the summary either select the target pa...

Page 30: ...3 ATR Power Injector Dimensions 7 1 in L x 6 5 in W x 1 6 in H 180 mm L x 165 mm W x 41 mm H Housing Plenum rated housing UL2043 Weight 1 8 lbs 0 82 kg Operating Temperature External antennas 4 F to 104 F 20 C to 40 C Internal antennas 32 F to 104 F 0 C to 40 C Storage Temperature 40 F to 158 F 40 C to 70 C Operating Humidity 85 RH non condensing Operating Altitude maximum 8 000 ft 28C Storage Alt...

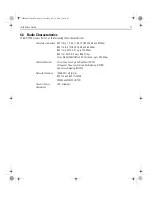
Page 31: ...s 802 11a n MCS 0 23 up to 300 Mbps 802 11ac MCS 0 9 up to 866 7 Gbps Turbo Mode 256QAM on 2 4 GHz band up to 400 Mbps Wireless Medium Direct Sequence Spread Spectrum DSSS Orthogonal Frequency Division Multiplexing OFDM Spatial multiplexing MIMO Network Standards IEEE 802 11a b g n ac 802 11d and 802 11i WPA2 WMM and WMM UAPSD Transmit Power Adjustment 1dB increments MN000879A01B fm Page 31 Thursd...

Page 32: ...enna Unauthorized antennas modifications or attachments could cause damage and may violate regulations This device is only to be used with a Motorola Solutions Wireless Switch Declared maximum operating temperature 40 C 5 2 Wireless Device Country Approvals Regulatory markings subject to certification are applied to the device signifying the radio s is are approved for use in the following countri...

Page 33: ...s High power radars are allocated as primary users meaning they have priority of 5250 5350 MHz and 5650 5850 MHz and these radars could cause interference and or damage to LE LAN devices Avertissement Le dispositif fonctionnant dans la bande 5150 5250 MHz est réservé uniquement pour une utilisation à l intérieur afin de réduire les risques de brouillage préjudiciable aux systèmes de satellites mob...

Page 34: ...ty systems Check with the manufacturer or its representative regarding your vehicle You should also consult the manufacturer of any equipment that has been added to your vehicle An air bag inflates with great force DO NOT place objects including either installed or portable wireless equipment in the area over the air bag or in the air bag deployment area If in vehicle wireless equipment is imprope...

Page 35: ...frequency energy and may affect medical electrical equipment When installed adjacent to other equipment it is advised to verify that the adjacent equipment is not adversely affected Pacemakers Pacemaker manufacturers recommended that a minimum of 15cm 6 inches be maintained between a handheld wireless device and a pacemaker to avoid potential interference with the pacemaker These recommendations a...

Page 36: ... comply with FCC RF exposure compliance requirements the antenna used for this transmitter must not be co located or operating in conjunction with any other transmitter antenna except those already approved in this filling To satisfy US and Canadian RF exposure requirements a transmitting device must operate with a minimum separation distance of 25cm or more from a person s body Pour satisfaire au...

Page 37: ...is equipment generates uses and can radiate radio frequency energy and if not installed and used in accordance with the instructions may cause harmful interference to radio communications However there is no guarantee that interference will not occur in a particular installation If this equipment does cause harmful interference to radio or television reception which can be determined by turning th...

Page 38: ...s utilisateurs il faut choisir le type d antenne et son gain de sorte que la puissance isotrope rayonnée équivalente p i r e ne dépasse pas l intensité nécessaire àl établissement d une communication satisfaisante In compliance with respective local regulatory law Motorola Solutions AP software provides professional installers the option to configure the antenna type and antenna gain for approved ...

Page 39: ...dário isto é não tem direito a proteção contra interferência prejudicial mesmo de estações do mesmo tipo e não pode causar interferência a sistemas operando em caráter primário Para maiores informações sobre ANATEL consulte o site www anatel gov br Este equipamento opera em caráter secundário isto é não tem direito a proteção contra interferência prejudicial mesmo de estações do mesmo tipo e não p...

Page 40: ...o corpo Para maiores informações consulte o site da Anatel Chile Este equipo cumple con la Resolución No 403 de 2008 de la Subsecretaria de telecomunicaciones relativa a radiaciones electromagnéticas China Mexico Restrict Frequency Range to 2 450 2 4835 GHz S Korea Taiwan 在 5 25 5 35 秭赫頻帶內操作之無線資訊傳輸設備 限於室內使用 Thailand MN000879A01B fm Page 40 Thursday July 10 2014 11 01 AM ...

Page 41: ... para reciclagem Para obter informações sobre como devolver o produto visite http www motorolasolutions com recycling weee Nederlands Voor klanten in de EU alle producten dienen aan het einde van hun levensduur naar Motorola Solutions te worden teruggezonden voor recycling Raadpleeg http www motorolasolutions com recycling weee voor meer informatie over het terugzenden van producten Polski Klienci...

Page 42: ...EU vsi izdelki se morajo po poteku življenjske dobe vrniti podjetju Motorola Solutions za reciklažo Za informacije o vračilu izdelka obiščite http www motorolasolutions com recycling weee Slovenčina Pre zákazníkov z krajín EU Všetky výrobky musia byť po uplynutí doby ich životnosti vrátené spoločnosti Motorola Solutions na recykláciu Bližšie informácie o vrátení výrobkov nájdete na http www motoro...

Page 43: ... you purchased your product from a Motorola Solutions business partner contact that business partner for support Customer Support Web Sites The Motorola Solutions Support Central Web site located at https portal motorolasolutions com Support US EN provides information and online assistance including developer tools software downloads product manuals and online repair requests Manuals https portal ...

Page 44: ... created to comply with China RoHS requirements for Motorola Solutions AP 7522 and AP 7522I Access Points 部件名称 Parts 有毒有害物质或元素 铅 Pb 汞 Hg 镉 Cd 六价铬 Cr6 多溴联 苯 PBB 多溴二苯 醚 PBDE 金属部件 Metal Parts X O O O O O 电路模块 Circuit Modules X O O O O O 电缆及电缆组件 Cables and Cable Assemblies X O O O O O 塑料和聚合物部件 Plastic and Polymeric Parts O O O O O O 光学和光学组件 Optics and Optical Components O O O O O O 电池 Batteries O O O ...

Page 45: ...Installation Guide 45 MN000879A01B fm Page 45 Thursday July 10 2014 11 01 AM ...

Page 46: ...46 AP 7522 Access Point MN000879A01B fm Page 46 Thursday July 10 2014 11 01 AM ...

Page 47: ...Installation Guide 47 MN000879A01B fm Page 47 Thursday July 10 2014 11 01 AM ...

Page 48: ...UTIONS and the Stylized M Logo are trademarks or registered trademarks of Motorola Trademark Holdings LLC and are used under license All other trademarks are the property of their respective owners 2014 Motorola Solutions Inc All Rights Reserved MN000879A01 Revision B July 2014 MN000879A01B fm Page 48 Thursday July 10 2014 11 01 AM ...

Reviews: