attaching the toys
attaching the toys
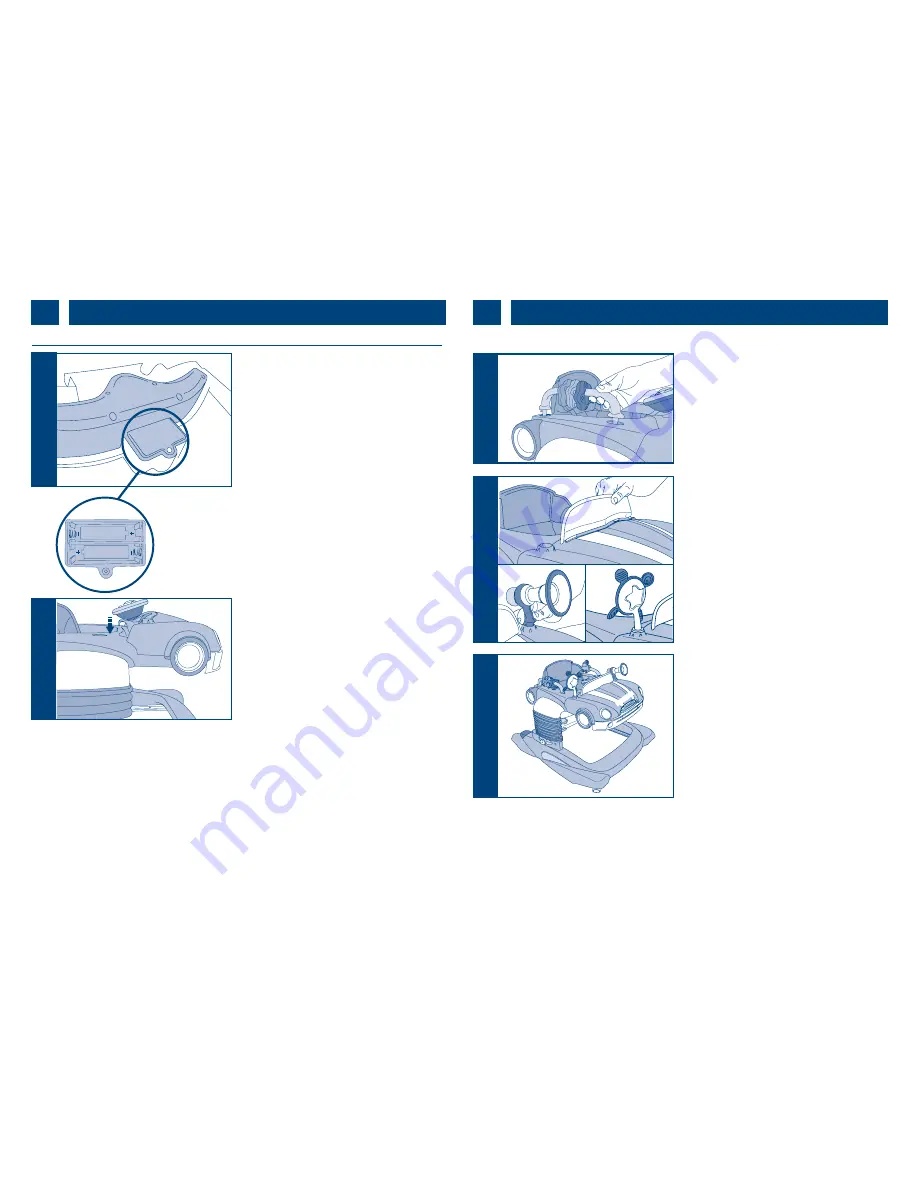
Clip the car toy tray on to the front of the seat
unit. It will click into place.
To replace the batteries in the toy tray, unclip
the tray by pushing the buttons located
underneath it on the inside of each front wheel,
then lift the toy tray away.
Clip the car toy tray on to the front of the seat
unit. It will click into place.
To replace the batteries in the toy tray, unclip
the tray by pushing the buttons located
underneath it on the inside of each front wheel,
then lift the toy tray away.
preparation for use • preparación para el uso
3
Before attaching the car toy tray to the seat
unit, turn the toy tray over and insert two AA
batteries into the battery compartment on
the underside. You’ll need a small Phillips
screwdriver to open the battery cover.
Before attaching the car toy tray to the seat
unit, turn the toy tray over and insert two AA
batteries into the battery compartment on
the underside. You’ll need a small Phillips
screwdriver to open the battery cover.
1
2
Attach the handrails by slotting the ends into
the holes on either side of the seat.
Attach the handrails by slotting the ends into
the holes on either side of the seat.
3
Clip the windscreen, horn and mirror into the
holes on the car toy tray as shown.
Clip the windscreen, horn and mirror into the
holes on the car toy tray as shown.
4
preparation for use • preparación para el uso
3
AA 1.5Vd.c LR6
AA 1.5Vd.c LR6
Use the alphabet stickers to create the number
plate of your choice. First apply the white
number plate sticker to the toy tray, then add
your chosen letters and numbers to the plate
sticker.
WARNING! Adult supervision required.
Use the alphabet stickers to create the number
plate of your choice. First apply the white
number plate sticker to the toy tray, then add
your chosen letters and numbers to the plate
sticker.
WARNING! Adult supervision required.
MC 100
5
MC 100


