background image

Slot the metal rod into the connection point on the chassis 
at the front of the stroller.

4

fig 1

3

attaching the front wheel

attaching the rear wheels

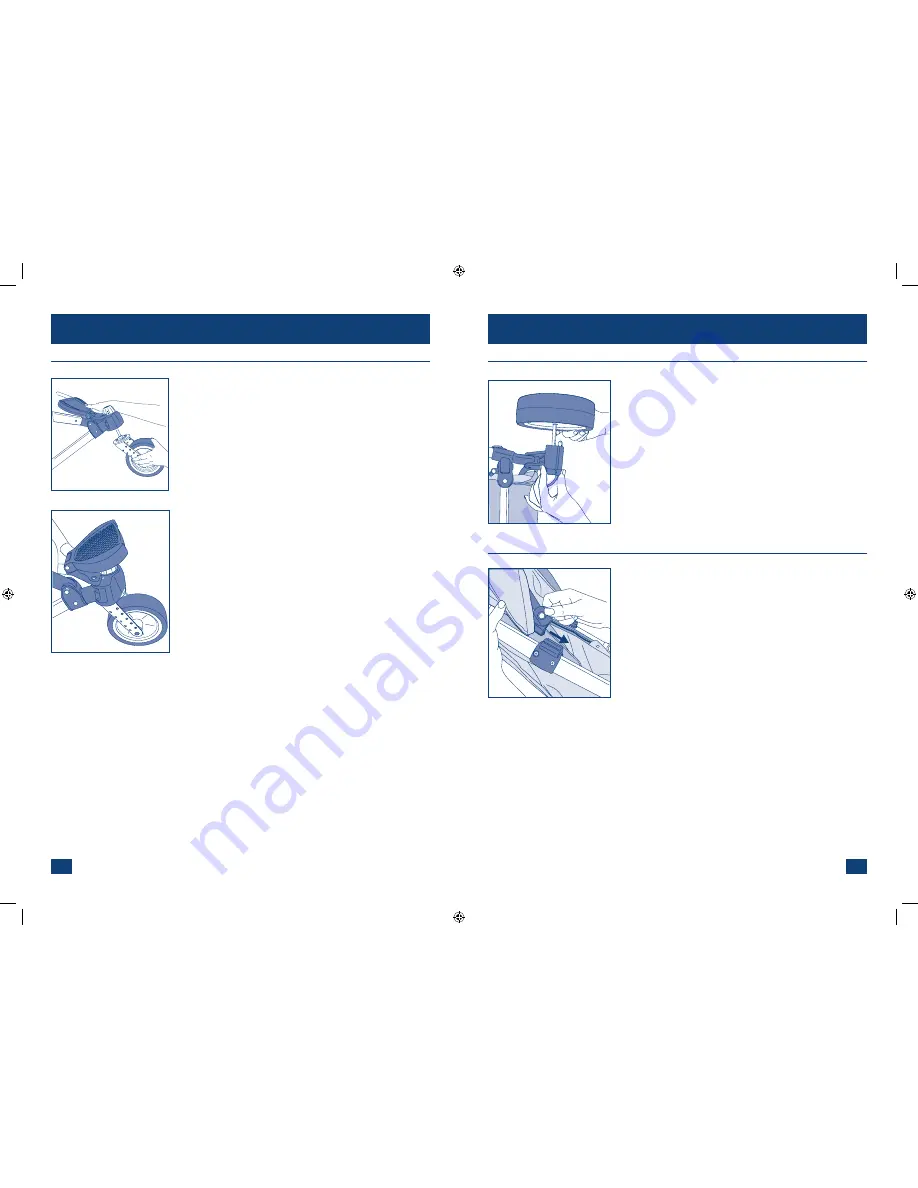
You may find it easier to lay the stroller on its side. Slot 
each wheel axle into the connector at the end of each 
back leg whilst pressing the red button on the chassis. 
The wheel will click into place, then release the button.
Pull gently on each wheel to check they are secure.

Warning: ensure all locking devices are engaged 
before use.

fig 1

attaching the hood

Slide each end of the hood over the connection points 
on the side of the chassis.

Fasten the hood fabric to the backrest using  
the poppers.

fig 1

fig 2

Press the red button on top of the front wheel and click 
the wheel into place. 

Pull gently on the wheel to check it is secure, then fold the 
footrest down so it covers the red button.

preparation for use

preparation for use

BUGGSTER D3.indd   3

3/8/07   16:12:33

Summary of Contents for Buggster

Page 1: ...r guide Warning Important Keep for future reference In the event of a problem with your product please contact Customer Care Mothercare UK Ltd Cherry Tree Road Watford WD24 6SH BUGGSTER D3 indd 1 3 8...

Page 2: ...eels hood rain cover and shopping basket WARNING this seat unit is not suitable for children under 6 months parts checklist Chassis fig 1a 1 2 preparation for use First undo the folding clips on each...

Page 3: ...elease the button Pull gently on each wheel to check they are secure WARNING ensure all locking devices are engaged before use fig 1 attaching the hood Slide each end of the hood over the connection p...

Page 4: ...eft unattended even for short periods To recline the seat undo the zips at either edge of the seat fabric To bring the seat back up again simply redo the zips fig 1 reclining the seat in use Slide the...

Page 5: ...ch shelter your baby needs fig 1 adjusting the hood applying the brake Push down firmly on the brake pedal between the rear wheels to engage the brake Check the brake is on by trying to gently push th...

Page 6: ...it altogether Remove the car seat attachment covers from the inside of the armrests Push the release catch at the top and slide the cover upwards fig 1 attaching your maxi cosi car seat Take the car...

Page 7: ...e compact storage At the back of the stroller press the red button on the black handle and twist the handle towards you fig 1 folding the stroller Press the button on the left side of the red folding...

Page 8: ...ith or hang on the stroller n If your stroller is used by someone unfamiliar with it e g grandparents always show them how it works additional care information n This stroller requires regular mainten...

Reviews: