


7
The rotor and motor of your fan have been dynamically balanced at the factory.
In addition, the blades have been matched to the nearest gram to ensure a
well balanced ceiling fan. Furthermore, a blade balancing kit has been included
with your fan. Please refer to the instructions packaged with the balancing kit
should your fan require additional balancing.
15
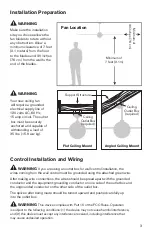
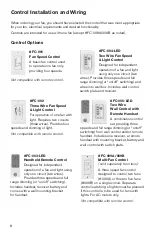
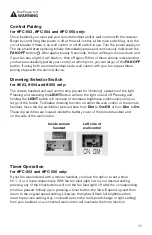
Install wall control as described in the control installation instructions
(unless you are using the handheld remote control only).
13
To install optional light kit, begin by identifying all parts on page 4, then follow
steps (a) through (c) below:
12
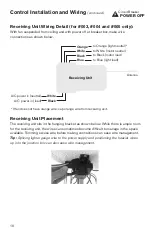
Your fan is reversible for summer and winter
operation. The reverse switch is located on the
top of the fan body. The LEFT position is for
summer and the RIGHT position is for winter.
14
reverse switch
(a) If your fan was ordered with the
LED light kit, the socket should be
pre-installed. If you are adding a light
kit, begin by connecting socket wires
to connectors from fan. Then secure
socket to light cup using socket
screws included with light kit or pre-
installed in light cup.
(b) Screw in LED lamp/bulb
(included with light kit).
(c) Identify three channels in glass
diffuser to align with fittings on inner
cup. Aligning channels and fittings,
rotate glass diffuser in the clockwise
direction until securely in place.