background image

5

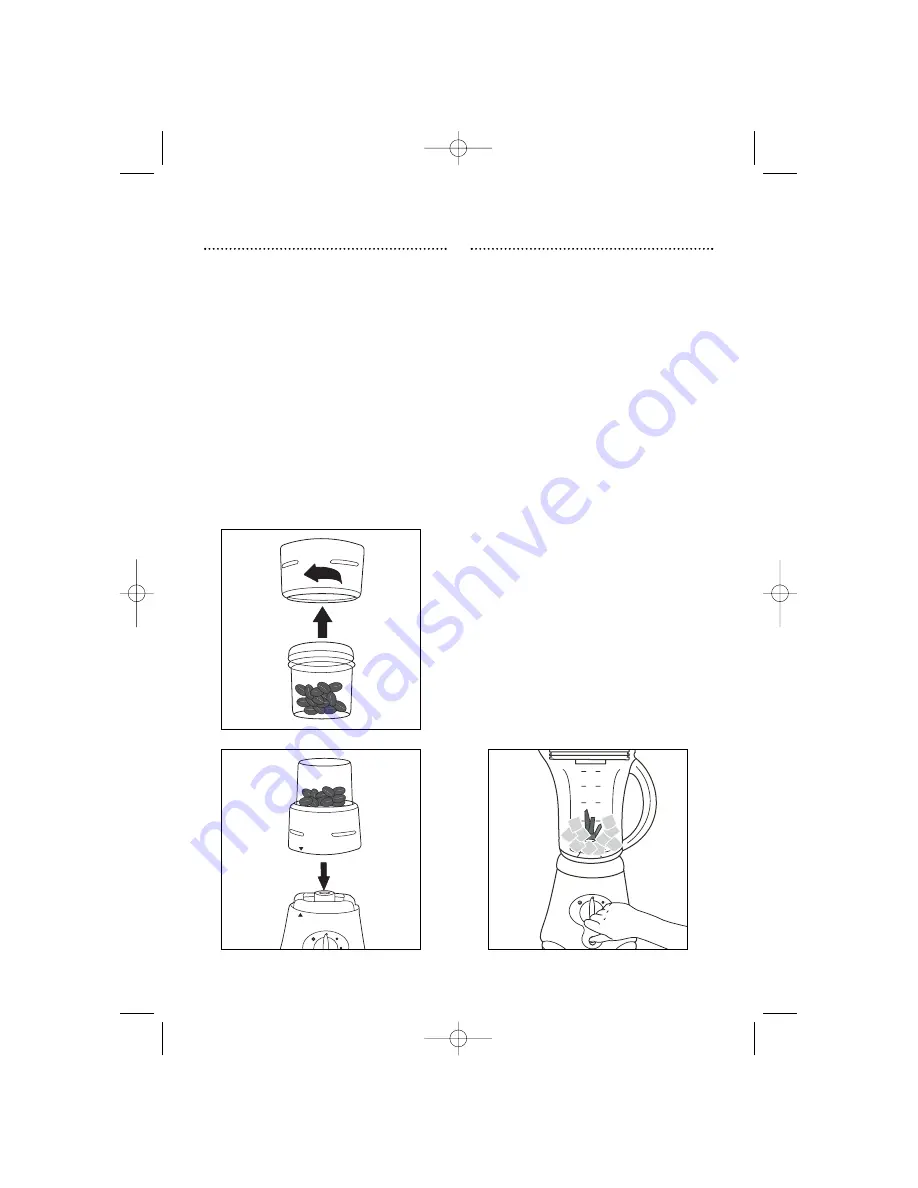
Operating the mill

1

Fill the jar with the approximate quantity.
See hints and tips.

2

Place the mill base upside down to screw
on the jar. 

E

Ensure jar is located

correctly before fitting to the base unit.

3

Place the mill attachment onto the base
unit. Will only fit when the 2 arrows are
aligned. 

F

4

Plug in the blender and turn the control
switch to the pulse position for 10-20
seconds.

Crushing ice

1

Follow the procedure for blending points
1-6, replacing food with ice cubes to be
crushed.

2

Plug in the blender and press the ice
crush button for several seconds. 

G

Note: The maximum capacity for ice
crushing at any one time is 500ml.

F

E

G

48493 Rev 1  2/3/04  12:42 PM  Page 5

Summary of Contents for PROFESSIONAL BLENDER AND MILL - REV 1

Page 1: ...uantities Do not overfill the blender Refer to the operating chart for quantities and operating times Ensure the blender lid is in place When using the blender ensure the lid is in place before switching on and do not remove until the blades have stopped rotating Operation Ensure that the jug base is fully screwed onto the jug or the product will not switch on due to a built in safety feature 4849...

Page 2: ...sils out of the blender when it is switched on Allow hot liquids to cool before blending always ensure the lid is fitted correctly WARNING Avoid touching moving parts Keep hands hair clothing as well as spatulas and other utensils away from blender blades during operation to prevent personal injury and or damage to the appliance Children Children do not understand the dangers associated with opera...

Page 3: ... Unpacking your blender Carefully unpack your blender as the blades are very sharp Remove any stickers except for serial label and wash all the parts that are safe to immerse in water WARNING Never immerse the blender body in water or in any other liquid and always ensure the electrical connections are kept dry This may be wiped with a clean damp cloth But only when unplugged from the electrical s...

Page 4: ...sh into position A 3 Screw the jug base fi onto the glass jug Ensure that the jug base is securely in place B 4 Place the blender jug onto the base unit fl Ensure that the jug base is securely in place C 5 Place the food in the blender Please see page 6 for hints on blending food 6 Place the lid onto the blender Then put the filler cap into position D 7 Plug in the blender and turn the control switc...

Page 5: ... the base unit Will only fit when the 2 arrows are aligned F 4 Plug in the blender and turn the control switch to the pulse position for 10 20 seconds Crushing ice 1 Follow the procedure for blending points 1 6 replacing food with ice cubes to be crushed 2 Plug in the blender and press the ice crush button for several seconds G Note The maximum capacity for ice crushing at any one time is 500ml F ...

Page 6: ...od Begin blending at the lower speed and increase when needed IMPORTANT To ensure the long life of your blender never run it for longer than 60 seconds and allow to cool for 5 minutes Switch off as soon as you have reached the desired consistency The machine will not work if the blender is fitted incorrectly Don t use the blender as a storage container Keep it empty when not in use Never blend mor...

Page 7: ...repeat as necessary Never use abrasives or cream cleaners Clean the base unit with a damp cloth or kitchen paper roll WARNING Never immerse the blender base unit in water To clean the jug 1 Remove the filler cap and lid from the glass jug 2 Clean all parts with warm soapy water 3 Reassemble the jug by carefully placing the glass jug on the base unit ensuring it fits correctly To clean the mill 1 W...

Page 8: ...or replaced and dispatched usually within 7 working days of receipt If for any reason this item is replaced during the 2 year guarantee period the guarantee on the new item will be calculated from original purchase date Therefore it is vital to retain your original till receipt or invoice to indicate the date of initial purchase To qualify for the 2 year guarantee the appliance must have been used...

Reviews: