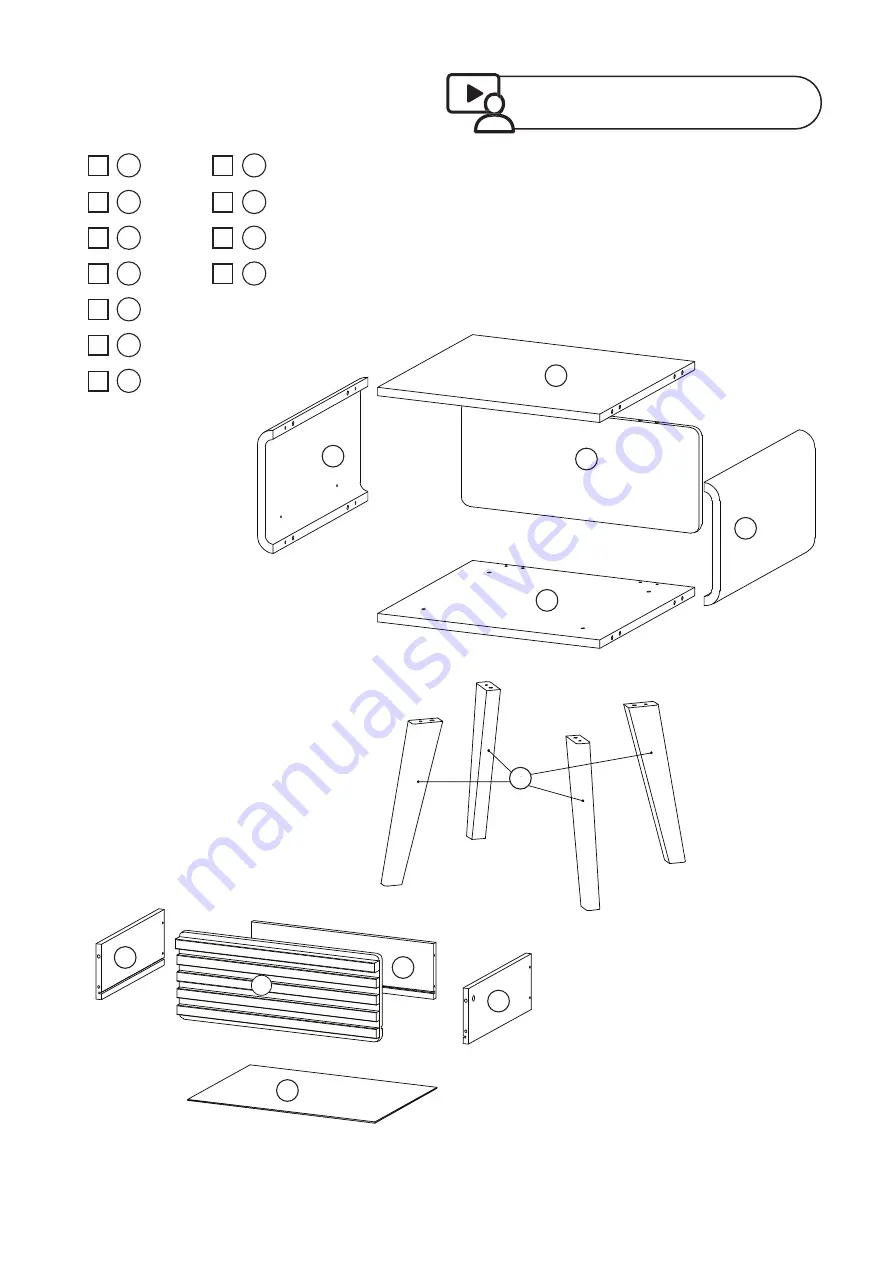
Parts
ENSLEY SIDE TABLE | 04
x1
1
2
3
4
8
9
10
11
x4
5
6
7
Watch installation demo video at:
https://bit.ly/36WUTt2
Page 1: ...ENSLEY SIDE TABLE A S S E M B LY I N S T R U C T I O N S...
Page 2: ...ur website at www mopio com warranty register or scan the QR code REGISTERED CUSTOMERS ALSO RECEIVE Exclusive offers and free gifts Early access to new product releases Interior design and styling tip...
Page 3: ...and familiarize yourself with the workload Make sure there are enough helping hands to assist you and that you have allocated the time required to assemble your new product Make sure you have cleared...
Page 4: ...Parts ENSLEY SIDE TABLE 04 x1 1 x1 2 x1 3 x1 4 x1 8 x1 9 x1 10 x1 11 x4 5 x1 6 x1 7 5 1 2 3 4 11 6 7 8 9 10 Watch installation demo video at https bit ly 36WUTt2...
Page 5: ...not completely tighten all the hardware until each assembly step is complete If parts are missing or damaged we will gladly ship your replacements parts free of charge Please contact us at help mopio...
Page 6: ...w cambolt A to board No 1 and No 2 don t over screw Please check carefully the different sizes for dowel D and dowel E Follow the illustration for matching the correct size dowel to the correct positi...
Page 7: ...d tighten it Take out rail H and follow carefully the correct position according to the illustration The roller of the rail must be positioned on the right position Then use screw K to tighten it K x4...
Page 8: ...Please ensure all the boards are in place before fully tighten all camlocks You may require an extra pair of hands to complete this step Hold and let board No 2 stand on the side Install the 4 pcs of...
Page 9: ...e Allen key provided Peel the floor protector sticker L and attach to the end of the legs You may require an extra pair of hands to complete this step Install board No 4 to the side of table top body...
Page 10: ...drawer bottom panel No 10 and ensure it engages the groove completely Install the drawer back panel board No 9 with screw J and tighten it Prepare the drawer assembly by taking out board No 6 7 8 Scre...
Page 11: ...ing the drawer in Face the drawer downwards Install the rail H at both sides of the drawer Please ensure the positioning of the rails is the same as illustrated Align the rails properly and use screw...
Page 12: ...set Enjoy your fresh and updated living space thanks to the addition of your new Mopio product Ensure there is no loose camlock or screw Ensure the drawer sliding pin are properly engaged to the groov...
Page 13: ...1 Avoid direct sunlight or use curtains or blinds to limit the sun exposure to the product 2 Clean the product regularly with a dry soft cloth 3 Avoid using abrasive or liquid cleanser 4 We recommend...
Page 14: ...Yes Simply write to our customer service team at help mopio com let us know your order ID and we will be happy to assist further 4 Who do I contact for repair queries You may write to us at help mopio...
Page 15: ...s only when the product has been properly used by consumers who purchased the product from authorized channels as a new product Proper use means using the product on a level surface where all legs tou...
Page 16: ...ther assistance with your Mopio products The Refund We will assist you to complete the return process We will perform standard inspection upon your return is received and will send you a message to ac...