


Presets
The SView 2 has 64 presets that can be used individually or as part of
an autotour. You can move to a preset by dropping down the preset
box and clicking on the desired preset. The camera will move rapidly
WRWKHSDQWLOWDQG]RRPSRVLWLRQGH¿QHGE\WKHSUHVHW
Presets are stored by going into the Admin functions, selecting Video
DQG¿QDOO\3UHVHW3RVLWLRQV)LUVWSRVLWLRQWKHFDPHUDWRWKHGHVLUHG
location using the Pan, Tilt and Zoom controls. Then place the cur-
sor in the “Current Position” box and type a descriptive name for the
position. Press “Save” when the name is correct. Repeat for each
preset desired.
7KHUH DUH WZR SUHVHWV ZLWK SUHVH¿QHG IXQFWLRQV 7KH ¿UVW SUHVHW LV
used to select autotour. The second preset will select the camera
system menus.
Preset Numbering
7KH¿UVWSUHVHWWKDWLVHQWHUHGE\WKHXVHUIROORZLQJ0HQXZLOOFRU
-
respond to Preset 4 in the PTZ. The next will be 5, etc. Care must be
taken when removing presets as you may leave a gap in the numbering
sequence. (See the section on Autotour above.) If you always remove
presets starting with the last one, the gaps will not occur.
Autotour
The Autotour function causes the camera to automatically go, in se-
quence, to each preset that has been programmed into the PTZ. The
dwell time at each preset position can be individually set to be from 0
to 99 seconds. See the Menu Driven Settings section to learn how to
set dwell time. The Autotour will continue until a pan or tilt command is
given. If the unit loses power while in Autotour, Autotour will be resumed
when power is restored.
Note that when a preset is removed via the Admin functions, it is not
actually deleted from the PTZ unit. Therefore once a preset has been
GH¿QHGLWZLOOFRQWLQXHWREHYLVLWHGGXULQJ$XWRWRXUHYHQLILWLVUHPRYHG
,IWKHODVWSUHVHWLVUHPRYHGDQGWKHQDQRWKHULVGH¿QHGLWZLOOUHSODFH
that preset in the PTZ. However, if you remove a preset that is not the
ODVWSUHVHWWKHQGH¿QHDQHZRQHLWPD\DGGDQHZSUHVHWWRWKH37=
rather than replace the previous one.
Controlling the dwell time during Autotuors is done via the menu functions.
See the Menu Driven Settings for the operation of this feature.
Restoring Autotour and Menu presets
If the Autotour and/or Menu preset is accidentally removed, the following
steps can be used to restore them.
Under Admin, select the Video icon then the “Preset Positions” icon.
From the “Preset positions:” drop down box, select each preset one at
DWLPHWKHQSUHVVWKH5HPRYHEXWWRQ:KHQWKHRQO\HQWU\OHIWLV³1RQH´
all the presets have been removed. Now go to the “Current position:”
box, type “Autotour” and press Save. Then type “Menu” and press save.
You should now see “None”, “Autotour”, and “Menu” in the drop down
boxes. Select “Menu” in the “Goto preset position” drop down box and
press Go to verify that these presets have been entered correctly. You
may then set up the desired PTZ preset positions.
Accessing the Dome Menus
The Menu function provides access to additional dome functions includ-
LQJRQVFUHHQWH[W&DPHUDDGMXVWPHQW]RQHVGZHOOWLPHVDQGV\VWHP
LQIRUPDWLRQ:KHQWKH0HQXIXQFWLRQLVVHOHFWHGWKHVFUHHQEODQNV
and 0000 is displayed on the bottom left of the screen. The up/down
controls change the current digit and the right/left controls move from
digit to digit. The password to access the menus is 6387. The password
is examined when selecting pan left at digit one or pan right at digit 4.
If the password is correct, the menus will be displayed. If the password
is incorrect, the dome will return to normal operation.
$WDQ\SRLQWLQWKHPHQXV\VWHPLIQRLQSXWSDQWLOW]RRPLVUHFHLYHG
for 30 seconds, the dome will exit the menus and return to normal
operation.
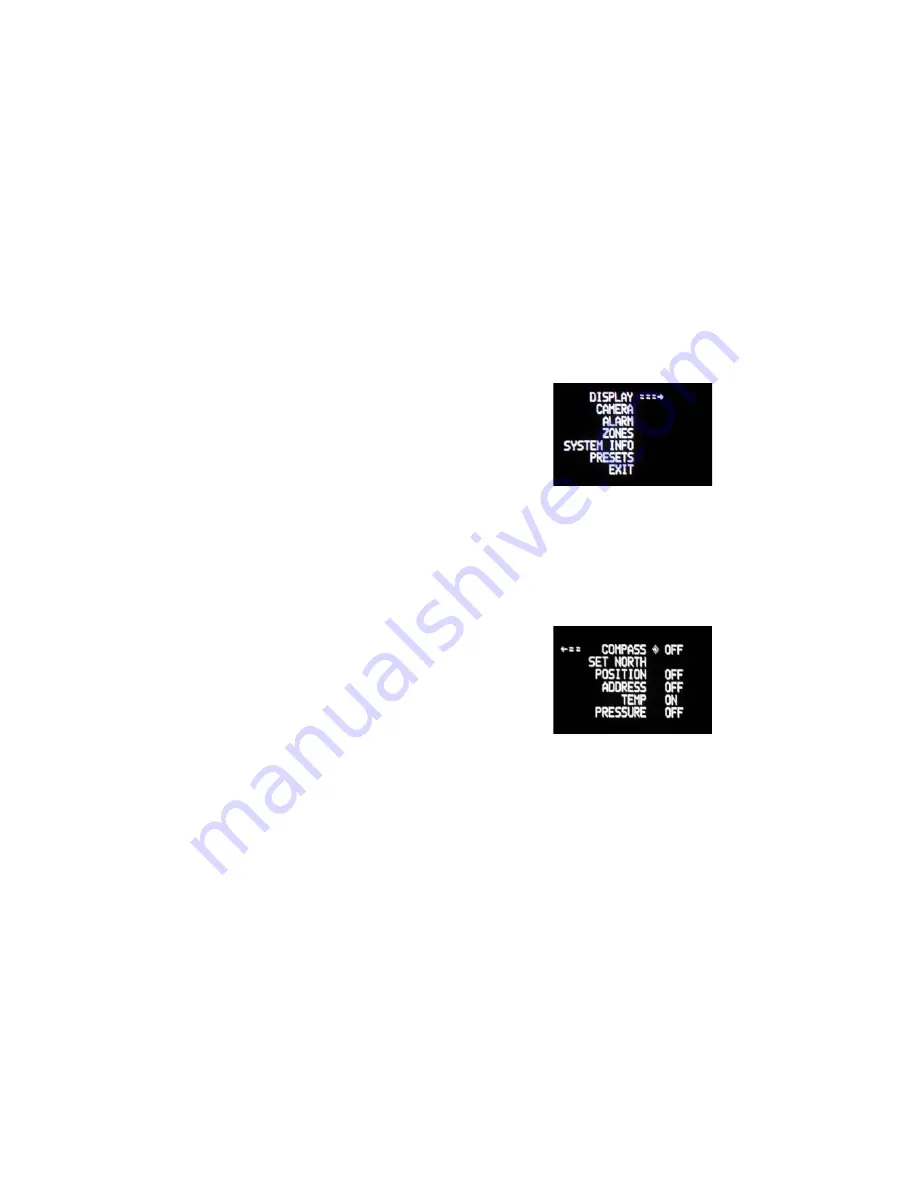
MENU DRIVEN SETTINGS
:KHQ\RXDUHLQWKH0DLQ0HQXSDQDQGWLOWIXQFWLRQVZLOOQRWFRQWURO
the motion of the pan/tilt (except where noted). Instead, “Tilt Up” or
“Tilt Down” will be used to navigate up or down along the main menu.
"Pan Right” and “Pan Left” will be used to select between the main
menu selection and the sub menu. The “Zoom In” and “Zoom Out”
are used to turn the selected functions on or off.
DISPLAY -
This controls the display of the compass heading and
allows the user to calibrate the compass heading. PAN RIGHT to
DFFHVVWKHVXEPHQX7,/7'2:1WRDFFHVVHDFKLWHP3$1/()7
to return to the main menu.
COMPASS
- The display show “COMPASS ON” or “COMPASS
2))´3UHVV³]RRPLQ´WRWXUQWKHFRPSDVVKHDGLQJRQDQG³]RRP
out’ to turn the compass display off.
SET NORTH
3UHVV³]RRPLQ´EXWWRQWRVHWFDOLEUDWLRQ7KH
display will show “OK”.
POSITION
- This displays the pan and tilt positions of the camera.
3UHVV]RRPLQWRWXUQWKLVRQ]RRPRXWWRWXUQLWRII
ADDRESS
7KLVGLVSOD\VWKHFDPHUDDGGUHVV3UHVV]RRPLQWR
WXUQWKLVRQ]RRPRXWWRWXUQLWRII
TEMP
- This displays the temperature sensor data on the tilt
ERDUG3UHVV]RRPLQWRWXUQWKLVRQ]RRPRXWWRWXUQLWRII
NOTE:
This reading will be higher than the actual ambient
temperature in the dome. This is for diagnostic use only.
PRESSURE
- This displays the pressure sensor data for units
HTXLSSHGZLWKDSUHVVXUHVHQVRU3UHVV]RRPLQWRWXUQWKLVRQ
]RRPRXWWRWXUQLWRII
- 4 -


