background image

© 2011 Monte Carlo Fan Company

4/20/2012

6

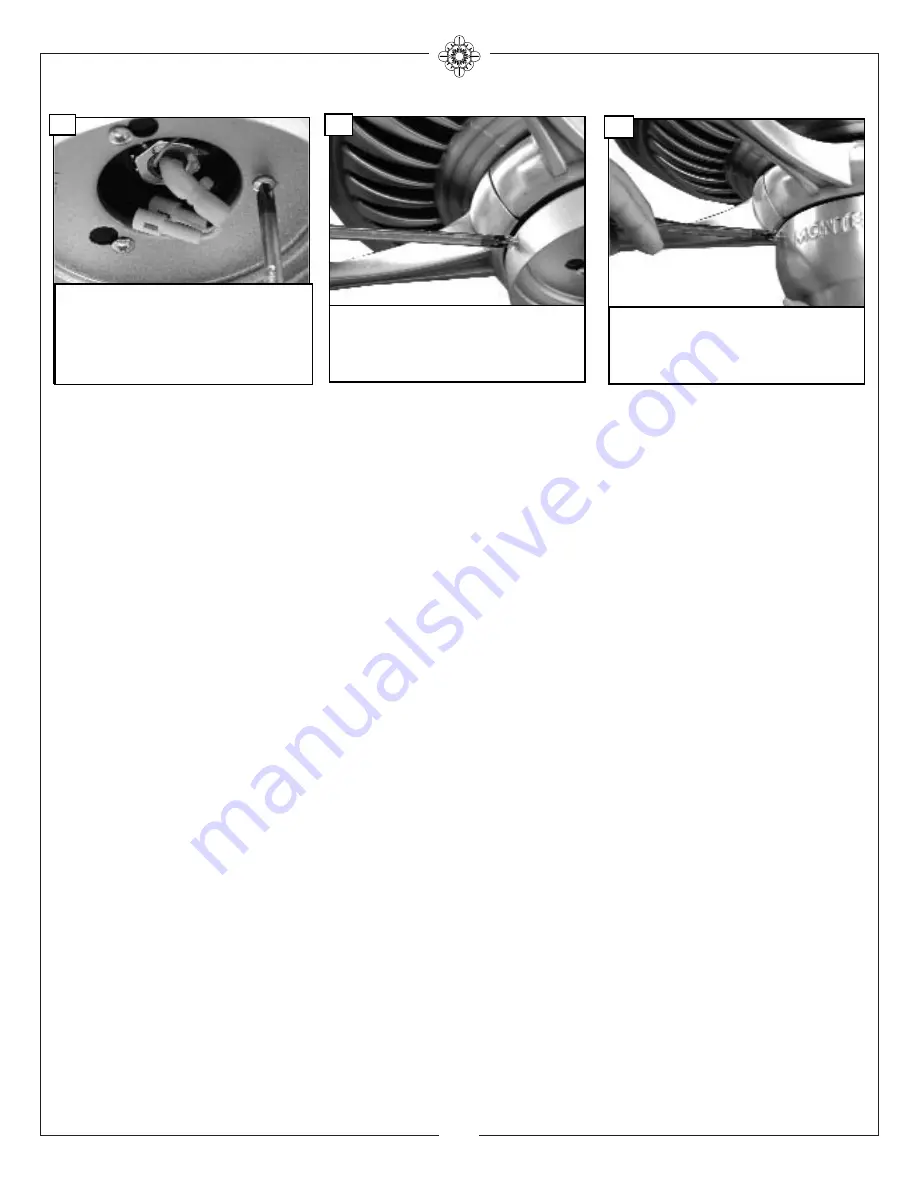
Install the switch housing using the

three screws previously removed.

30

Remove the 3 screws on the switch

housing plate and save.

29

Install the switch housing plate by

aligning the 2 screws with the 2 key

slot holes on the plate and twist to

lock into place. Install the 1 screw

removed and tighten the other 2

screws securely.

28

Summary of Contents for 5DCR60XX Series

Page 1: ...RESS To register your fixture please visit our website www montecarlofans com 5DCR60XX Series Fan Total fan weight UL Model No AC 560DC 11 kgs 24 2 lbs Warning Only blades that come with the fan are ac cepatable for installation Warning This fan uses dimmable remote controller Do not install light kit with SBCFL Self Ballasted Com pact Fluorescent Lamp on this fan ...

Page 2: ... Box Marked Acceptable for Fan Support of 31 8 kg 70 lbs or less And Use Mounting Screws Provided With The Outlet Box WARNING To reduce the risk of personal injury do not bend blade holders during installation to motor balancing or during cleaning Do not insert foreign object between rotating blades Attach the mounting bracket using only the hardware supplied with the outlet box WARNING To reduce ...

Page 3: ... quali fied electrician if in doubt 2 OUTLET BOX METHOD Secure mounting plate directly to a joist from the buliding structure via the two knock out holes on the outlet box Use only the appropri ate wood screws and washers included with your fan Caution Wood screws must go through into the building joist 5 Outlet box Mounting Plate Wood Screws BUILDING STRUCTURE METHOD Remove the 6 screws attaching...

Page 4: ...r secure downrod Reinstall the downrod ball previously removed Loosen the 2 set screws You should be able to put your downrod into the yoke 10 Remove the shipping stabilizers and discard 15 17 Hang assembled fan from the mounting bracket installed to ceiling in previous step Make sure the fan is hanging straight Rotate fan until the tab on the Mounting bracket engages the slot on the Downrod Ball ...

Page 5: ...re nuts provided Make sure that no filiments are outside of the wirenut After making the wire connections the wires should be spread apart with the grounded conductor and the equipment grounding conductor on one side of the outlet box and ungrounded conductor on the other side of the outlet box 20 For Canadian installation and for USA fan and light kit combinations over 35 lbs in both flush and do...

Page 6: ... screws previously removed 30 Remove the 3 screws on the switch housing plate and save 29 Install the switch housing plate by aligning the 2 screws with the 2 key slot holes on the plate and twist to lock into place Install the 1 screw removed and tighten the other 2 screws securely 28 ...

Page 7: ...ns can not be controlled separately 2 The fan can remember the running setting before power failure or cut off 3 If the new fan runs after connected to power it may be due to the fan remembering the previous running setting in the factory during the QC process push stop key on transmitter twice to stop Operation Installation 1 Remove the battery cover and the battery from the transmitter you will ...

Page 8: ...ce quickly To turn offpress once quickly while light is on To dim light hold down button light dimmer The light will cycle from bright to dim to bright until button is released Light willmaintain last setting if turned off You can see the percentage on the display screen NOTE If you have more than 1 fan with a remote you will have to change the DIP switch settings located above the battery of the ...

Page 9: ...t a blade tip down insert a washer not supplied between the blade and blade holder at the screw closest to the motor To adjust a blade tip up insert washer not supplied between the blade and blade holder at the two screws farthest from the motor Reverse the position of the washer if blades mount from top of blade 6 If blade wobble is still noticeable interchanging two adjacent side by side blades ...

Page 10: ......

Reviews: