background image

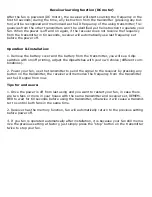
Receiver learning function (DC motor)

After the fan is powered (DC motor), the receiver will start sourcing the frequency in the

first 60 seconds; during the time, any instruction from the transmitter (pressing any but-

ton) will be recognized and memorized as the ID frequency of the using transmitter; fre-

quencies from the other transmitters won’t be identified as the instruction to operate your

fan. When the power is off and on again, if the receiver does not receive the frequency

from the transmitter in 60 seconds, receiver will automatically use last frequency set

before the power off.

Operation & Installation:

1. Remove the battery cover and the battery from the transmitter, you will see 4 dip-

switches with on/off printing, adjust the dipswitches with your own choice (different com-

binations).

2. Power your fan, use the transmitter to send the signal to the receiver by pressing any

button on the transmitter, the receiver will memorize the frequency from the transmitter

as the ID signal from now.

Tips for end users:

1. Once the power is off from last using and you want to restart your fan, in case there

are two fans or more in your house with the same transmitter and receiver set, REMEM-

BER to wait for 60 seconds before using the transmitter, otherwise it will cause a transmit-

ter to control both fans in the same time.

2. Receiver has the memory function, fan will automatically return to the previous setting

before power off.

3. If you fan is operated automatically after installation, it is because your fan still memo-

rize the previous setting at factory, just simply press the “stop” button on the transmitter

twice to stop your fan. 

Summary of Contents for 5DCR52XX Fan

Page 1: ...Owner s Manual Ceiling Fan Installation Instructions For 5DCR52XX Fan READ AND SAVE THESE INSTRUCTIONS Total fan weight ...

Page 2: ...le speed control If this unit is to be installed over a tub or shower it must be marked as appropriate for the application NEVER place a switch where it can be reached from a tub or shower The combustion airflow needed for safe operation of fuel burning equipment may be affected by this unit s operation Follow the heating equip ment manufacturer s guideline safety standards such as those published...

Page 3: ...able must be installed into the house structure beams using the 3 lag screws provided Make sure that when the safety cable is fully extended the leadwires are longer than the cable and no stress is placed on the leadwires 11 Safety cable installation Safety Cable Lag Screw Make sure that all exposed wiring is secured inside wire nuts Note Wires from house may vary in color and may not include grou...

Page 4: ...rews on the switch housing plate and save 21 Install the switch housing plate by aligning the 2 screws with the 2 key slot holes on the plate and twist to lock into place Install the 1 screw removed and tighten the other 2 screws securely 20 Loosen 2 screws and remove 1 screw and save 19 ...

Page 5: ...st speed LIGHT DIMMER To turn light on press light dimmer once quickly To turn offpress once quickly while light is on To dim light hold down button light dimmer The light will cycle from bright to dim to bright until button is released Light willmaintain last setting if turned off You can see the percentage on the dis play screen NOTE If you have more than 1 fan with a remote you will have to cha...

Page 6: ...rinting adjust the dipswitches with your own choice different com binations 2 Power your fan use the transmitter to send the signal to the receiver by pressing any button on the transmitter the receiver will memorize the frequency from the transmitter as the ID signal from now Tips for end users 1 Once the power is off from last using and you want to restart your fan in case there are two fans or ...

Page 7: ... the following procedure To adjust a blade tip down insert a washer not supplied between the blade and blade holder at the screw closest to the motor To adjust a blade tip up insert washer not supplied between the blade and blade holder at the two screws farthest from the motor Reverse the position of the washer if blades mount from top of blade 6 If blade wobble is still noticeable interchanging ...

Reviews: