


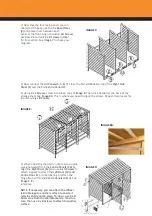


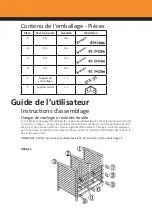


2) Now that the three main panels are con
-
nected from the back, use
2 x Base Plates
(7)
and place them between each panel at
the front. Align and use
4 x B Screws
per
Base Plate. Use
8 x B Screws in total
for this
section. See
Image 2
to check your progress.
IMAGE 2:
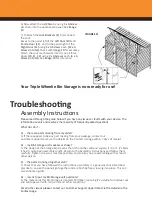
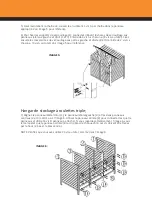
3) Place the first
Lid Panel (4)
on top of the
Right Side Panel (1)
and
Centre Panel (2)
. Using
4 x
C Screws
, tighten into place. Look at
Image 3
. The lid is attached at the back of the
storage shed. See
Image 3A
. This is where you need to place the screws. Repeat this process for
the next
Lid Panel (5)
.
IMAGE 3:
IMAGE 3A:
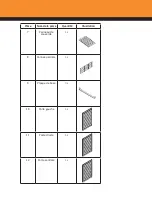
4) When attaching the doors, note that the hinges sit
inside the
Centre Panel (2)
and the doors swing out
-
wards from the Centre Panel. Align the
Right Door (9)
and use
6 x A Screws
to attach. Repeat to attach the
Left Door (8)
, remembering to attach the hinge from
within the
Centre Panel (2)
.
See
Image 4
for reference.
NOTE: If necessary, you can attach the Wheelie Bin
Storage to another surface to ensure it remains sturdy
and in place. To do so, use 4 x B Screws to attach the
Wall Brackets to the structure, then use 4 x B Screws
to attach to another surface.
IMAGE 4:


