8
11.
If you have not already done so, prepare your speaker wire in accordance with the
guidelines in the
Speaker Wire Preparation section above.
Important! Because the speaker wire will necessarily be routed through your walls,
you must use in-wall rated speaker wire.
12.
Route your speaker wire from the back of your amplifier, through the wall, to the
installation location.
13.
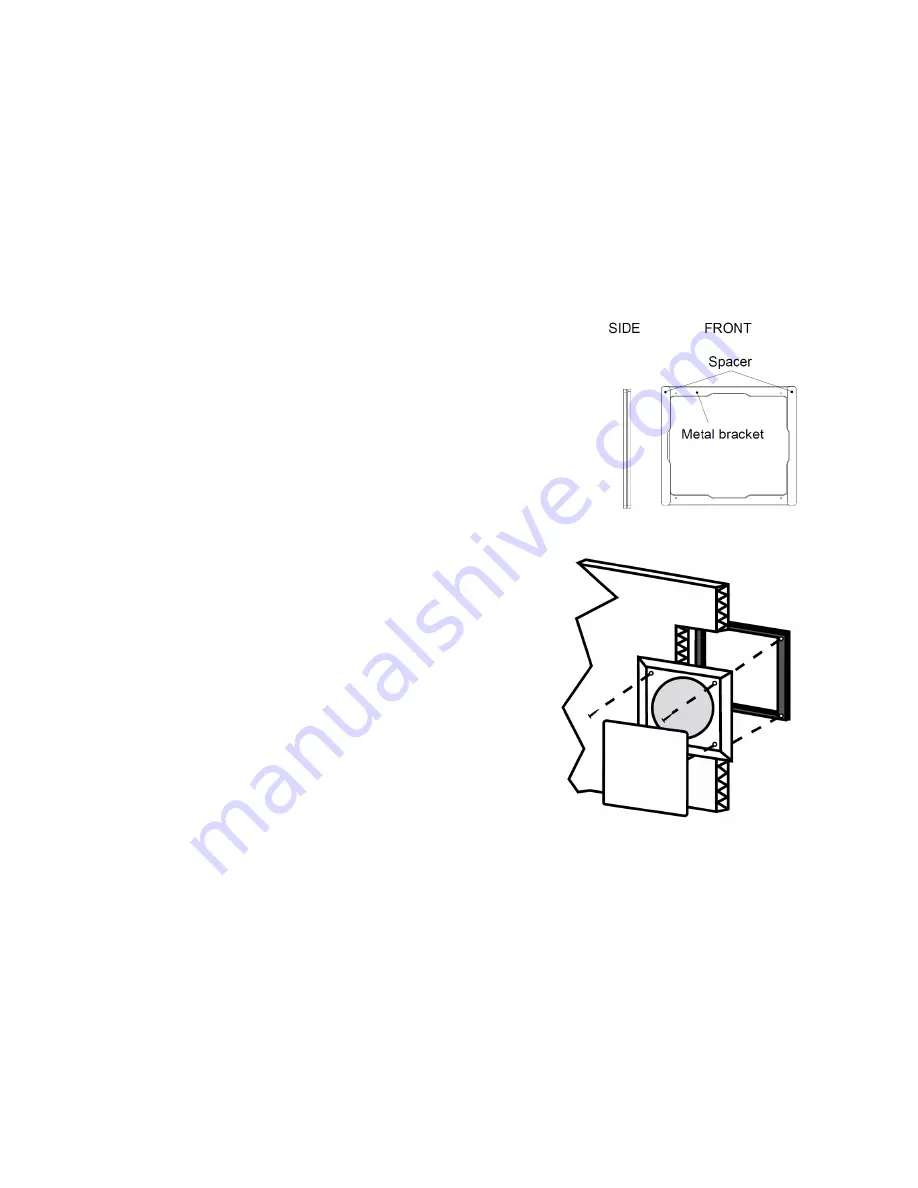
Connect the plastic spacers to the metal ring (flat
side) by lining up the protruding plastic with the holes
on the metal ring.
14.
Remove the grille with the grille removal tool.
15.
Place the metal ring around the back of the speaker
with the flat part of the metal ring facing the speaker.
The metal ring will only fit a certain way.
16.
Thread the screws through the front of the
speaker and slightly into the metal bracket. At
this point, the screws should be flush and not
protruding through the threads in the bracket.
17.
Connect one end of the speaker wire to the
speaker terminals.
18.
Give a gentle tug on each lead to ensure that
they are securely connected to the terminals.
19.
With the terminals at the bottom of the
speaker, slide the top part of the mounting
bracket into the opening and up, then slide the bottom of the metal bracket into
the opening
20.
With the speaker flush against the wall, tighten the screws in an X pattern in
increments until they are all tight.
21.
Replace the speaker grille.


