Installation Instructions
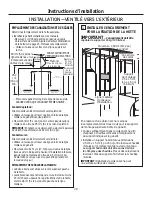
,167$//$7,21³5(&,5&8/$7,1*
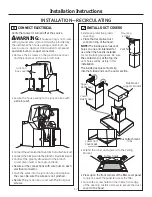
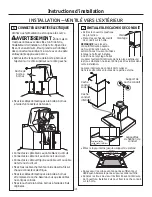
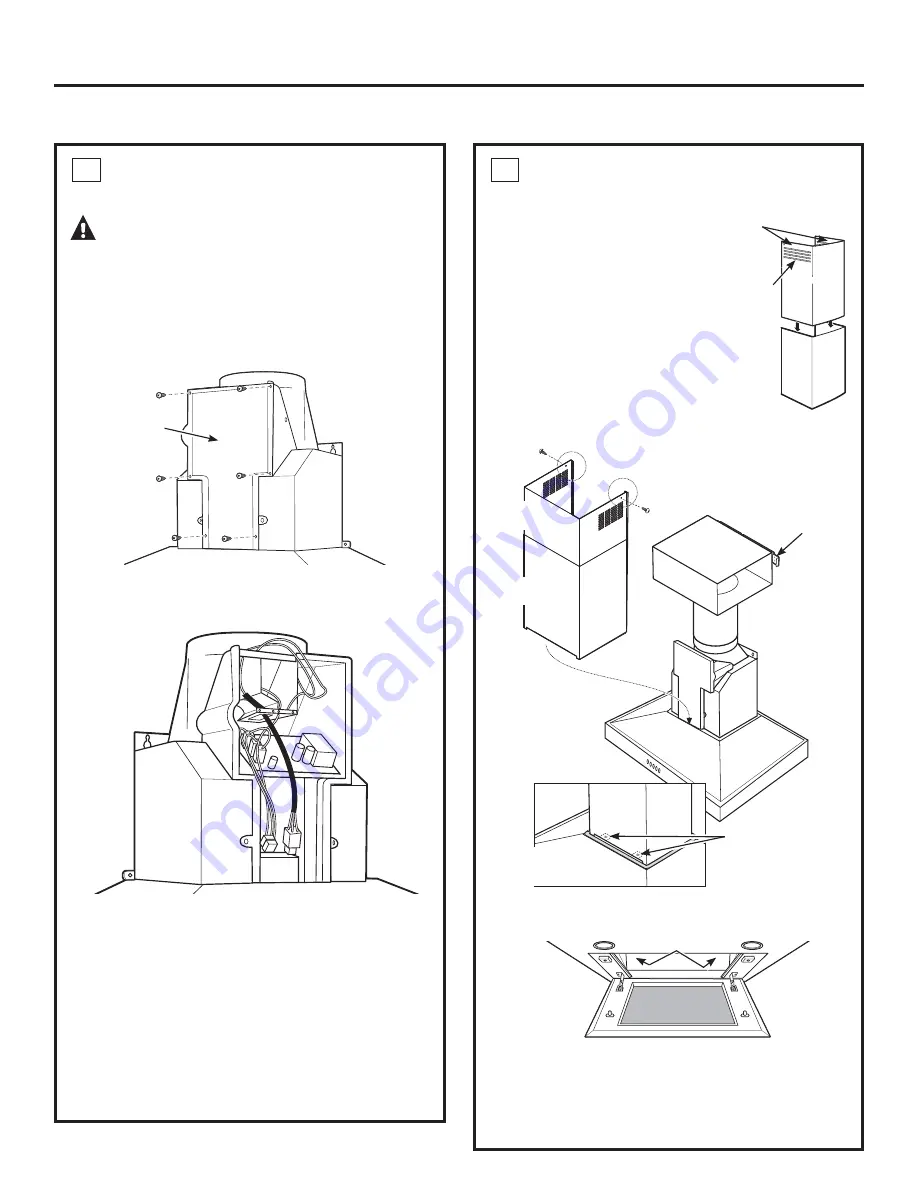
6 CONNECT ELECTRICAL
Verify that power is turned off at the source.
WARNING:
,IKRXVHZLULQJLVQRWZLUH
ZLWKDJURXQGZLUHDJURXQGPXVWEHSURYLGHGE\
WKHLQVWDOOHU:KHQKRXVHZLULQJLVDOXPLQXPEH
VXUHWRXVH8/DSSURYHGDQWLR[LGDQWFRPSRXQG
and aluminum-to-copper connectors.
5HPRYHWKHVFUHZVRQWKHMXQFWLRQER[FRYHU
DQGWKHNQRFNRXWRQWKHWRSRUOHIWVLGH
6HFXUHWKHKRXVHZLULQJWRWKHMXQFWLRQER[ZLWK
a strain relief.
•
&RQQHFWWKHZKLWHOHDGWRWKHEUDQFKFLUFXLWZKLWHOHDG
•
&RQQHFWWKHEODFNOHDGWRWKHEUDQFKFLUFXLWEODFNOHDG
&RQQHFWWKHJUHHQ\HOORZOHDGWRWKHEUDQFK
FLUFXLWJUHHQOHDGRUEDUHJURXQGOHDG
• Secure all the connections with wire nuts on each
electrical connector.
3XVKWKHZLUHVLQWRWKHMXQFWLRQER[DQGUHSODFH
the cover. Be sure the wires are not pinched.
• Secure the
MXQFWLRQER[FRYHUZLWK
the 6
RULJLQDO
screws.
-XQFWLRQ
ER[FRYHU
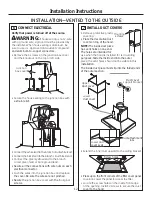
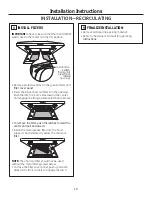
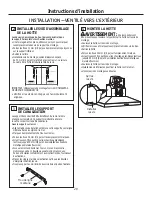
7 INSTALL DUCT COVERS
5HPRYHSURWHFWLYHSODVWLF
FRYHULQJ
• Place the decorative duct
covers on top of the hood.
NOTE: The inside piece has vent
holes on one end intended for
use when the hood is installed
IRUUHFLUFXODWLQJSXUSRVHV%HVXUH
the vented end is at the top; the
YHQWKROHVZLOOEHYLVLEOHLQWKLV
installation.
The inside duct piece must slip
into the folded ends on the outer section.
([WHQGWKHLQQHUGXFWXSZDUGWRWKHFHLOLQJ
EUDFNHW
• Press up on the front corners of the filter cover panel
WRXQORFN/RZHUWKHSDQHOWRDFFHVVWKHILOWHU
/RFDWHWKHVFUHZKROHVRQWKHLQVLGHIURQWHGJH
RIWKHRSHQLQJ,QVWDOOVFUHZVWRVHFXUHWKHGXFW
cover to the hood.
0RXQWLQJ
screws
Vent holes
/RZHUGXFW
cover seat
Duct cover
VXSSRUWEUDFNHW
/RZHU
duct cover
8SSHU
duct cover
Duct attachment
WDEV
Screw holes
Summary of Contents for ZV830
Page 19: ...19 Installation Instructions NOTES ...
Page 20: ...20 Installation Instructions NOTES ...
Page 38: ...38 Instructions d installation NOTES ...
Page 39: ...39 Instructions d installation NOTES ...
Page 40: ...40 Instructions d installation NOTES ...
Page 58: ...58 Instrucciones para la instalación NOTAS ...

