background image

22

AirStream 10

maIn menu
SLeep

you  can  set  your  AirStream  10  to  automatically  switch  off  after  15,  30,  45  or  60 
minutes or you can turn this feature off. you can quickly access this menu option by 
pressing the ‘Sleep’ button. 

aLarmS 

you can set two separate alarms on your AirStream 10 and choose a different mode 
for each one. you must first set the time and date on your AirStream 10 before you 
can use the alarm functionality.  When an alarm is set, a symbol will appear in the 
stand by screen with the time the alarms is set for within it.

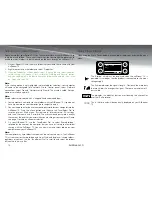
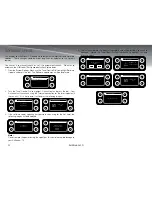
to Set an alarm:

Press  the  ‘Menu’  key  and  use  the  ‘Tune/Select  Dial’  to  scroll  and  select  the 

1. 

following options: ‘Main menu, ‘Alarms’.  Alternatively press the ‘Alarm’ button

Turn the ‘Tune/Select Dial’ to highlight and select ‘Alarm 1’ or ‘Alarm 2’.

2. 

use  the  ‘Tune/Select  Dial’  scroll  through  the  options  and  press  to  select  and 

3. 

change.

Enable:

• 

  either enables or disable the alarm.

Time:

• 

  Set the time for the alarm to go off.  This is in a 24hr clock format.  use 

the ‘Tune/ Select Dial’ to change and set.

Mode:

• 

  you can select from either DAB, FM, Internet or buzzer modes, for the 

alarm to sound with.

Preset:

• 

  you can either select a certain preset or the last listened to station for 

the alarm to go off with.

Frequency:

• 

  Here you can select the alarm to go off either Daily, once, Weekdays 

& Weekends.  Weekdays are Monday - Friday, weekends are Saturday and Sunday

Volume:

• 

  Select the volume for the alarm to go off at.

Save:

• 

  Saves your alarm settings.  If you do not select ”Save”, no alarm settings 

will be saved

SyStem SettIngS menu
tHe tIme anD Date

you can manually change or allow the AirStream 10 to automatically update the Time 
and Date via DAB (not on uS models), FM or the network to which you are connected.   
Both manual and automatic methods are explained below.  Also explained are the 
other options within the Time/Date Menu:

When you AirStream 10 is in standby mode, the display will show the time and date.

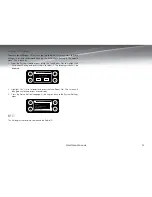
to manually Set the Date and time:

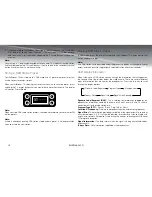
Press  the  ‘Menu’  key  and  use  the  ‘Tune/Select  Dial’  to  scroll  and  select  the 

1. 

following  options:  ‘Main  Menu’,  ‘System  Settings’;  ‘Time/Date’,  ‘Set  Time/
Date’.

Turn the ‘Tune/Select Dial’ to the correct day and press to select.

2. 

Turn the ‘Tune/Select Dial’ to the correct month and press to select.

3. 

Turn the ‘Tune/Select Dial’ to the correct year and press to select.

4. 

Turn  the  ‘Tune/Select  Dial’  to  the  correct  hour  (24  hour  clock)  and  press  to 

5. 

select.

Turn the ‘Tune/Select Dial’ to the correct minutes and press to select.

6. 

Note: 

If you need to go back at any point to change something again, just press the ‘Return 
Button’ (see page 3).

1

2

3

4

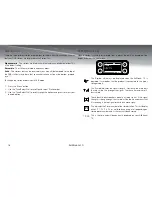
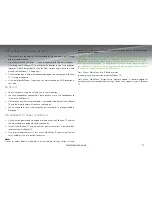
       Alarms

enable: off

Time: 00:00
Mode: Internet Radio
Preset: Last Listened                       
Frequency: Daily

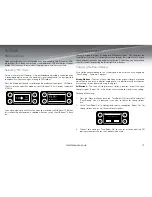
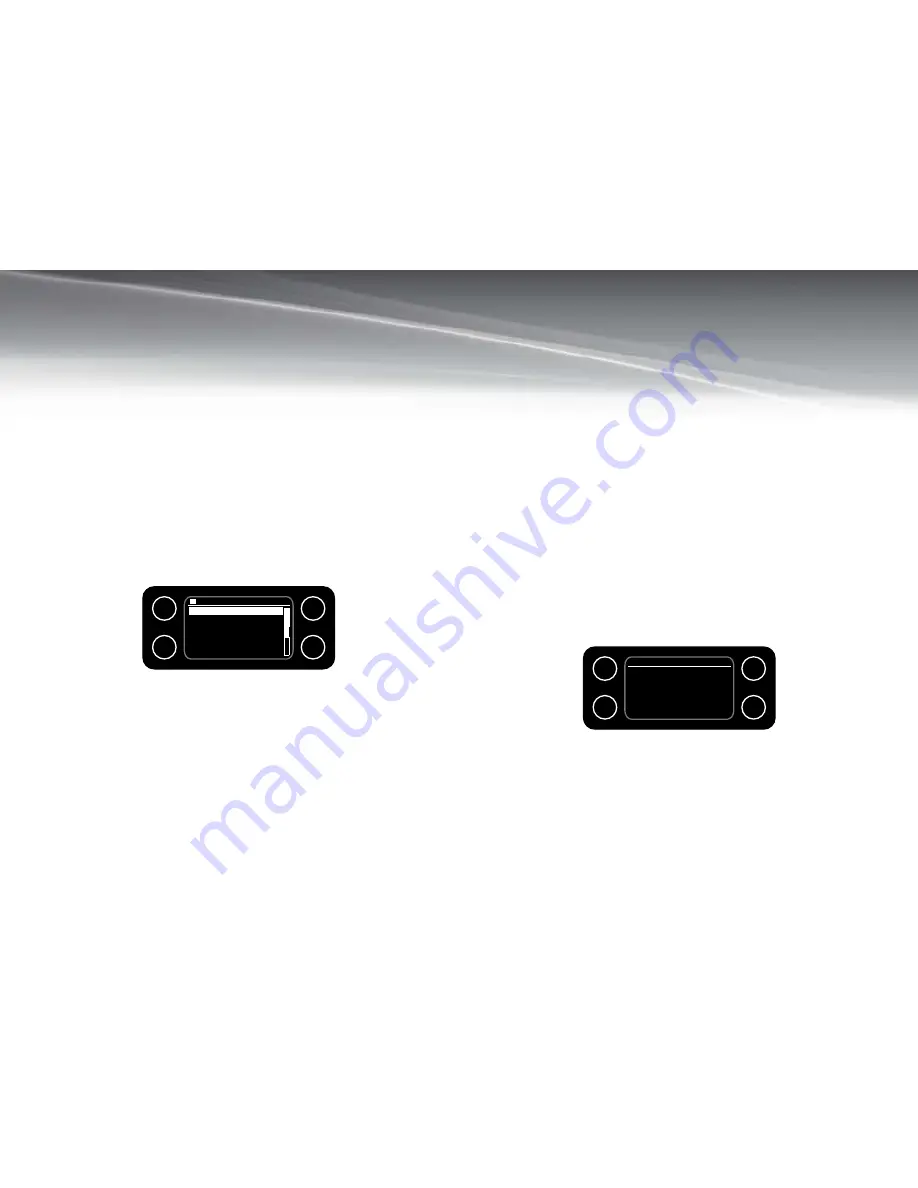
   Set Time/Date

DD - MM - yyyy

HH:MM

1

2

3

4

Summary of Contents for AirStream 10

Page 1: ...Instruction Manual Internet Wi Fi DAB FM Radio System ...

Page 2: ......

Page 3: ...o alert the user to presence of important maintenance servicing instructions in the literature accompanying the appliance FCC RF Radiation Exposure statement This equipment complies with FCC RF radiation exposure limits set forth for an uncontrolled environment This equipment should be installed and operated with a minimum distance of 20 centimeters between the radiator and your body NOTE This equ...

Page 4: ...htening storms 13 or when unused for long periods of time Refer all servicing to qualified service personnel 14 Servicing is required when the apparatus has been damaged in any way such as power supply cord or plug is damaged liquid has been spilled or objects have fallen onto the apparatus the apparatus has been exposed to rain or moisture does not operate normally or has been dropped The applian...

Page 5: ...Player Display 14 DAb radio 15 What is DAB Digital Radio 15 Selecting DAB Mode 15 Changing DAB Stations 15 Manually Scanning for DAB Stations 15 Storing a DAB Station Preset 16 Select a DAB Station Preset 16 DAB Display Information 16 Manual Tune 17 Dynamic Range Control 17 Station Order 18 DAB Mode Display 18 FM RADIO 19 FM Radio Mode 19 Selecting FM Radio Mode 19 Tuning to a FM Station 19 Changi...

Page 6: ...10 can communicate with your network Your AirStream 10 should work in all locations where the Wi Fi network is available You will also need to know the name of your wireless network i e its SSID Before you continue please make sure that your wireless access point is turned on and connected to your broadband internet You may need to read the instructions provided with your wireless access point and...

Page 7: ...al Audio Output Ethernet Input Auxillary Input Headphone Output Power Input Aerial Mode Menu Alarm Left Button Play Pause Right Button Preset Buttons Return Button Speaker Info EQ Sleep Snooze Stand By Button Buttons connections Display ...

Page 8: ...it is used as a form of manual tuning in 0 05MHz steps It has no function in Internet Radio or Auxiliary modes Right Button This is used to go forward to the next track s when in Music Player mode In DAB mode it brings up the station list In FM mode it is used as a form of manual tuning in 0 05MHz steps It has no function in Internet Radio or Auxiliary modes Return Button This button is used more ...

Page 9: ...he Tune Select Dial to highlight and select System Settings 4 This will display the System Settings menu Press the Tune Select Dial to select Network which will then bring up the 5 Network settings menu Press the Tune Select Dial again to select and start the Network Wizard The wizard will automatically scan for available Wi Fi and Wired networks and will display a list for you to choose which net...

Page 10: ...s menu and select the Wired option then DHCP enable Note For privacy reasons you should only connect to wireless access points that you own or have agreement to use Note The security details must be the same as those saved in the wireless access point which would have been set up by the person who installed your wireless network Note Make sure that the letter number or symbol you wish to select is...

Page 11: ...ones You can connect headphones not included to your AirStream 10 The headphone socket can be found on the right hand side of the AirStream 10 see image on page 3 and when you have headphones connected the AirStream 10 speaker is switched off and all sound is via the headphones The volume control will be done via the Tune Select Dial on the AirStream 10 Selecting a Listening Mode When you turn you...

Page 12: ...can now scroll and choose from the following 2 5 options Location Enables you to choose a continent and then a country from that continent You can then select from a list of stations from within your chosen country Genre Enables you to choose radio stations according to their content e g Blues Comedy Dance Folk or Rock Search stations enables you to enter the name of a station and then search for ...

Page 13: ...ernet mode on your 1 AirStream 10 Press the menu buttom and select Station List 2 Turn the Tune Select Dial to Podcasts and press to select 3 Using the Tune Select Dial you can now scroll and choose from the following 3 4 options very much like the Internet radio station search Location Enables you to choose a continent and then a country from that continent You can then select from a list of Podc...

Page 14: ...to make a note of it just press the RETURN key Help If you need help with your AirStream 10 you can browse through the Frequently Asked Questions FAQs which can be found in internet radio mode under Help In internet radio mode Press the RETURN key 1 Use the Tune Select Dial to scroll to Help and press to select 2 Use the Tune Select Dial to scroll to FAQ and press to select 3 A list of questions w...

Page 15: ... In order to play the music files you have stored on your computer via the AirStream 10 you must first ensure the following That the music files on your computer are not protected That your computer has the correct type of music files as below Your computer has file sharing turned on The music files can be shared on the network You know the name and password if applicable of your computer Music Fi...

Page 16: ...usic to be shared via the Media Player the AirStream10 must be connected to it The AirStream 10 must be switched on and connected to the same network 1 as the computer see page 5 Switching on and Connecting to your Network Press the Mode button to select the Music Player 2 Press the Menu button and use the Tune Select Dial to highlight and select 3 Shared Media It will the start to search for avai...

Page 17: ...capable of sharing pictures and videos to other devices Obviously it will not be possible to see or play the videos pictures on your Airstream 10 Therefore please only select the Music option Now to select and play 9 the files from your server PC Select the Music option The AirStream 10 will then show the different categories that you can browse through These include All Music Genre All Artists Co...

Page 18: ...s the Menu button and then use the Tune Select Dial to scroll and select Main menu System setup Internet setup PC settings and then User name and Password The user name and password is exactly the same as the one that you enter when you are sitting at your computer Please see page 5 for help on charcater selection On your AirStream 10 use the Tune Select Dial to select Shared folders 6 followed by...

Page 19: ...stations will be displayed in numerical and then alphabetical order by default Use the Tune Select Dial to scroll through the stations and press to select the one that you would like to listen to If the station you are trying to find is not display it can be searched for manually see below Note The DAB radio station list is stored in the memory and so the next time you switch your AirStream 10 on ...

Page 20: ...tation and begin to play Note If no DAB station has been stored under the preset the display will change to Preset empty and then revert to the previously selected station after a few seconds DAB Display Information When listening to a DAB station you can change the information that will appear on the second line of the display below the station name There are several different types of informatio...

Page 21: ...ange for each radio programme is set by the broadcaster for each radio station and may be different for the types of programme broadcast such as pop or classical music or a chat show The Dynamic Range Control signal is transmitted in parallel with the audio signal for each programme and with your AirStream 10 you can use this control signal to expand or compress the dynamic range the difference be...

Page 22: ...on DAB Mode Display When a station is tuned in or selected from a preset below is an example of the display and what the icons mean This Symbol will always be displayed when the AirStream 10 is powered It symbolises that the product is connected to the mains voltage supply This Symbol indicates the signal strength Obviously the more bars that are visible the stronger the signal There are a maximum...

Page 23: ...inds a strong enough signal then stop and play that station Alternatively you can manually scan for stations by pressing the left or right arrow buttons Changing the Scan Setting If the station you are looking for isn t showing up in the auto scan try changing the Scan Setting There are 2 options Strong Stations The scan will only stop when a strong signal strength is received which should also re...

Page 24: ... the RDS symbol is displayed see opposite you can change the information that will appear on the second line of the display You can choose between the frequency type of show such as Rock Pop Talk or News the time or the date Press the Info key repeatedly to move through the display options FM Mode Display When a station is tuned in or selected from a preset below is an example of the display and w...

Page 25: ...uarters Auxiliary Mode Display When an auxiliary device is connected the example below shows the display and what the icons mean This Symbol will always be displayed when the AirStream 10 is powered It symbolises that the product is connected to the mains voltage supply This is the time and will be constantly displayed on your AirStream 10 1 2 3 4 Auxiliary Input Audio In Today s Date DD MM YYYY 1...

Page 26: ...select the alarm to go off either Daily Once Weekdays Weekends Weekdays are Monday Friday weekends are Saturday and Sunday Volume Select the volume for the alarm to go off at Save Saves your alarm settings If you do not select Save no alarm settings will be saved system settings menu THE TIME AND DATE You can manually change or allow the AirStream 10 to automatically update the Time and Date via D...

Page 27: ...nd select your current timezone Daylight Savings LANGUAGE LCD STANDBY BACKLIGHT The benefit of this section is so that when the unit is in standby mode just the clock showing on the display you can select what state you would like the backlight on You can select between Always On Always Dim and Off Always On In this state the backlight is the same brightness intensity as when the unit is operating...

Page 28: ...following images If the software needs updating very possible when using for the first time the 3 following images will be displayed Note Do not remove the power during the update as this could irreversible damage to your AirStream 10 You will then be told the update is complete and will be asked if you wish to 4 continue Rotate the Tune Select Dial anti clockwise to highlight Yes and press to sel...

Page 29: ...tting and press the dial to select it The following screen will be displayed Highlight Yes if it isn t already and press the Tune Select Dial The screen will 2 then go back to the previous menu display Press the Return Button see page 3 to bring you back to the System Settings 3 menu Info This will display the software version and the Radio ID 1 2 3 4 System Settings Time date Language LCD Standby...

Page 30: ...n a different time zone The station may have too many people trying to connect to its servers and their server capacity may not be enough to enable everyone to connect The station is not broadcasting anymore The internet connection between the server often located in another country and you is slow Some Internet Service Providers may fail to provide service is some geographical areas You could use...

Page 31: ...the back of the AirStream 10 and that the mains adaptor is plugged in and switched on Turn off the AirStream 10 unplug the mains power Leave for 1 minute and then reconnect your AirStream 10 Try a reset to factory defaults Press Menu Main Menu System setup Factory reset and press the Info button to confirm Note A reset to factory defaults will delete all of the network settings station lists and p...

Page 32: ...months and is therefore guaranteed to be free from defects in materials and workmanship during that period If you experience a problem within that time simply call the Helpdesk on 0845 833 1673 local rate call charge applies If your problem cannot be solved by our Helpdesk you will need to return your product to the place it was purchased Remember to take your receipt as proof of purchase as it mu...

Page 33: ...29 monitoraudio co uk ...

Page 34: ......

Page 35: ...Inside Back Cover ...

Page 36: ...Back Cover ...

Reviews: