


18
8. Recording/Playback buttons
RECORD: Press once to begin recording all active channels. Press again to end recording.
R-PLAY: Reverse Playback. Press to begin reverse playback. Under PTZ control menu,
used to decrease the speed of Pan, Tilt, Zoom, Focus.
STOP: Stop playback.
PLAY:
Access to playback.
- Playback button will activate assigned starting position and Channel at playback setup of
menu.
- At pause mode, it will release pause mode.
- Under PTZ control menu, used to increase the speed of Pan, Tilt, Zoom, Focus.
PAUSE:
Press to freeze the picture at playback mode..
1.3.2
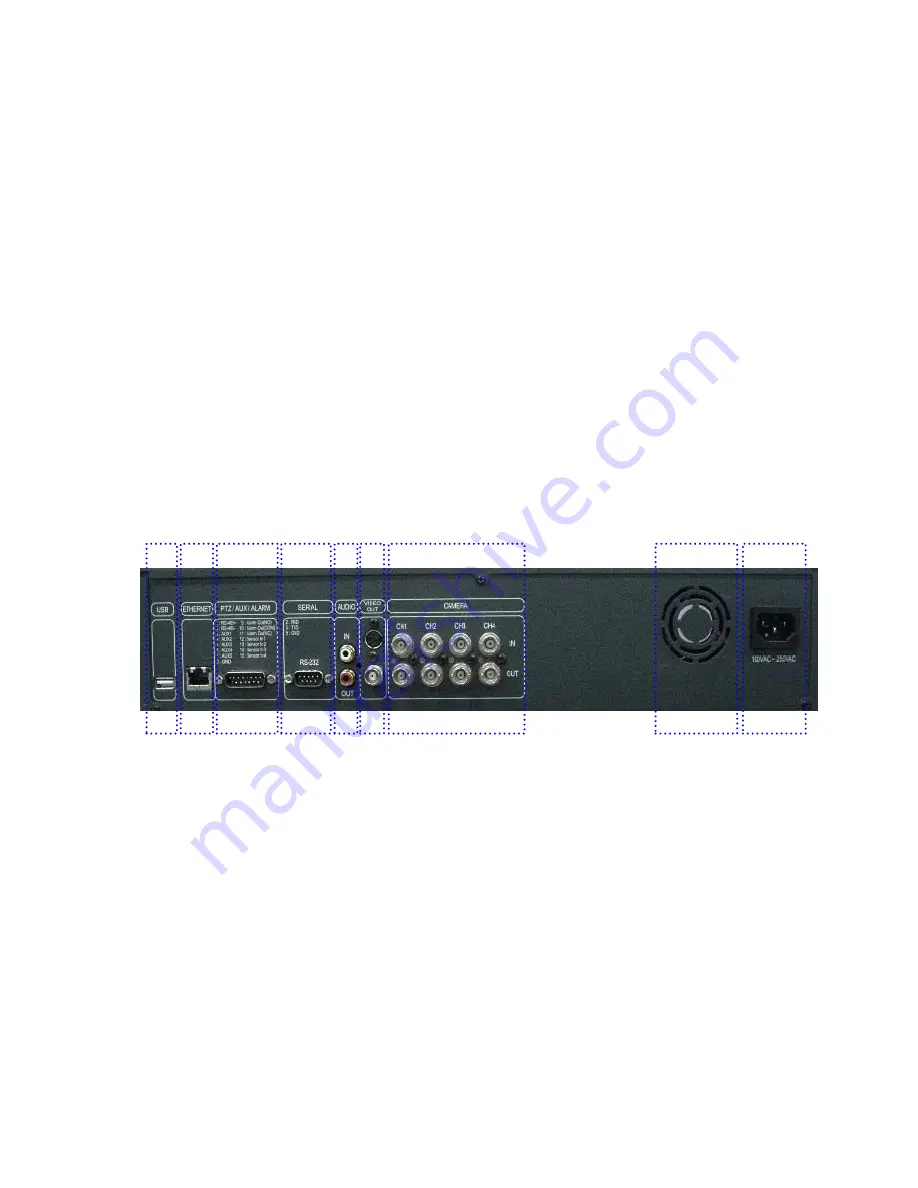
Rear panel view
1
2
3
4
5 6
7
8
9
1. USB
Connect USB flash drives for backing up stored video files.
2. ETHERNET
Network terminal for 10Base-T (RJ-45)
3. PTZ/AUX/ALARM
Terminal for PTZ, sensor, alarm, and AUX IN/OUT (DB-15 Male Connector)
4. SERIAL
Serial terminal for RS-232C (PC) for console or quick installation
(DB-9 Male Connector)
5. AUDIO : support or not support
IN:
Audio line input
OUT:
Audio line output