PAGE 2 OF 10
780−160MD2−0
Only use hand tools to assemble this item
. Do not use power tools.
Do not tighten bolts or screws completely until all hardware is lined up
and inserted into the holes.
Do not over-tighten screws and bolts to avoid stripping the hardware
or cracking the item.
For vanity and plumbing installation, we suggest hiring a professional
contractor and plumber.
Assemble your item on a fl at, carpeted area, with plenty of space to work.
This will prevent damage and scratches to your fl oors or the item while
you’re assembling the product.
Keep all components and packaging out of reach of children or animals
to avoid risk of choking or suff ocation.
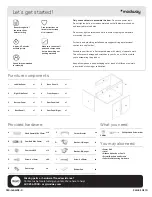
Provided hardware:
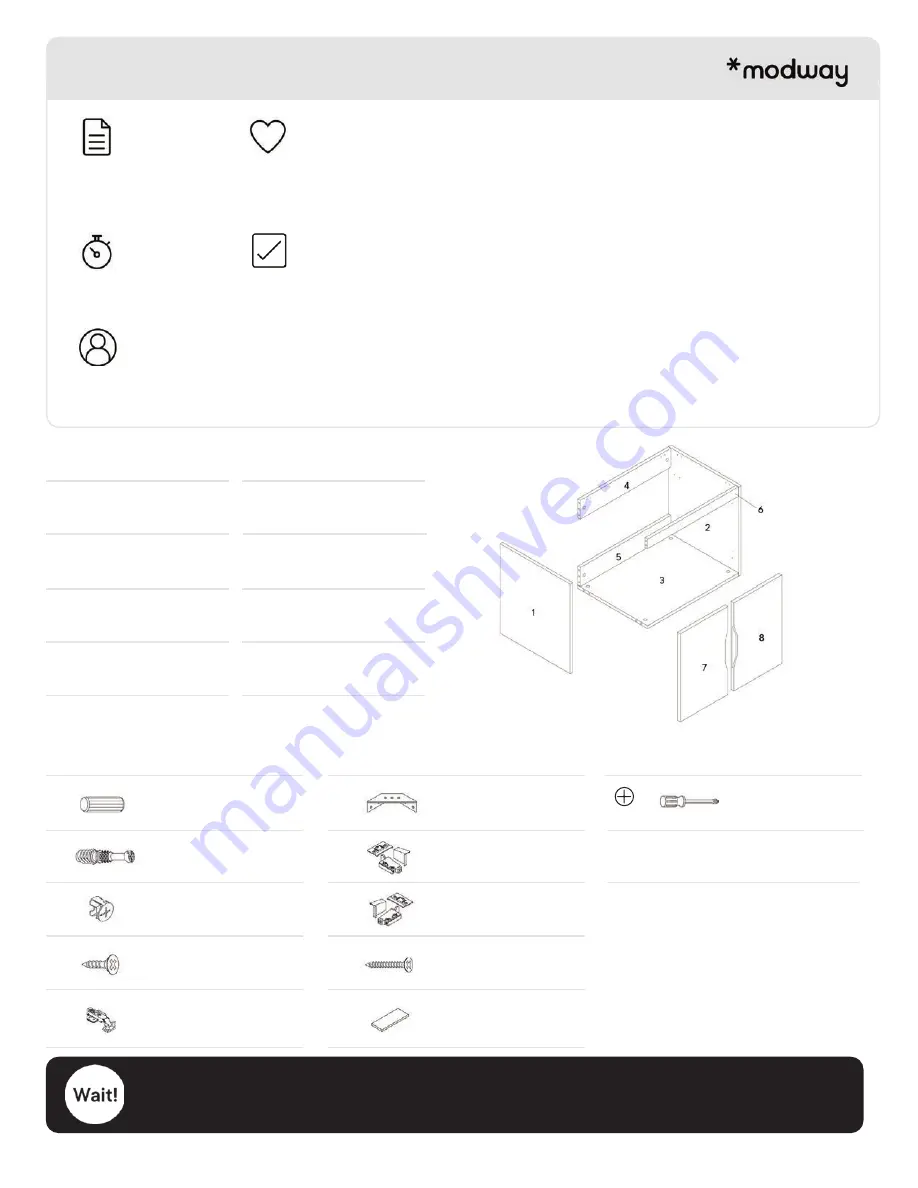
Furniture components:
What you need:
E
F
G
H
I
J
A
x14
x1
x1
x4
x4
x4
x4
Wood Dowel M8 x 25mm
Bracket-L/Hanger
B
x10
Cam Bolt Ø6 x 24mm
Bracket-R/Hanger
D
x40
Screw 4 x 14mm
C
x10
Cam Lock Ø15
Phillips Head Screwdriver
Door Hinge
Corner Bracket
Rubber Pad
Screw 4 x 28mm
Phillips
2
3
1
x1
x1
x1
x1
x1
x1
x1
x1
Left Side Panel
Right Side Panel
Bottom Panel
4
5
6
Back Panel 1
Back Panel 2
Front Support
7
8
Door Panel Left
Door Panel Right
Approx. 60 minutes
assembly time
2 people recommended
for assembly
Care instructions are
listed in the last step
of this manual
Read through all of
the instructions
before starting
Make sure you have all
parts and components
before discarding any
packing materials
Let’s get started!
Missing parts or hardware? Need assistance?
Contact us before returning your item. We're here to help!
609.256.9000 • [email protected]
You may also need:
+ Power Drill
+ Level
+ Silicone Adhesive or Caulk
+ Drywall Anchors and Screws
+ Other Wall-Mounting Hardware

