

Modine Manufacturing Company
1500 DeKoven Avenue
Racine, WI 53403
Phone: 1.800.828.4328 (HEAT)
www.modinehvac.com
© Modine Manufacturing Company 2015
AIR74-536
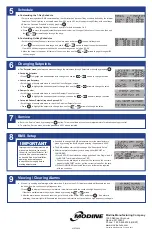
Schedule
Changing Setpoints
5
6
a. Enter the ‘Service’ menu by pressing the
button. This menu allows access to several parameters for advanced setup or control.
b. To enter the ‘Service’ menu, enter the password ‘0001’ when prompted.
Service
7
BMS Setup
8
Viewing / Clearing Alarms
9
a. The ‘Setpoint’ menu
can always be accessed through the main menu through ‘Setpoints’ or directly by pressing
set
.
b. Occupied Setpoints
i. Press
to highlight the desired setpoint to change then use the
or
arrows to change the value.
c. Unoccupied Setpoints
i. Scroll through the setpoints menu to reach the ‘Unocc Setpoint’ screen.
ii. Press
to highlight the desired setpoint to change then use the
or
arrows to change the value.
d. Damper Control
i. Scroll through the setpoints menu to reach the ‘Damper Control’ screen.
ii. Press
to highlight the desired setpoint to change, then use the
or
arrows to change the value.
e. Occupied Dehum Setpoint (requires Space pAD)
i. Scroll through the setpoints menu to reach the ‘Pad Hum Setpoint’ screen.
ii. Press
to highlight the setpoint to change, then use the
or
arrows to change the value.
a. If needed to change the BMS parameters, enter the manufacturers'
menu by pressing the BLUE key and entering the password ‘0002’.
b. The BMS settings start on the third page title ‘Supervisory Setup’.
c. Select what protocol system you are using, either BACNET or
LONWORKS;
i. When BACNET is selected the next page will ask ‘Use Plugin:’ and if
the BACNET card is installed select YES.
ii. The next option allows you to either ‘set’ the values on the next two
pages to the BACNET card or ‘get’ the current values off of the card.
iii. When LONWORKS is selected there is no further action required
with the controller.
a. If the unit is sending an alarm signal, the alarm icon ‘Alarm’ on the pGD-t display module will illuminate red and
the unit will emit a continuous high frequency tone.
i. Press
to display the active system alarms, this will also disable the continuous high frequency tone.
If there are multiple alarms they may be viewed by pressing the
or
arrows.
ii. After the alarm issues have been resolved, go to the end of the ‘Alarm’ menu and press
. If an alarm is
persisting, the alarm light will illuminate red and the unit will start to emit a continuous high frequency tone again.
IMPORTANT
a. Customizing the 7-Day Schedule
i. For units running without BMS communication, the controller has a preset 7-day schedule defi ned by the internal
timeclock. The unit will run in occupied mode from 6:30 am to 4:30 am, Monday through Friday, with no holidays.
ii. Enter the ‘Occupied Schedule’ menu by pressing
.
iii. The fi rst screen displays Monday’s start and end time for both schedules 1 & 2.
iv. Press
to move through adjustable setpoints until cursor is at the upper left corner of the screen, then use
the
or
arrows to page through the days.
b. Customizing Holiday Schedules
i. Scroll to the ‘Holiday Schedule’ selection in the main menu and press
to open Holiday menu.
ii. Press
to move to each date range and use the
or
arrows to adjust the number as needed.
If not all 20 holiday ranges are required the unneeded ranges can be left as ‘00-00’
iii. Move the cursor to the upper left corner of the screen, then use the
or
arrows to page through all 20
holiday ranges.
Improper control adjustments and
manual mode control can cause
the unit to run less effi cient or fail
to control the space temperature
as desired. Read the installation,
operating and maintenance
instructions thoroughly before
making adjustments.