Once your section A is securely in the tree stand where you plan
to set up the tree, only untie or release the bottom red string to
release the bottom row of branches.
(This will keep the upper rows of branches out of the way while
you progressively shape one row at a time.)
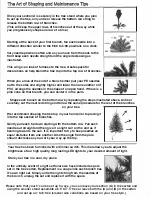
Starting at the back of your first branch, fan each needle into a
different direction similar to the 9:00 to 3:00 positions on a clock.
Vary needle positions often and as you move from the back to the
front keep each needle straight and the angle decreasing as
illustrated.
This will give a look of fullness to the tree, create space for
decorations an help blend the tree top into the top row of branches.
When you arrive at the end of a branch either pull your PE needles
out to the sides and slightly higher and lower than one another or if
PVC, arrange the needles in the shape of an open hand. If there is a
pine cone on that branch, you can center it in the palm.
9:00
Shape each branch on the bottom row by repeating the steps illustrated above. Untie or
carefully cut the next red string and follow the same procedure for the rest of the branches
on your tree.
We recommend shaping the tree top in your hand prior to placing it
into the top section of branches.
Gently pull each tip down starting with the bottom row. Pull each
needle out straight and then give it a slight curl on the end as if
bending towards the sun. It is important to try to keep needles an
equal distance from one another. Also the angle from the pole
should decrease as you work your way up the top.
Your tree has been furnished with a dimmer switch. This dial allows you to adjust the
brightness of our high quality, long lasting LED lights to your desired amount of light.
Store your tree in a cool, dry place.
In the unlikely event of a light set failure we have included a spare
set in the tree carton. Replacement is a snap since each branch has
it's own light set. Simply untie the light string from the needles of
the branch, unplug the set and replace it with the spare.
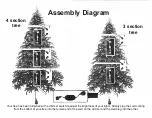
Please note that your 9' can be set up 3 ways, you can leave your section (A) in the carton and
using the smaller stand assemble a 6.5' to 7.5' tree or leave both the (A) and (8) in the carton
and set up a 4' to 6' tree (smaller size variations are based on your tree style.)


