background image

  USING THE TV 

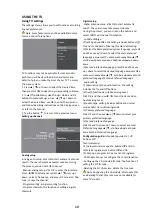
Snapshots and display mode 


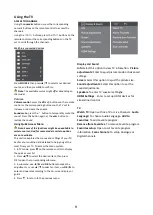
Se ng up an image: 


- Image mode: op mize image quality for General 
type of images. Use 

up / 

down to scroll 

through the preset image se ngs: Standard, 
Dynamic, Movie, Sports, and Personal. 
- Advanced se ngs: 
Access to advanced image quality improvement 
features. 
Brightness: adjusts the brightness of the image. 
Color: adjusts the color satura on. 
Image contrast/ clarity: an advanced technique for 
improving image quality. 
Reset: resets the image se ngs. 
 

Display se ng 


- display screen Mode: adjust the image size. Use 

up / 

down to scroll through the preset 

se ngs: Wide format, Normal, Full, and Zoom. 
- Autoscreen : automa cally adjusts the screen 
mode depending on the signal. Turn the TV on and 
off. 


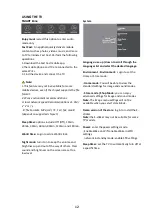
Sound 

Sound adjustment: 

func ons for adjus ng the 

sound and speakers.  
-Audio customiza on mode: op mize the sound 
quality for General content. Use 

up / 

down to 

view the preset audio se ngs: Sports, Standard, 
Movies, Music, and news. 
- Surround: Reproduces realis c surround sound 
when playing 5.1-channel audiosources . Turn the 
TV on and off a er se ng the se ngs.  
- Advanced se ngs: access addi onal op ons to 
improve the sound quality. 

Se ng the volume: 

1) Automa c Auto Volume: maintains a constant 
volume level for all programs and inputs.  Turn the 
TV on and off a er se ng the se ngs.   
2) Balance: adjust the balance of the speakers. 
3) digital audio output Volume: applies to PCM 
only. The volume levels between PCM and 
compressed audio will differ. 
4) digital audio output Delay: set the delay  me for 
digital audio. 
5) volume Offset: adjust the sound level of the 
current input rela ve to other inputs. 

Sound mode: 

 1) surround sound effect:  Use 

 / 

 to scroll 

Surround sound effect. 


 2) Equalizer:  Use 

 / 


 / 

up / down to 

scroll Equalizer. 


Reset: resets all sound se ngs.  

 
Placement on TV:

 choose the TV placement 

method. Place the TV on a stable support or table.  
It is possible to mount the TV on the ceiling or on 
the wall. 

 
Placement of the digital audio output:

 op cal 

output for audio signals from Digtal Audio Out 
devices.  
Режим Dolby Digital Plus mode: on and Off 
bu ons.


11

Summary of Contents for TV 3211 LAX

Page 1: ...User Manual TV 3211 LAX TV 3212 LAX TV 4356 LAX TV 4377 LAX TV 5077 LAX ...

Page 2: ...ns on the Home Page Chapter 4 Using the TV Access to channels Viewing connected devices Sound Volume Using the Quick Access Menu Display and sound TV Func ons Using the TV Configuring Channels Snapshots and display mode Sound Smart Zone System Chapter 5 Other informa on Smart Pleer Warning and Frequently Asked Ques ons Troubleshoo ng and troubleshoo ng TV installa on methods Safe disposal Product I...

Page 3: ...he device and the external power supply yourself as this may cause electric shock cause the device to fail and void the manufacturer s warranty For repairs and maintenance contact only qualified personnel To power the device use an electrical network with proper characteris cs Connect the device only to the audio and video components intended for this purpose and the connec ng cables intended for t...

Page 4: ...u ons on the remote and adjust menu controls 2 bu on Increases decreases the volume In the menu system they act like the right le direc on bu ons on the remote and adjust menu controls 3 bu on Turns the TV on or standby The TV is on press it brings up the main menu or press to return to the previous menu Before enter menu long press it for three seconds to display the Source Select Note The loca o...

Page 5: ... on the TV may vary depending on the TV model CI Connector This CI connector can be used to install a CI card to receive blocked programs Note This feature may not be available on some models The headphone headset jack output Allows you to connect headphones to listen to the sound coming from the TV Note Excessive sound pressure from the headphones can cause hearing loss LAN Connector The R45 CONN...

Page 6: ...re you use it first connect it to your TV For reference follow these steps Step 1 Click the bu on to enter the home page Step 2 Click the bu on to enter the RC connec on Step 3 Follow the Setup Tips listed on the click OK page and also together Step 4 The screen will display Pairing display Successful Note if you wait for more than 2 minutes and the device cannot connect please repeat the abovestep...

Page 7: ... only be connected to an AC supply It must not be connected to a DC supply If the plug is detached from the cable do not under any circumstances connect it to a mains socket as there is a risk of electric shock If your TV is connected to a DC supply Your TV set should only be connected to a DC supply It must not be connected to a AC supply If the plug is detached from the cable do not under any ci...

Page 8: ...u to set up the TV Connec ng to a wireless network Connec ng to a Wireless Network 1 Make sure you have A router that transmits a high speed wireless signal A high speed internet connec on is available 2 Use the Network menu to set up the TV WARNING NOTE Never place a television set in an unstable loca on A television set may fall causing serious personal injury or death Many injuries par cularly ...

Page 9: ...ogle Assistant menu 2 No fica ons a reminder of system cri cal informa on such as running out of disk space logging in to Google or account errors network connec on issues etc 3 Input select the input source 4 Se ngs access to the system configura on 5 Apps shows a list of your favorite apps or lets you access the app store 6 Youtube viewing the app allows you to watch a wide range of online videos ...

Page 10: ...your TV Each menu is outlined and detailed to help you get the most from your TV To access the menu system 1 In TV mode press on the remote control to display the quick access list 2 Press to select the desired item then press OK to open the corresponding submenu 3 In submenu use and OK bu ons to make the adjustments or use to select an item use OK to enter and operate according to the on screen d...

Page 11: ...e search Func on sub tle se ngs 1 se ng up sub tles the se ng includes bu onsOff On and For the hard of hearing for Hard of Hearing 2 Select the Main preferred system language press OK and then use up down to select the main preferred language ажмите OK и затем используйте чтобы выбрать основной предпочитаемый вами язык 3 Second preferred language press OK and then use up down to select the desired...

Page 12: ...s Music and news Surround Reproduces realis c surround sound when playing 5 1 channel audiosources Turn the TV on and off a er se ng the se ngs Advanced se ngs access addi onal op ons to improve the sound quality Se ng the volume 1 Automa c Auto Volume maintains a constant volume level for all programs and inputs Turn the TV on and off a er se ng the se ngs 2 Balance adjust the balance of the speake...

Page 13: ...nd 180min World me Login to add a World clock Night mode turn it on to keep the volume and brightness up and out of the way of others Clear sound and brightness on the screen are set to a low level System Language use up down to scroll through the Languages list and select the desired language Environment Environment Login to set the Home or Store mode Home mode You will be able to view the standa...

Page 14: ...isk icon then click OK to select a folder 2 Click the up down le or right arrow bu on to select the desired file and then click OK to play the file Press the return key on the remote control to stop playback Warnings and frequently asked ques ons A en on Some non standard mobile storage devices may not be recognized Please change your device to use the standard exchange interface Note There are many...

Page 15: ...rference Snow spots and interference If the antenna is located in a peripheral area of the TV signal where the signal is weak the image may be damaged by dots When the signal is very weak you may need to install a special antenna to improve recep on 1 Adjust the posi on and orienta on of the indoor outdoor antenna 2 Check the antenna connec on 3 Fine tune the channel Try a different channel The TV ...

Page 16: ...ENA equipment The manufacturer reserves the right to make changes to the design design and configura on of the product without prior no ce PRODUCT INFORMATION h ps www modena com ru_ru Date of manufacture you can see the informa on on the product label Знак Energy efficiency sign Label with informa on about энергоэффективностиit is a ached to this device Informa on about the energy consump on provide...

Page 17: ...Инструкция пользователья TV 3211 LAX TV 3212 LAX TV 4356 LAX TV 4377 LAX TV 5077 LAX ...

Page 18: ...й странице Глава 4 Использование телевизора Доступ к каналам Просмотр подключенных устройств Громкость звука Использование меню быстрого доступа Дисплей и звук Функции ТВ Использование телевизора Настройка каналов Снимки и режим дисплея Звук Smart Зона Система Глава 5 Другая информация Smart Pleer Предупреждение и часто задаваемые вопросы Поиск и устранение неисправностей Способы установки телевиз...

Page 19: ...ите его для использования в будущем Никогда самостоятельно не вскрывайте устройство и внешний блок питания это может стать причиной поражения электрическим током привести к выходу устройства из строя и аннулирует гарантийные обязательства производителя Для ремонта и технического обслуживания обращайтесь только к квалифицированным специалистам Для электропитания устройства используйте электросеть с...

Page 20: ...вления меню 2 кнопка Увеличивает Уменьшает громкость В системе меню они действуют как правые левые кнопки направления на пульте дистанци онного управления и настройки элементов меню 3 кнопка Включить телевизор или переводит его в режим ожидания Если телевизор включен нажатие этих кнопок вызывает главное меню повторное нажатие позволяет вернуться в предыдущее меню Прежде чем войти в меню нажмите и ...

Page 21: ...ет различаться в зависимости от модели телевизора Разъем CI Этот разъем CI можно использовать для установки карты CI для приема заблокированных программ Примечание Эта функция может быть недоступна на некоторых моделях Разъем для наушников гарнитуры выход Позволяет подключить наушники для прослушивания звука поступающего из телевизора Примечание Чрезмерное звуковое давление от наушников может прив...

Page 22: ...и выполните следующие действия Шаг 1 Нажмите Кнопка для входа на домашнюю страницу Шаг 2 Нажмите кнопка для входа в RC соединение Шаг 3 Следуйте Советам по настройке указанным на странице нажмите ОК а также вместе Шаг 4 На экране отобразится Pairing дисплей Успешно Примечание если вы ждете более 2 минут и устройство не может соединиться пожалуйста повторите описанные выше шаги для повторного соеди...

Page 23: ...телевизор должен быть подключен только к сети переменного тока Он не должен быть подключен к источнику постоянного тока Если вилка отсоединена от кабеля ни при каких обстоятельствах не подключайте ее к сетевой розетке так как существует риск поражения электрическим током Если ваш телевизор подключен к источнику постоянного тока Ваш телевизор должен быть подключен только к источнику постоянного ток...

Page 24: ... меню Сеть Network для настройки телевизора Подключение к беспроводной сети Подключение к Беспроводной Сети 1 Убедитесь что у вас есть маршрутизатор передающий высокоскоростной беспроводной сигнал В наличии имеется высокоскоростное интернет соединение 2 Использовать меню Сеть Network для настройки телевизора ПРЕДОСТЕРЕЖЕНИЕ Никогда не устанавливайте телевизор на нестабильную опору Телевизор может ...

Page 25: ...ения No fica ons напоминание о критически важной для системы информации такой как нехватка места на диске вход в Google или ошибки учетной записи проблемы с сетевым подключением и т д 10 Входные данные Input выберите источник входного сигнала 11 Настройки Se ngs доступ к настройке системы 12 Программы Apps показывает список избранных приложений или позволяет получить доступ к магазину приложений 13...

Page 26: ...елевизор Чтобы получить доступ к системе меню 1 На телевизоре или на пульте дистанционного управления нажмите кнопку чтобы перейти в меню телевизора 2 Нажмите кнопки чтобы выбрать нужный элемент затем нажмите ОК чтобы открыть соответствующее подменю 3 В подменю используйте и ОК кнопки чтобы сделать настройки или используйте чтобы выбрать элемент войдите в подменю с помощью кнопки ОК произведите на...

Page 27: ...ский поиск Поиск может занять несколько минут Во время процесса вы можете нажать на кнопку и выбрать YES ДА чтобы выйти из Функции поиска Настройка субтитров 1 Настройка субтитров настройка включает кнопки Выкл Вкл и Для слабослышащих For Hard of Hearing 2 Выбор Основного предпочтительного языка системы нажмите OK и затем используйте чтобы выбрать основной предпочитаемый вами язык 3 Второй предпоч...

Page 28: ...ъемный Воспроизводит реалистичный объемный звук при воспроизведении 5 1 канальных аудиоисточников Включите и выключите телевизор после установки настроек Дополнительные настройки доступ к дополнительным параметрам улучшения качества звука Настройка громкости 1 Автоматический Auto Volume поддерживает постоянный уровень громкости для всех программ и входов Включите и выключите телевизор после устано...

Page 29: ...н 20мин 30 мин 60 мин 90 мин 120 мин и 180 мин Мировое время Войдите чтобы добавить Мировые часы Ночной режим включите чтобы сохранить громкость и яркость и не мешать окружающим Четкий звук и яркость на устанавливаются на низком уровне Система Язык Language Используйте для прокрутки списка Языки и выберите нужный язык Среда Environment Войдите чтобы установить режим Дома или Магазин Домашний режим...

Page 30: ...k затем нажмите кнопку ОК чтобы выбрать папку 2 Нажмите кнопку со стрелкой вверх вниз влево или вправо чтобы выбрать нужный файл и нажмите OK чтобы воспроизвести файл Нажмите клавишу возврата пульта дистанционного управления чтобы остановить воспроизведение Предупреждения и часто задаваемые вопросы Внимание Некоторые нестандартные мобильные устройства хранения могут быть не распознаны Пожалуйста и...

Page 31: ...ние может быть испорчено точками Когда сигнал очень слабый может потребоваться установка специальной антенны для улучшения приема 1 Отрегулируйте положение и ориентацию внутренней наружной антенны 2 Проверьте подключение антенны 3 Произведите точную настройку канала Попробуйте другой канал Может произойти сбой телевещания Зажигание Появляются черные пятна или горизонтальные полосы или изображение ...

Page 32: ...арительного уведомления ИНФОРМАЦИЯ О ПРОДУКЦИИ Дата изготовления Вы можете увидеть информацию на этикетке продукта Знак энергоэффективности Этикетка с информацией о энергоэффективности прикреплена к этому устройству Информация о потреблении энергии предоставляемой с продуктом определяется в соответствии с правилами каждой страны h ps www modena com ru_ru 31 ...

Reviews: