background image

Mobilex A/S

Grønlandsvej 5
DK-8660 Skanderborg

www.mobilex.dk

Accessories – safety belt

It is possible to mount a safety belt on the chair.
It is important that the safety belt has loops at the end like the 
Mobilex
 belt (Item no. 233012).

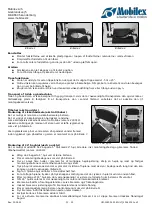
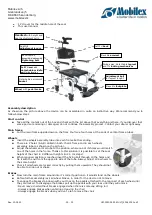
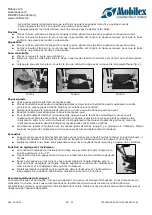
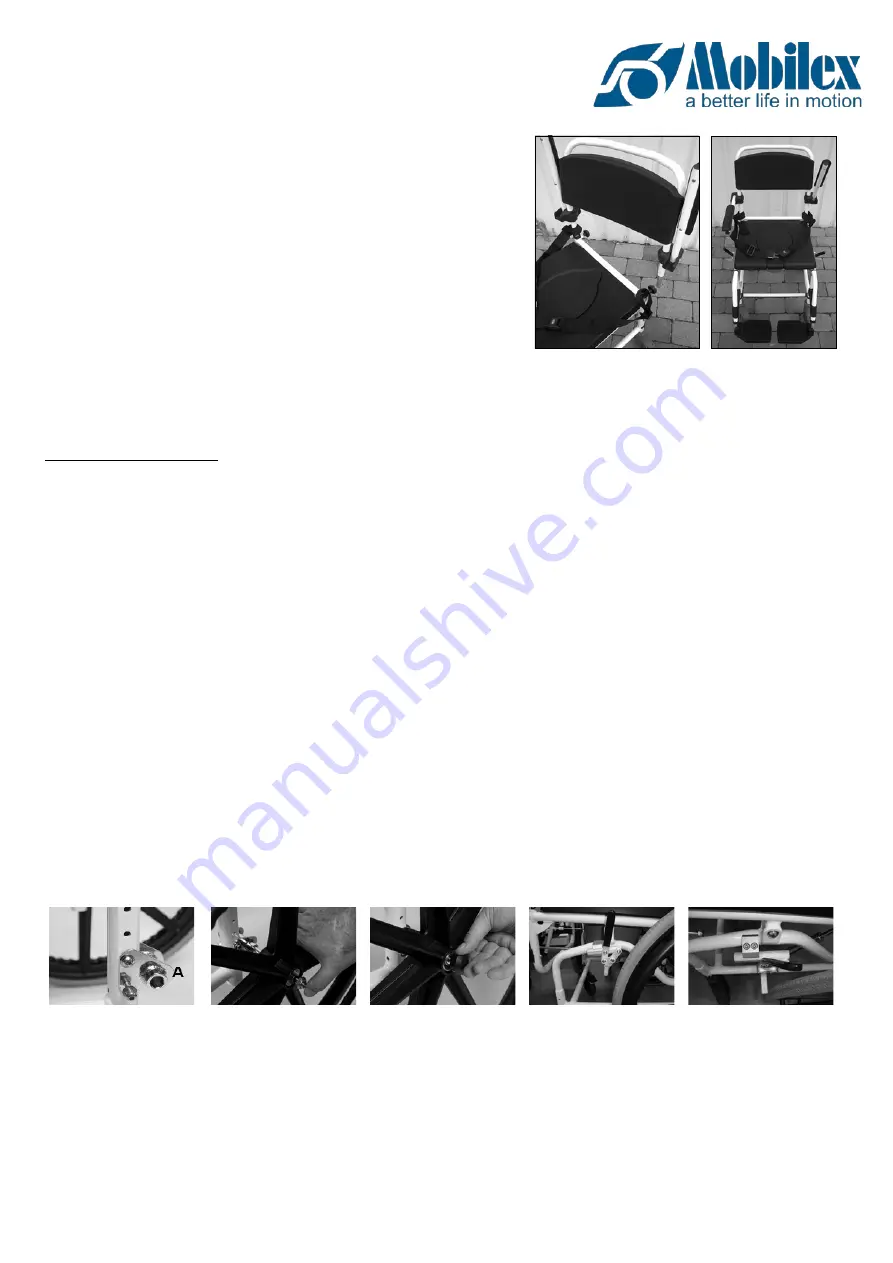
The loops should be placed at the backrest by lifting the backrest like 
at pic. 6

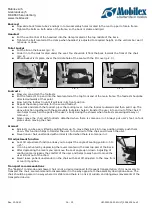
Be aware that the belt is turned the right way before the backrest is 
put back into position like in pic. 7

Mounting of 24" rear wheels (extra equipment)

It is possible to replace rear 5” small wheels with 24” big wheels with pushrims for self propelling. Assembly of this 
kind of wheels requires also mounting of typical wheelchair brakes. It is all included in the accessory kit (Item no. 
302023) together with fixing bolts, assembly clamps and plates.

Replacement description:

Disassemble the 2 rear standard wheels in the way opposite to previous assembly instruction.

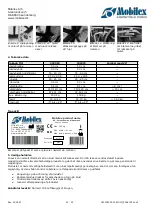
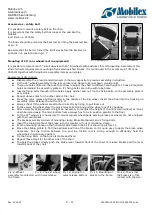
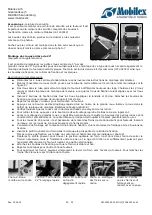
Fit the 24“ wheels assembly to the rear vertical side-frame tube (as shown on picture 8).

There are holes drilled in the tube that allow to adjust the chair to different seat heights. Choose 2 required  
holes and adjust the assembly plate so it's fixing holes are in line with tube holes.

Insert 2 fixing bolts through all the holes. Apply washer and nut. Tie the fixing bolts, so the assembly plate is 
very stable.

Repeat above steps for the other side of the chair.

Press the quick release button located in the middle of the big wheel. Insert the wheel into the housing on 
assembly plate. Release the button (Pic. 9)

Always check if the wheels are attached correctly by trying to pull them out.

To take away the wheel press the quick release button and pull the wheel out of it's housing.

After assembly of big wheels it might be necessary to readjust the height of the front small wheels as it was 
described previously. The main bottom frame always has to be in position parallel to the floor.

For the 24” wheels it is necessary to mount regular wheelchairs parking brakes as wheels are not equipped 
with their own brakes.

The brake assembly consists of mounting clamp, Brake Mechanism and 2 fixing bolts.

Insert the sliding profile of the brake in to the smaller cut out of mounting clamp.

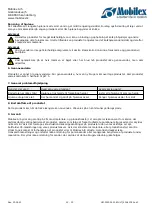
Put the mounting clamp on the horizontal side frame tube as it is shown on picture 11.

Move the sliding profile to find the optimum position of the brake, so it is quite easy to apply the brake when 
necessary,   but   the   friction   between   tire   and   the   friction   rod   is   strong   enough   to   efficiently   hold   the 
wheelchair in stationary position.

Tie the fixing bolts, so the brake is stable and fixed.

Repeat those steps for the other side of the chair.

To apply the brakes simply push the brake lever towards front of the chair. To release brakes pull the lever 
towards back of the chair.

Pic. 8: W

heel 

assembly mounted on 
the frame

Pic. 9: The 24" wheel 
with quick release 

Pic. 10: Coping for 
quick release bottom

Pic. 11: Mounting of 
brakes to the frame.

Pic. 12: Check that 
the brakes is in firm 
contact with the tyre.

Rev. 20.04.21

 17 - 32

UM-302024-25-MULTI_20042021.odt

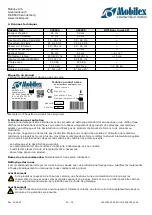
pic. 6: open backrest 

Pic. 7: belt mounted

Summary of Contents for 302024

Page 1: ...nd Gebrauchsanleitung Montage og brugervejledning User Manual Manuale d uso e manutenzione Manuel d instructions Mobilex A S Grønlandsvej 5 DK 8660 Skanderborg www mobilex dk Standard model w 4 lockable 5 wheels Kakadu Tilt w 24 wheels Detachable adjustable footrests and leg support White powdercoated frame ...

Page 2: ...of content Indice Table des matières Montage und Gebrauchsanleitung 3 9 DEUTSCH Montage og brugervejledning 10 14 DANSK User Manual 15 19 ENGLISH Manuale d uso e manutenzione 20 24 ITALIANO Manuel d instruction 25 30 FRANÇAIS Declaration of Conformity 31 DOC Rev 20 04 21 2 32 UM 302024 25 MULTI_20042021 odt ...

Page 3: ...Toilettenrollstuhls sich nicht Finger oder andere Körperteile einzuquetschen Sorgen Sie dafür dass diese Anleitung von allen Personen die den Dusch Toilettenrollstuhl Verwenden auch sorgfältig gelesen wird Schäden die durch Nichtbeachtung dieser Anleitung entstehen sind von jeder Gewährleistung ausgeschlossen Halten Sie bei der Verwendung dieses Geräts immer eine stabile Sitzposition ein und lasse...

Page 4: ...t dem Sitz 1 abnehmbares Rückenteil mit den Armlehnen 1 abnehmbare Kopfstütze 2 abnehmbare Beinstützen 4 abnehmbare Räder 1 Toiletteneimer mit Tragebügel und Deckel 1 PU Abdeckung für die Sitzaussparung für den Toiletteneimer Dieses Handbuch Bei Beachtung der Abbildung oben sollte der anfängliche Zusammenbau des Toilettenstuhls sehr einfach zu bewerkstelligen sein Zur Montage beachten Sie bitte we...

Page 5: ...raube an der Halterung so dass sich die Kopfstütze nicht mehr auf oder abwärts bewegt werden kann Zur Einstellung der Tiefe horizontale Ebene der Kopfstütze lösen Sie die Handschraube an der waagrechten Halterungsstange hinter der Kopfstütze schieben die Kopfstütze auf die gewünschte Tiefe und fixieren anschließend die Handschraube wieder Toiletten Eimer Setzen Sie den Deckel auf den Toiletteneime...

Page 6: ...vor 1 Montieren Sie die Radhalterungen an den dafür vorgesehenen Aufnahmelöchern am Rahmen Es besteht dabei die Möglichkeit den Radstand anzupassen die Halterung kann dafür in 6 verschiedenen Positionen montiert werden Achten Sie aber darauf dass bei der Montage der längere Teil der Achsenhülse Bild 8 A immer nach außen zeigt 2 Die Steckachse in das Rad einführen und in die Achsenhülse am Rahmen s...

Page 7: ...Räder Es wird empfohlen die Räder mit warmem Wasser und einem milden Reinigungsmittel zu reinigen Schmieren Sie auch die Lager indem Sie von Zeit zu Zeit oder wenn die Räder zu quietschen beginnen ein Schmiermittel aufsprühen Warnung Wenn das Produkt sehr kalkhaltigem Wasser ausgesetzt wird kann es zu einer Bindung und Ansammlung von Kalk an Radlagern und anderen beweglichen Teilen kommen In diese...

Page 8: ...Rohr der Räder im Rahmenrohr Spiel hat und kontrollieren Sie ob die Befestigungsschrauben fest angezogen sind 8 Entsorgung des Produktes Das Produkt kann nicht mit dem Hausmüll entsorgt werden sondern muss zur lokalen Müllentsorgungsstelle gebracht werden 9 Garantie Mobilex A S bietet 2 Jahre Garantie auf Schäden die durch Produktionsfehler oder Materialfehler verursacht sind Die Garantie erlischt...

Page 9: ... Produktet må ikke anvendes til at stå på Alle hjul SKAL hele tiden være i kontakt med underlaget under brug Dette sikrer at produktet er i balance hvorved uheld forebygges Når produktet anvendes i stationære situationer skal hjulene låses Sørg altid for at sidde i stolen i korrekt siddeposition og flyt kun toiletudskæringen ved toiletbesøg Kan brugeren ikke opretholde en stabil siddeposition bør ...

Page 10: ...laden på den forreste del af hjulet For senere at låse bremsen op løftes trædepladen igen med foden Lås altid hjulenes bremser når stolen ikke benyttes Lås altid hjulenes bremser ved ind og udstigning af stolen Ryglæn Monter ryggens rør i de 2 montagehuller på bagsiden af rammen Fastgør ryggen ved at dreje på grebene Hovedstøtte Monter hovedstøttens vertikale rør med beslaget på skubbe bøjlen Just...

Page 11: ...ede 6 Vær opmærksom på at vende selen så spændet vender fremad inden ryglænet igen påsættes og selen er monteret som på billede 7 Montering af 24 baghjul ekstra udstyr Det er muligt at udskifte de 2 bageste 5 hjul med 24 hjul Alle dele inkl monteringsbeslag og bremser findes i tilbehørssættet varenr 302023 Aftag de 2 bageste 5 hjul ved at løsne boltene Placer monteringsbeslagene som vist på billed...

Page 12: ...at følgende kontrolleres og udføres Rengøring og desinficering af produktet Ramme produkt tjekkes for skævheder og tegn på brud Sliddele kontrolleres og skiftes hvis nødvendigt Generel efterspænding af produktet Anbefalet levetid Normalt 10 år afhængigt af brugen Rev 20 04 21 12 32 UM 302024 25 MULTI_20042021 odt Max width 63 cm Max 150 kg Max load in basket 5 kg MOBILEX A S Grønlandsvej 5 DK 8660...

Page 13: ... være grunden Hvad skal jeg gøre Badestolen er ikke stabil Hjulene er justerede til forskellige højder Juster alle hjulene til samme højde Hjulene drejer ikke let Der har samlet sig skidt på hjulenes aksel Rengør hjulenes aksler for skidt 8 Bortskaffelse af produktet Dette produkt skal når det ikke længere kan anvendes afleveres på en kommunal genbrugsplads 9 Garanti Mobilex A S yder en garanti på...

Page 14: ...UST be in contact with the floor at ALL TIMES during use This will ensure that the device is properly balanced and should avoid accidents When using the device in a stationary position the brakes MUST be locked The device must not be loaded with more than 150 kg The device is dedicated to be used indoors and on a flat surfaces without any obstacles Always maintain a stable sitting position when us...

Page 15: ... the fixing bolt through all the holes and tie it with the nut from the opposite side of the tube Always adjust all 4 wheels to the same height Check if all wheels are locked correctly by pulling them upwards They should not be able to slide out or shake Brakes Now turn the main frame around into it s correct position so it would stand on the wheels Before further assembly lock all wheel brakes in...

Page 16: ...t also helps to wash all the parts of the user s body during the shower when footrests are swinged away or removed Never move the chair with footrests detached when there is someone in it Always put user s feet on foot plates when moving the chair Armrest Armrests can be easily lifted by pulling them up To move them back in to low position simply push them down This function helps to transfer the ...

Page 17: ...eel into the housing on assembly plate Release the button Pic 9 Always check if the wheels are attached correctly by trying to pull them out To take away the wheel press the quick release button and pull the wheel out of it s housing After assembly of big wheels it might be necessary to readjust the height of the front small wheels as it was described previously The main bottom frame always has to...

Page 18: ...e wheels It is recommended to clean the wheels in hot water with a mild cleaning agent Lubricate the bearings with oil periodically or when the wheels start squeaking Warning If the product is exposed to very calcareous water a binding and accumulation of lime on wheel bearings and other moving parts may occur In this case the product can be cleaned with a limescale remover and then lubricated wit...

Page 19: ...s 8 Disposal of the product The product can not be disposed of with household waste but must be brought to the local recycling centre 9 Guarantee terms Mobilex A S offers 2 years of warranty for damages caused by errors in production or material errors The warranty is not valid by not intended repair or usage of the product Parts subject to normal wear are not covered by the warranty unless wear i...

Page 20: ...uti non apportare modifiche al prodotto se non esplicitamente autorizzate o proposte dal costruttore usate la carrozzina solo su terreni piani e stabili nell uso fate attenzione a non schiacciare dita e altre parti del corpo ponete attenzione che questo manuale sia letto attentamente da tutte le persone che intendano usare la carrozzina Danni derivanti dall inosservanza delle istruzioni sono esclu...

Page 21: ...e inserendone ciascun tubo verticale fino alla battuta nei fori del telaio Fissate ora con le viti passanti in dotazione ogni ruota al telaio Controllate bene che le ruote siano fissate provando a rimuovere le ruote cercando di estrarre il tubo dal telaio Le ruote non devono staccarsi Ora rigirate il telaio nella posizione giusta in modo che appoggi sulle 4 ruote Freni Prima di continuare con l as...

Page 22: ...late che non si lascino girare senza tirare la levetta di bloccaggio altrimenti non sono inseriti in modo corretto Per poter togliere i poggia gambe dal telaio tirate o spingete la levetta di bloccaggio verso la seduta e girate i poggia gambe di 90 verso l esterno Ora potete togliere i poggia gambe sfilandoli verso l alto Braccioli I braccioli della carrozzina sono elevabili e possono essere ribal...

Page 23: ...ruota premendo sul pulsante del perno montate la ruota sulla carrozzina spingendo il perno fino in fondo immagine 9 Rilasciate il pulsante sul perno in modo che il perno sia bloccato nella boccola e controllate che la ruota non si lasci sfilare dalla carrozzina senza premere il pulsante sul perno 3 Inserite ora il coperchietto nero sulla ruota coprendo il perno immagine 10 4 Posizionate i freni su...

Page 24: ...ote iniziano a cigolare Attenzione Se il prodotto è esposto ad acqua molto calcarea si può verificare un legame e un accumulo di calcare sui cuscinetti delle ruote e su altre parti mobili In questo caso il prodotto può essere pulito con un anticalcare e poi lubrificato con olio lubrificante Attenzione Se utilizzato in ambienti altamente clorati può verificarsi una forte corrosione extra e la garan...

Page 25: ...on sono coperte da garanzia a meno che l usura non sia causata da un difetto di fabbricazione In caso di modifiche apportate al prodotto senza una nostra approvazione scritta il marchio CE e la garanzia del prodotto non saranno più valide In caso di danni al prodotto coperti da questa garanzia si prega di informare il rivenditore o direttamente Mobilex A S La garanzia non copre spese di trasporto ...

Page 26: ...e deux éléments mobiles de l appareil L appareil ne doit être utilisé que sur une surface stable Toutes les roues DOIVENT être en contact avec le sol pendant l utilisation Cela garantira que l appareil est correctement équilibré et devrait éviter les accidents Lors de l utilisation de l appareil en position fixe les freins DOIVENT être verrouillés L appareil ne doit pas être chargé avec plus de 13...

Page 27: ... sur la position où l un de ses trous correspond à l un des trous du cadre Grâce à cette solution il est possible de régler la hauteur d assise de la chaise sur 3 hauteurs différentes par incréments de 2 5 cm Lorsque la position requise est atteinte insérez le boulon de fixation dans tous les trous et attachez le avec l écrou du côté opposé du tube Toujours régler les 4 roues à la même hauteur Vér...

Page 28: ... fonction ci dessus associée à ces repose pieds surélevés aide l utilisateur à entrer et à sortir du fauteuil Il est également utile de laver toutes les parties du corps de l utilisateur pendant la douche lorsque les repose pieds sont écartés ou retirés Ne déplacez jamais le fauteuil avec les repose pieds détachés lorsqu il y a quelqu un à l intérieur Placez toujours les pieds de l utilisateur sur...

Page 29: ...de la grande roue Insérez la roue dans le boîtier de la plaque de montage Relâchez le bouton photo 9 Vérifiez toujours que les roues sont correctement fixées en essayant de les retirer Pour retirer la roue appuyez sur le bouton de déverrouillage rapide et retirez la de son logement Après le montage de grandes roues il peut être nécessaire de réajuster la hauteur des petites roues avant comme décri...

Page 30: ...mandé de nettoyer les roues à l eau chaude avec un produit de nettoyage doux Lubrifiez les roulements à l huile périodiquement ou lorsque les roues commencent à grincer Avertissement Si le produit est exposé à de l eau très calcaire une fixation et une accumulation de calcaire sur les roulements de roue et autres pièces mobiles peuvent se produire Dans ce cas le produit peut être nettoyé avec un p...

Page 31: ... ne peut pas être jeté avec les ordures ménagères mais doit être amené au centre de recyclage local 9 Conditions de garantie Mobilex A S offre 2 ans de garantie pour les dommages causés par des erreurs de production ou des erreurs matérielles La garantie n est pas valable pour une réparation ou une utilisation non prévue du produit Les pièces sujettes à une usure normale ne sont pas couvertes par ...

Page 32: ...ruito in conformità alla documentazione tecnica ed alla seguente normativa CEE est conçu conformément à la documentation technique et est constitué de la manière suivante In case of unintended incidents or suspected faults failures or defects of the product the dealer or Mobilex A S must be contacted Ved utilsigtede hændelser eller hvis der er formodning om at der er fejl svigt eller mangler ved p...

Reviews: