CARE AND CLEANING
- REGULAR CLEANING IS RECOMMENDED
- USE A NON-ABRASIVE CLEANER OR DETERGENT. RINSE
WITH WARM WATER AND DRY COMPLETELY.
- ABRASIVE CLOTHS MAY DAMAGE THE SURFACE
- PLEASE REGULARLY INSPECT YOUR BATH STOOL
AND IT'S PARTS FOR ANY CORROSION, BREAKAGE,
COMPRESSION OR WEAR.
ASSEMBLY INSTRUCTIONS
1. Remove all parts from box:
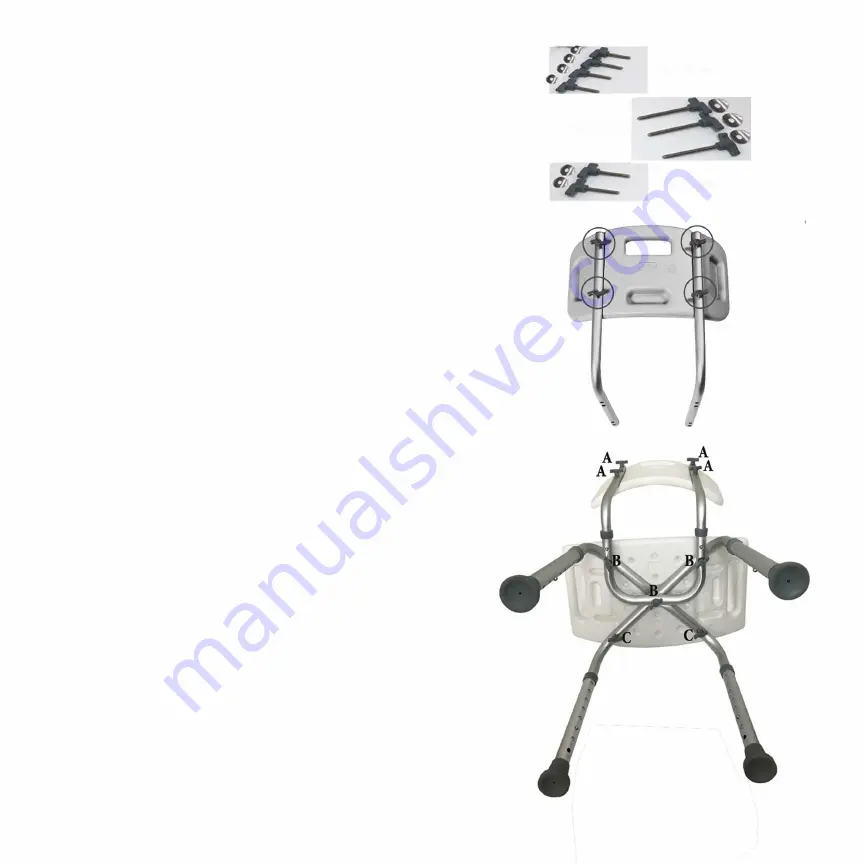
One Seat, one backrest (if equipped) with horseshoe-shaped
mounting bracket, four lower legs, two horseshoe-shaped
upper leg section tubes, 7 thumb screws.
2. Place the seat face down on a level surface. Place the first leg
section into the groove on the bottom of the seat. Place the
second section on top of the first and secure with the short
thumb screw through the front two holes with the two
thumb screws (refer to C location)
3.
(If Applicable) Insert the L-shaped backrest tubes and
securing them to the back rest using the shorter thumb screws.
(A)
4. Align holes on U-shaped tubes with the holes on the leg
sections. Use the longer thumb screws. (B)
5. Insert legs into the leg sections by pushing in the locking
push buttons, and slide legs over the receiving tube until an
audible "click" is heard ensuring the legs are locked into position.
6. Use the push buttons to adjust the bench to the desired seat
height. Be sure the bath bench height is level, stable, and all
push buttons fully engaged before using.
A:4X 3 CM
B: 3X6CM
C: 2x 3.5cM
A
NOTE: WEIGHT CAPACITY is 3001bs


