© MOBATIME
3 / 3
QE-801301.01
5.
Putty:
conf –p8:03
6.
Putty:
wifi –m 1
7.
Putty:
exit
With the command “exit” the
configuration settings will be submitted
to the WiFi clock. Your WiFi clock is now
connected to your local WiFi network.
After "exit" this message appears, which is normal.
3.2
Static
Option 2:
Integrate the clock into the desired
WiFi with static IP.
For this, the information about your
wifi without DHCP is needed:
a.
SSID
b.
Password
c.
Security/ encrypt. Type
d.
Network operation
mode: unicast, manual
network settings
e.
IP
f.
Gateway
g.
Subnetmask
h.
NTP Server
i.
DNS Server
j.
Change Wifi Mode
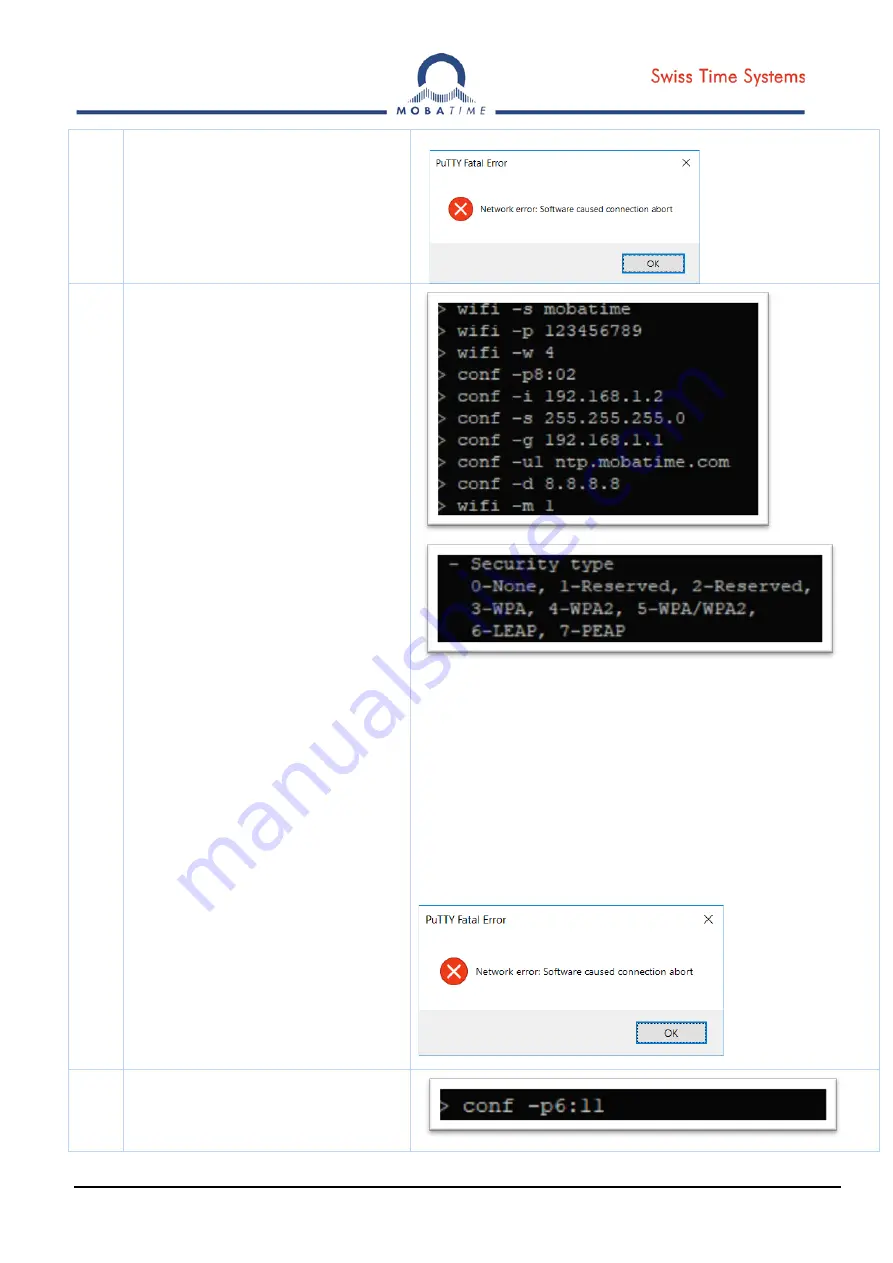
Use the following commands for the
WiFi clock configuration.
1.
Putty:
wifi –s <SSID>
As example
wifi –s Mobatime
Press “enter” and continue with
step 2 - 11
2.
Putty:
wifi –p <Password>
3.
Putty:
wifi –w <Encryption type
see on the printscreen>
4.
Putty:
conf –p8:02
5.
Putty:
conf –i <IP>
6.
Putty:
conf –s <Subnet Mask>
7.
Putty:
conf –g <Gateway>
8.
Putty:
conf –u1 <NTP Server>
9.
Putty:
conf –d <DNS Server>
10.
Putty:
wifi –m 1
11.
Putty:
exit
With the command “exit” the
configuration settings will be submitted
to the WiFi clock. Your WiFi clock is now
connected to your local WiFi network.
After "exit" this message appears, which is normal, because of lost
network connection.
5.
Configure the correct time zone.
1.
Connect to your clock with a
telnet client
2.
Putty:
conf –p6:<ZoneTable>


