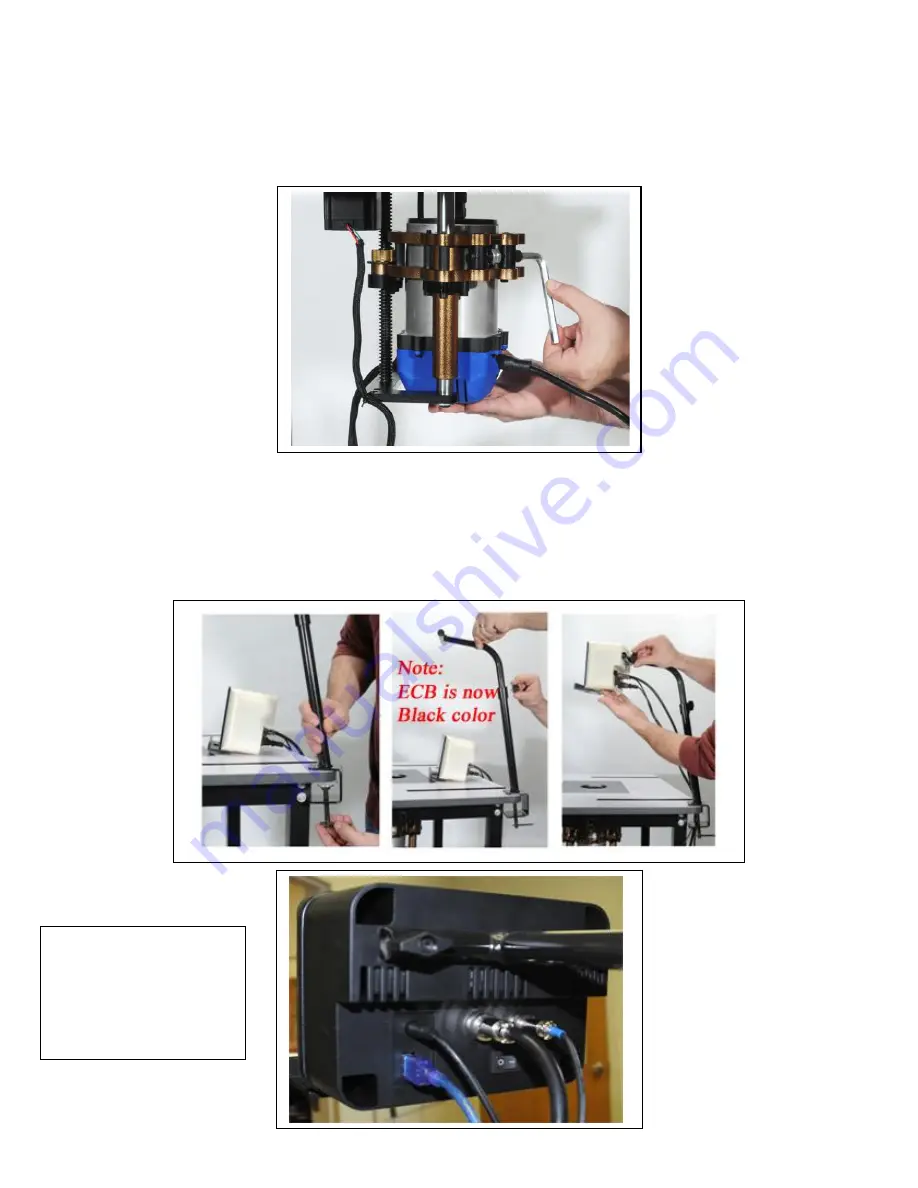
3. With the lift carriage in the lowest position insert the router motor into the carriage and lock it into
place. You will want the top of the router motor just about flush with top of the carriage. Use the largest
hex wrench to tighten the motor into position.
4. If using the mounting arm to hold the control box as recommended start with the lower section of the
arm and clamp it to the back of your router table. Next insert the upper section of the arm into the
lower and use the short studded knob to lock the arm into position.
Using the two longer studded knobs to attach the control box to the upper mounting arm.
**Note - The Mounting
Arm is no longer needed
or included with the
Bluetooth version of the
PowerLift Pro**
Summary of Contents for PowerLift Pro
Page 4: ......


