e.
Tripole
®
With Adjustable Attenuated Dipole
To adjust the attenuation of the Dipole element, connect the positive (+) lead to Terminal 3 and
insert a 5 watt resistor between terminals 3 and 4. The resistor can be any value between 2 and
11 ohms. The larger the value of the resistor, the greater the attenuation.
f.
Tripole
®
With Maximum Output From All Drivers (2.4 ohm impedance)
Compared to the standard Tripole
®
configuration, the output from the Dipole (side) drivers will be
unchanged, but there will be significantly greater output from the Direct (front) drivers.
To get maximum output from all drivers, connect the (+) lead from the amplifier to Terminal 1.
Connect a jumper wire between Terminal 1 and Terminal 3.
CAUTION: This configuration presents a 2.4 ohm load to the amplifier. Do not use this
configuration unless your amplifier is rated to 2 ohms.
g.
Direct Radiator Only Mode
There will be very little output from the Dipole (side) drivers. To operate as a Direct Radiator, connect
the (+) lead from the amplifier to Terminal 3. Use no jumper.
Remember, regardless of configuration, the Ground (-) lead must always connect to Terminal 2.
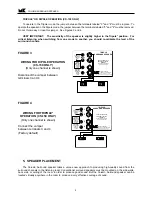
REMOTE SWITCHING OF MODES (CS-150 ONLY)
If you want to be able to switch between any of the
above modes, you can do so by using a speaker level
switch box. The specific instructions will vary according
to the particular switcher you are using and so this sec-
tion is intended to be general in nature.
To switch between THX Dipole mode and Tripole
®
mode, connect one wire between Terminal 3 and the
switcher Input.
Connect a separate wire between
Terminal 4 and one of the switcher outputs. For the THX
Dipole mode, the switcher output connected to Terminal
4 should be turned off. For the Tripole
®
mode, the switch-
er output should be turned on. Nothing else should be
connected to the switch box, especially your amplifier.
As another example, you can also use a switcher to
direct the (+) signal from the amplifier to either Terminal
1 or Terminal 3, to switch between some of the custom
modes described above. See Figure 5.
CAUTION: DO NOT WIRE THE SWITCH BOX SO TERMINAL 2 CAN BE CONNECTED TO ANY OTHER
TERMINAL. If Terminal 2 is connected to Terminal 1, 3, or 4, the output of the power amplifier will be
shorted, which will almost certainly damage the amplifier.
8. SPEAKER POLARITY TEST
In any system using a subwoofer separate from Satellite speakers, especially in multi-channel surround
sound applications, a polarity test must be performed to insure proper phase in the system, in order to achieve
optimum sound in the critical bass frequencies.
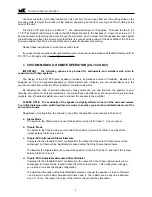
Therefore, you must have correct phase among all the speakers in the system. We recommend using a test
disc to compare the phase of the front channels, surround channels, and subwoofer. Test by comparing the
phase between individual channels (starting with the front right and left) until you have established that all units
have identical phase.
COLUMN SURROUND SPEAKER
10
TRIPOLE
SURROUND SPEAKER
9351 Deering Avenue, Chatsworth, CA 91311
818/701-7010 fax: 818/701-0369 www.mksound.com
INPUT
4 ohms
FOR TRIPOLE
OPERATION:
install jumper
between
terminals
3 and 4
DO NOT CONNECT YOUR
AMPLIFIER TO TWO RED
TERMINALS.
1
3
2
4
FOR THX
(DIPOLE)
OPERATION:
remove jumper
between
terminals
3 and 4
Connect your
amplifier to
terminals
1 and 2
For remote control operation,
see your owner's manual.
+
-
LEFT SURROUND
RIGHT SURROUND
+
-
+
-
+
-
INPUT
OUTPUT - A
OUTPUT - B
+
-
Miller & Kreisel Sound Corporation
Amplifier or Receiver
Switch Box
FIGURE 11

