


2
����������
�����������������������
����������
������
�������
����������
������
�
�
�
�
�
�
�
�������������
����������
������
�������
����������
������
�������������
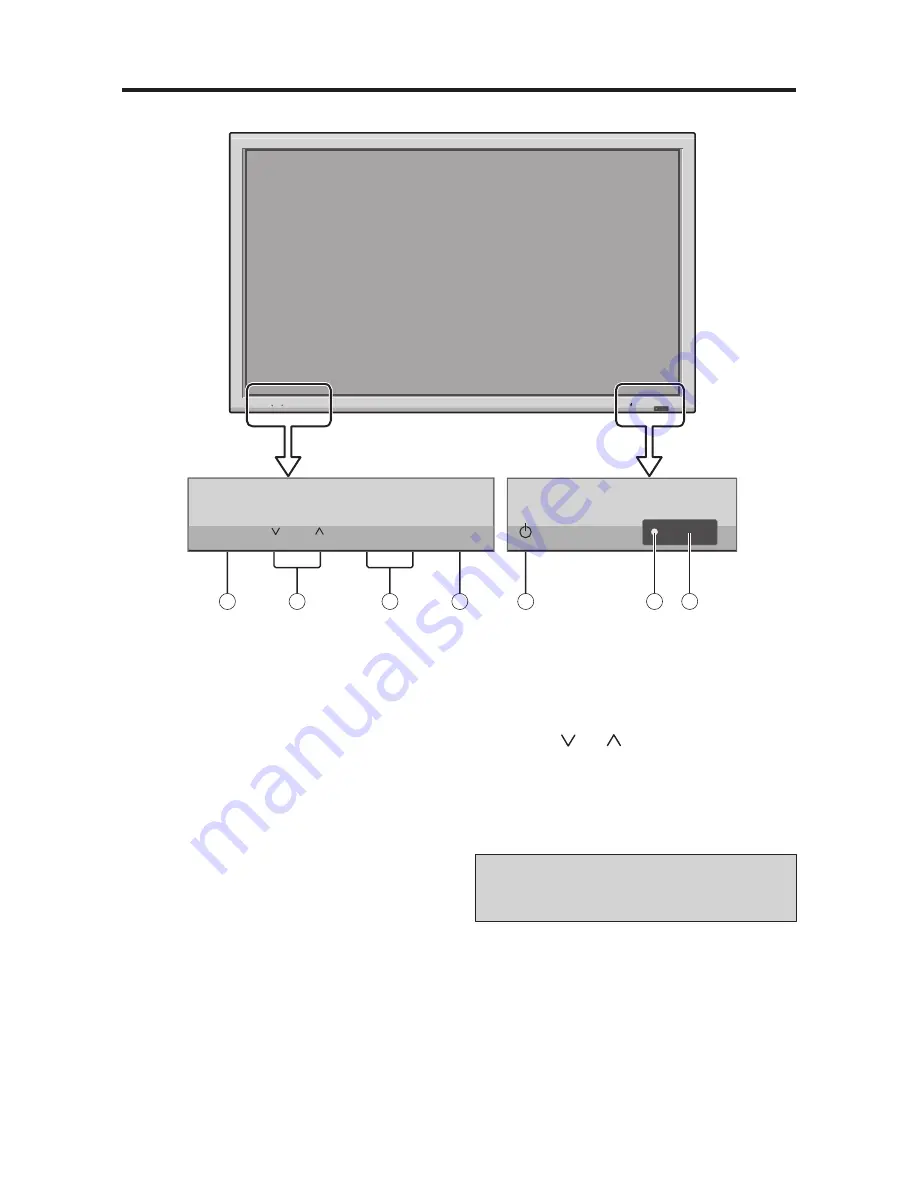
�
POWER
Push this button to turn the displays main power on or
off.
�
REMOTE SENSOR WINDOW
Receives the signals from the remote control.
�
POWER/STANDBY Indicator
When the power is on ............................. Lights green.
When the power is in the standby mode ... Lights red.
�
INPUT / EXIT BUTTON
Switches the input.
The available inputs depend on the setting of BNC
INPUT, RGB SELECT and HDMI SET UP.
Functions as the EXIT buttons in the On-Screen Menu
mode.
�
LEFT/ and RIGHT/+
Functions as the ADJUST (
�
�
/
�
) buttons in the On-
Screen Menu mode.
�
VOLUME and
Adjusts the volume. Functions as the ADJUST (
�
/
�
)
buttons in the On-Screen Menu mode.
�
MENU/ENTER BUTTON
Display the main menu or select a menu item.
�������
The Power on/off button does not disconnect the plasma
display completely from the main power supply.
2
Summary of Contents for PD-5050
Page 1: ...Mitsubishi Plasma Display PD 5050 PD 6150 Owner s Guide...
Page 9: ......
Page 15: ...6 6...


