


12
2. TV Menus
For assistance call 1(800) 332-2119
Picture, continued
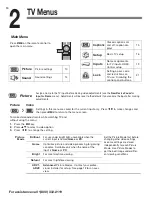
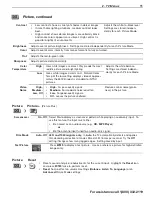
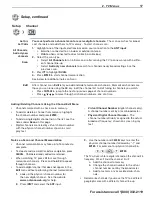
Picture
Adv anced
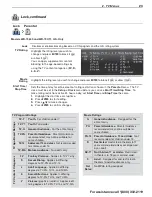
Picture > Advanced
allows you to save highly customized picture adjustments for each
input.
Mitsubishi recommends these adjustments be made only by a trained pro-
fessional installer.
1.
Press
MENU.
Under
Picture
, highlight the
Advanced
icon and press
ENTER
.
2.
With
Picture Mode
(the first option) highlighted,
press
ENTER
to change from blank (undefined) to
ADV1
(daytime settings) or
ADV2
(nighttime settings).
3.
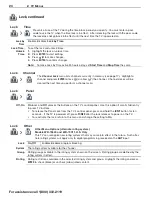
Use to highlight an option you wish to change and
press
ENTER
to see the adjustment display.
4.
Press to change settings.
5.
Use to navigate to additional options and press
to change settings.
6.
Press
MENU
to return to the
Picture > Advanced
menu and save the adjustments for the current
input. Press
EXIT
to close the menu.
Saving Custom 3D Settings
This menu can be used to create a custom Picture
Mode for viewing 3D content. Mitsubishi recommends
using
ADV1
to save 3D settings and
ADV2
to save 2D
settings.
To create a custom 3D picture mode:
•
The TV must be receiving a 3D signal
•
One of the TV’s 3D Source Formats must be
selected
•
You must be wearing matching 3D glasses.
To Use a Custom Picture Mode at a Later Time
• Press
VIDEO
and use to find the Picture Mode
option. Press to select
ADV1
or
ADV2
.
• Press
MENU
and go to
Picture > Video > Picture
Mode
and select
ADV1
or
ADV2
.
To Return to the Default Values for Advanced
Display the
Picture > Advanced
menu and:
1.
Highlight the name of the
Advanced
mode to change.
2.
Highlight
RESET Pic Mode
and press
ENTER
. You
must perform the reset separately for both
ADV1
and
ADV2.


