


Chapter 8
PERIODIC INSPECTION AND MAINTENANCE PROCEDURES
8-12
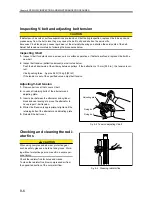
When required
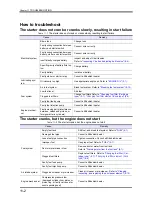
Cleaning, inspecting, and
replacing the air cleaner ele-
ment
&$87,21
Never service the air cleaner while the engine is run-
ning. Servicing the air cleaner while the engine is in
operation can cause particles of foreign matter to
enter the engine and result in rapid wear of parts,
leading to a shorter service life of the engine. Never
knock or hit the element.
When using compressed air, wear protective gear
such as safety glasses, a hard hat and gloves. Work-
ing without protective gear can result in a severe per-
sonal injury.
&$87,21
Cleaning, inspecting and replacing procedure
described below is a commonly used procedure.
Some application may be equipped with different air
cleaner.
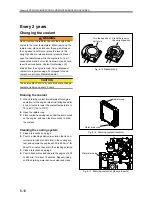
1.
Remove the air cleaner cap and wing bolt.
2.
Remove the air cleaner element from the body.
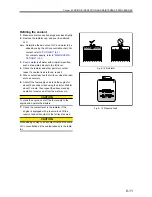
3.
Blow compressed air (0.69 MPa {7 kgf/cm
2
} [100
psi] or lower) onto the inside surface of the ele-
ment to remove dust and other contaminants.
4.
To remove dust stuck on the element, blow dry
compressed air onto the outside surface from a
distance. Blow compressed air on the inside sur-
face toward the outside along the pleats. Then,
blow compressed air on the outside and inside sur-
face again.
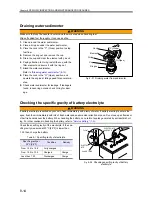
5.
After cleaning, hold the element near a light bulb to
illuminate the inside, to check for defects such as
cuts, pinholes or local wear.
6.
If any defect is found, replace the air cleaner ele-
ment with a new one.
7.
Reinstall the air cleaner element to the engine.
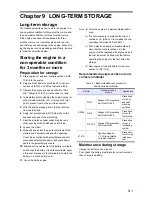
&$87,21
If defects such as cuts, pinholes or local wear are
found in the element, or if the air cleaner indicator
shows a red sign soon after the cleaned element is
installed, replace the filter element.
Reset the indicator by pressing the reset button to
erase a red sign after installing the clean or new ele-
ment.
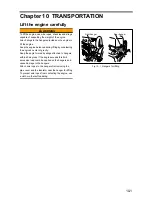
Fig. 8-20
Removing air cleaner element
Fig. 8-21
Cleaning air cleaner element
Fig. 8-22
Checking air cleaner element
Fig. 8-23
Air cleaner indicator
(OHPHQW
%RG\
:LQJ
EROW
%XWWRQ
6LJQDO


