Mitsubishi Electric WD3300U User Manual Download Page 27

EN-27

Settings of each menu item

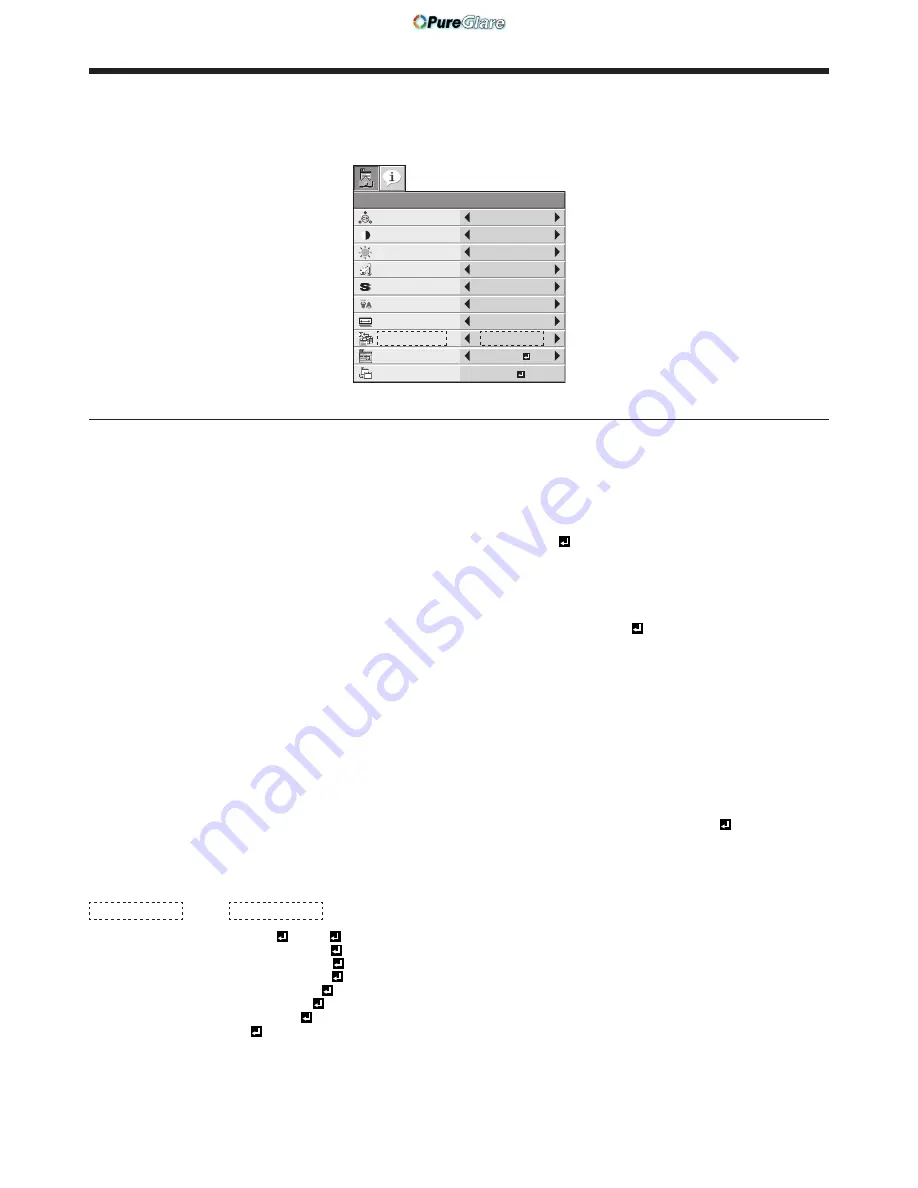
Menus displayed in the QUICK MENU mode

QUICK MENU

NORMAL (FULL)

ASPECT

LAMP MODE

STANDARD

QUICK MENU

CONTRAST

BRIGHTNESS

0

0

STANDARD

COLOR

0

COLOR

COLOR TEMP.

0

SHARPNESS

AUTO

COLOR

ENHANCER

SELECT

USER MENU

OK

DETAIL MENU

*

*

ITEM

SETTING

FUNCTION

COLOR ENHANCER

AUTO

Select to optimize the settings automatically depending on the input signal. 

(Select this option for normal use.)

PRESENTATION

Select to make the displayed image look bright and crisp.

STANDARD

Select to make the displayed image look natural.

THEATER

This option, suitable for viewing movies, makes the displayed image look soft 

and smooth.

sRGB

Select to give priority to the color reproducibility.

USER

The values of the gamma curve, BrilliantColor™, color intensity, and color 

balance that are set by USER   of COLOR ENHANCER in the IMAGE menu 

are applied. (See page 29.)

CONTRAST

±30

Use to adjust the contrast of the projected image. (See page 33.)

BRIGHTNESS

±30

Use to adjust the brightness of the projected image. (See page 33.)

COLOR TEMP.

STANDARD / LOW / 

HIGH

Select from the predetermined color temperatures.

USER

The color temperature that is set by USER   of COLOR TEMP. in the IMAGE 

menu is applied. (See page 29.)

SHARPNESS

±5

Use to adjust the sharpness of the projected image. (See page 33.)

LAMP MODE

STANDARD

Select this option when you want to view images in a well-lit room.

LOW

Select to moderate the intensity of the lamp. The operating sound is reduced 

and the lamp lifetime becomes longer.

•  When the lamp mode is switched, the projected image may flicker. 

•  Frequent switching of the lamp mode may damage the lamp.

ASPECT

NORMAL (FULL)

Input video signal is displayed at the max height (800 pixels) or max width 

(1280 pixels) of the panel while its aspect ratio is maintained. 

NORMAL (16:9)

Select this setting when using a 16:9 screen. 

NORMAL (4:3)

Select this setting when using a 4:3 screen.

16:9 

Regardless of the type of input signal, image is displayed at 16:9 aspect ratio 

(1280 x 720 pixels). Select to expand squeezed (or horizontally compressed) 

images such as DVD images to 16:9. When selecting 16:9   of ASPECT in 

the FEATURE menu, you can select whether or not to display signals at 16:9 

depending on their type. (See page 19.)

REAL

Input video signal is displayed at its original pixel size.

FULL

Select to project images in full size (1280 x 800 pixels) irrespective of type of 

input signal.

(USER MENU)

 *

 *

*:  The item selected in SELECT USER MENU below and its value are 

displayed.

SELECT USER MENU COLOR   / TINT   /

STANDBY MODE   /

IMAGE REVERSE   /

MENU POSITION   /

CINEMA MODE   /

SCART INPUT   /

LANGUAGE 

Select the item to be displayed in the preceding row. For the details of the 

selectable items, see the following pages.

•  COLOR, TINT ...... page 29

•  STANDBY MODE, IMAGE REVERSE ...... page 30

•  MENU POSITION, CINEMA MODE, SCART INPUT, LANGUAGE ...... page 

31

DETAIL MENU

OK 

Select to change the menu display mode to the DETAIL MENU mode. 

•  When COLOR ENHANCER is sRGB, COLOR TEMP., COLOR and TINT can’t be adjusted.

•  When the setting of COLOR ENHANCER is changed, the displayed image may be disturbed.

Menu operation (continued)

http://www.pureglare.com.au

Summary of Contents for WD3300U

Page 1: ...WD3300 This User Manual is important to you Please read it before using your projector DLP PROJECTOR MODEL WD3300U User Manual http www pureglare com au ...

Page 2: ...he appliance WARNING TO PREVENT FIRE OR SHOCK HAZARD DO NOT EXPOSE THIS APPLIANCE TO RAIN OR MOISTURE CAUTION TO PREVENT ELECTRIC SHOCK DO NOT USE THIS POLARIZED PLUG WITH AN EXTENSION CORD RECEPTACLE OR OTHER OUTLET UNLESS THE BLADES CAN BE FULLY INSERTED TO PREVENT BLADE EXPOSURE NOTE SINCE THIS PROJECTOR IS PLUGGABLE EQUIPMENT THE SOCKET OUTLET SHALL BE INSTALLED NEAR THE EQUIPMENT AND SHALL BE...

Page 3: ...d trademark DLP Digital Micromirror Device DMD and BrilliantColor are all trademarks of Texas Instruments HDMI the HDMI logo and High Definition Multimedia Interface are trademarks or registered trademarks of HDMI Licensing LLC Macintosh is registered trademark of Apple Computer Inc The trademark of PJLink is trademark applied for registration or registered trademark in Japan the United States and...

Page 4: ...objects of any kind through openings of this projector as they may touch dangerous voltage points or short out parts that could result in a fire or electric shock Never spill liquid of any kind on the projector 14 Servicing Do not attempt to service this projector by yourself Refer all servicing to qualified service personnel 15 Damage requiring service Unplug this projector from the wall outlet a...

Page 5: ...st etc may blow out of it and hurt your eyes Do not insert your fingers in the space between the lens and the cabinet The lens may shift causing injury or damage to the projector Do not block the air inlet and outlet grilles If they are blocked heat may be generated inside the projector causing deterioration in the projector quality and fire Do not use flammable solvents benzene thinner etc and fl...

Page 6: ...battery side If the battery is forced to insert in this way the outer label of the battery may get ripped and it may cause a short circuit and heating 3 Attach the rear lid Important Use two size AA batteries R6 Replace the 2 batteries with new ones when the remote control is slow to operate Removing the batteries from the remote control Remove the back lid of the remote control and take out the b...

Page 7: ...ower jack 2 Main power switch O OFF I ON 3 HDMI IN terminal HDMI 19 pin 4 COMPUTER COMPONENT VIDEO DVI D IN HDCP terminal DVI D 24 pin 5 AUDIO IN 1 terminal mini jack 6 AUDIO DVI D terminal mini jack 7 DC OUT terminal 5V 1 5A MAX 8 LAN terminal Terminal panel Preparating your projector continued 9 Kensington Security Lock Standard connector 10 Lock bar SECURITY ANCHOR Attach a chain etc to this lo...

Page 8: ...on Pressing the LASER button emits a laser beam Even when you keep holding down the LASER button it is emitted only one minute To keep emitting it longer press the LASER button again You can disable the LASER button to prevent laser radiation due to misuse of the button How to disable the LASER button While holding the LASER button down press the q button 3 times How to enable the LASER button Whi...

Page 9: ...projector When operating the remote control keep the distance from the remote control to the projector via the screen within about 5 m 15 feet The operable range of the remote control however depends on the characteristics of the screen Using the wired remote control Attached remote control for this projector can be used as a wired remote control with remote control cable Wired remote control is u...

Page 10: ... inch m inch m inch cm inch cm inch cm inch cm 40 102 34 86 21 54 58 1 5 80 2 0 2 3 6 12 30 2 6 3 9 60 152 51 129 32 81 88 2 2 121 3 1 3 4 9 18 46 3 9 5 13 80 203 68 172 42 108 118 3 0 162 4 1 4 6 12 24 61 4 11 7 17 100 254 85 215 53 135 148 3 8 203 5 2 5 7 15 30 76 6 14 9 22 150 381 127 323 79 202 224 5 7 306 7 8 8 6 22 45 114 8 21 13 33 200 508 170 431 106 269 299 7 6 408 10 4 11 4 29 60 152 11 ...

Page 11: ...t placed perpendicularly to each other projected images become trapezoidal If you cannot make the projector and the screen perpendicular to each other by mechanical adjustments adjust keystone To adjust keystone Press the KEYSTONE button on the projector or the remote control to display KEYSTONE and adjust the image by pressing the or button or VOLUME or button on the remote control LENS SHIFT FAS...

Page 12: ...ll the projector near a fire alarm because it emits hot air from its exhaust vents Rear projection Ask a specialist for installation For details consult your dealer For rear projection set IMAGE REVERSE in the INSTALLATION menu to MIRROR See page 30 Caution Placing the projector directly on a carpet impairs ventilation by the fans causing damage or failure Put a hard board under the projector to f...

Page 13: ...ed from a digital connected computer press the DVI D HDCP button on the remote control Turn on the main power switch of the projector before starting the computer For audio connection 1 Connect one end of a commercially available PC audio cable to the AUDIO IN 1 2 terminal of the projector 2 Connect the other end of the PC audio cable to the audio output terminal of the computer This projector use...

Page 14: ...he power cord with your hand wet It may cause electric shock 2 1 Earthing terminal Power cord example About DDC The COMPUTER COMPONENT VIDEO IN 1 terminal of this projector complies with the DDC1 2B standard and the COMPUTER COMPONENT VIDEO DVI D IN HDCP terminal complies with the DDC2B standard When a computer supporting this standard is connected to this terminal the computer will automatically ...

Page 15: ...er If necessary install the terminal cover to the projector 1 Fit two hooks of the terminal cover into the projector 2 Tighten the attachment screws a firmly Important Don t carry the projector by the terminal cover a Viewing computer images continued http www pureglare com au ...

Page 16: ...uld be replaced soon Replace the lamp when the STATUS indicator blinks red See page 41 4 Press the ZOOM FOCUS button to display the ZOOM FOCUS menu 5 Adjust with the or button to get a fine picture When the ENTER button is pressed while the ZOOM FOCUS menu is displayed the adjustment mode is switched between FAST and STEP When FAST is selected the speed of focus controlled by the or button becomes...

Page 17: ... the fans make loud sounds during cooling such symptom is not a malfunction 16 Turn off the main power switch The POWER indicator will go out If the main power switch should be turned off or the power cord should be unplugged accidentally while either the air inlet fan or the air outlet fans are operating or the lamp is on allow the projector to cool down for 10 minutes with the power off To light...

Page 18: ...ed even after pressing the AUTO POSITION button several times refer to the procedure to adjust computer images See pages 35 and 36 When you carry out this procedure with a dark image the image may be displaced When connecting to a notebook computer When the projector is connected to a notebook computer images may not be projected in some cases In such cases set the computer so that it can output s...

Page 19: ... 1066 x 640 16 9 04 1066 x 602 16 9 1066 x 600 16 9 1280 x 720 16 10 16 9 1280 x 720 16 9 16 9 1280 x 720 16 9 1280 x 720 16 9 6 1280 x 768 16 10 1280 x 800 1360 x 768 16 10 1280 x 800 1366 x 768 16 10 16 10 1280 x 800 16 10 1280 x 800 16 10 1280 x 800 16 10 1280 x 800 4 3 1024 x 768 4 3 16 10 1280 x 800 1152 x 720 1066 x 666 1280 x 720 1280 x 800 1280 x 800 With the QUICK MENU or FEATURE menu See...

Page 20: ... C terminals BNC type respectively Select S VIDEO as the input source When using the S VIDEO IN Y and C terminals BNC type and the S VIDEO IN terminal S type at the same time the video signal input to the S VIDEO IN terminal S type takes priority When connecting a monophonic video device use the white L terminal to connect the audio cable The same audio signal is output from the channels L and R o...

Page 21: ...gital video data that are output from DVD players HDCP High bandwidth Digital Content Protection developed by Intel Corporation is a method to encrypt digital video data for the purpose of copy protection HDMI High Definition Multimedia Interface is fully backward compatible with computers displays and consumer electronics devices incorporating the DVI standards This projector can be linked with v...

Page 22: ...re are 2 kinds of methods to digitally transfer image data in which different black level settings are employed respectively Therefore the specifications of the signals output from DVD players differ depending on the type of the digital data transfer method they use Some DVD players are provided with a function to switch the methods to output digital signals When your DVD player is provided with s...

Page 23: ...is switched between FAST and STEP When FAST is selected the speed of focus controlled by the or button becomes fast and it becomes slow when STEP is selected 6 Select an input source Press the VIDEO HDMI button on the projector or the VIDEO S VIDEO or HDMI button on the remote control that is corresponding to the terminal in use The input source is switched between VIDEO S VIDEO and HDMI at every ...

Page 24: ... repeat turning off the main switch within 30 minutes from the lamp illumination an error may occur in the clock function of this product Instant Shut Down You can turn off this projector just by turning off the power switch or unplugging the power cord without pressing the POWER button Don t shut down the projector while the STATUS indicator is blinking after the lamp lights up because the lamp s...

Page 25: ...d for making detailed settings FEATURE menu page 31 SIGNAL menu page 32 INFORMATION menu page 28 IMAGE menu page 29 INSTALLATION menu page 30 R G B R G B SIGNAL HORIZ POSITION 0 VERT POSITION 0 TRACKING 0 COMPUTER INPUT RGB FINE SYNC 0 USER opt OK OFF HOLD 100 OVER SCAN MEMORY CALL AUTO RESOLUTION MEMORIZE 1024 x 768 V H A U IMAGE opt CONTRAST BRIGHTNESS 0 0 STANDARD 0 0 COLOR TINT COLOR TEMP 0 SH...

Page 26: ...OR TEMP 0 SHARPNESS AUTO COLOR ENHANCER SELECT USER MENU OK DETAIL MENU 6 To cancel the menu press the MENU button several times Important When an item marked with is selected pressing the ENTER button makes its value effective or displays another screen for further setting When the MENU button doesn t function unplug the power cord from the wall outlet Wait about 10 minutes plug the power cord in...

Page 27: ...reduced and the lamp lifetime becomes longer When the lamp mode is switched the projected image may flicker Frequent switching of the lamp mode may damage the lamp ASPECT NORMAL FULL Input video signal is displayed at the max height 800 pixels or max width 1280 pixels of the panel while its aspect ratio is maintained NORMAL 16 9 Select this setting when using a 16 9 screen NORMAL 4 3 Select this s...

Page 28: ...s 0 to 10 hours 0H is displayed The lamp operating time exceeding 10 hours is indicated by the actual hours When the lamp operating time reaches 3000 hours the bar turns to yellow When it reaches 3800 hours the bar turns to red INPUT Indicates the name of the terminal to which the currently projected video signal is being input RESOLUTION Indicates the resolution of the currently projected video s...

Page 29: ...just the color thickness of the projected image See page 33 TINT 10 Use to adjust the color tint of the projected image See page 33 SHARPNESS 5 Use to adjust the sharpness of the projected image See page 33 ADVANCED MENU OK The ADVANCED MENU is displayed for the following settings NOISE REDUCTION ON OFF Use to reduce noise and roughness in the image when noisy video signal is input CTI ON OFF Use ...

Page 30: ...ed when there is no signal input from the source When IMAGE is selected the splash screen will be displayed AV MUTE MODE BLACK IMAGE Use to choose the background either BLACK or IMAGE which will be displayed when the AV MUTE button is pressed When IMAGE is chosen the splash screen will be displayed IMAGE REVERSE OFF Select when viewing images from the front with the projector installed on the floo...

Page 31: ...oves the symptom better FILM Fixed to the film mode VIDEO The film mode will not be activated VIDEO SIGNAL AUTO NTSC PAL SECAM 4 43NTSC PAL M PAL N PAL 60 When AUTO is selected the appropriate video format is automatically selected depending on the input signal If the image isn t displayed correctly select the desired video format manually SETUP AUTO Select to change the SETUP mode automatically O...

Page 32: ...solution is canceled and the SIGNAL menu is displayed HORIZ POSITION 0 999 Use to adjust the horizontal position of the projected image VERT POSITION 0 999 Use to adjust the vertical position of the projected image FINE SYNC 0 31 Use to eliminate flickering or blur if appears viewing the projected image TRACKING 0 9999 Use to eliminate vertical wide stripes if appears viewing the projected image C...

Page 33: ...lor becomes thicker Every time the button is pressed the color becomes lighter TINT Use to adjust the tint of the projected image Every time the button is pressed the image appears more greenish Every time the button is pressed the image appears more reddish To sharpen or soften the projected image SHARPNESS You can adjust the sharpness of the projected image using the menu See page 26 for menu se...

Page 34: ...kept relatively low such as movies and music performance BrilliantColor Use this item to make the colors having medium brightness such as yellow and skin tone look natural Press the button to decrease the value to lessen the effect Press the button to increase the value to heighten the effect BrilliantColor doesn t work at value 0 6 Select a setting value by pressing the or button For more enhance...

Page 35: ...lick the Settings tab to display the screen resolution setting The screen resolution setting of your computer is different from the setting of RESOLUTION MEMORIZE in the SIGNAL menu of the projector Select RESOLUTION MEMORIZE in the SIGNAL menu and press the ENTER button Set HORIZ PIXELS and VERT LINES to the values of the screen resolution of your computer Example When the screen resolution of th...

Page 36: ... use Noise appears on the right or left half of the image Adjust SHUTTER LS or SHUTTER RS in the SIGNAL USER menu Noise appears on the top or bottom part of the image Adjust SHUTTER U or SHUTTER L in the SIGNAL USER menu 1 Display the SIGNALmenu 2 Press the or button to select an item to adjust 3 Adjust the selected item by pressing the or button To cancel the menu 4 Press the MENU button Simple m...

Page 37: ...red Some images can t be captured correctly because of their signal type For details see page 50 You can t change the new startup screen back to the original startup screen Even when you select RESET ALL in the FEATURE menu the factory default screen isn t available any longer When you want to change the startup screen again capture another image The captured image will be displayed from the next ...

Page 38: ...utton to cancel the password function and try again 4 Press the ENTER button The screen for setting the password function will appear MENU ACCESS FEATURE opt LOCK UNLOCK OK OK 5 Press the ENTER button The screen for entering a password will appear PASSWORD CONFIRM 1 3 2 4 O K ENTER CANCEL MENU 6 Enter a 4 8 digit password using the and buttons on the remote control as shown below 1 2 3 4 7 Press t...

Page 39: ...ble length you are recommended to use a repeater You cannot control the computer using the remote control during power standby and for a while after the power is turned on Operation COMPUTER HDMI VIDEO KEYSTONE AUTO POSITION DVI D HDCP S VIDEO FREEZE AV MUTE PAGE UP HOME PAGE DOWN END 1 2 VOLUME CE ASPECT MENU ENTER ZOOM FOCUS LENS SHIFT LASER R CLICK Mouse pointer Use to move the cursor on the im...

Page 40: ...ired For the specifications of PJLink access to the Web site of Japan Business Machine and Information System Industries Association JBMIA http pjlink jbmia or jp english This projector is fully compliant to the specifications of JBMIA PJLink Class 1 It supports all the commands defined by PJLink Class 1 and the compliance has been verified with the PJLink standard specifications Version 1 0 Conne...

Page 41: ...he ventilation grilles Relocate the projector to a cooler place Steady red Blinking green The protection circuit is working or the lamp is in an abnormal condition Wait until the STATUS indicator goes out then press the POWER button If the above solution is not effective replace the lamp Steady green Blinking green red Lamp operation time warning Total lamp operation time reached 3000 hours 1 whil...

Page 42: ...ed for about 3800 hours 1 the replacement message LAMP EXCHANGE will appear on the screen for 1 minute every 20 hours 1 thereafter When the lamp operation time exceeds 4000 hours 1 2 the projector automatically shuts off and can t be used until the lamp is replaced and the lamp operation time is reset 1 Duration when LAMP MODE of the INSTALLATION menu is set to LOW When it is set to STANDARD this ...

Page 43: ...lips screwdriver to secure the lamp cover b a b Reset of the lamp operation time 10 Plug the power cord into the wall outlet and turn on the main power switch 11 Press the t and POWER button on the projector at the same time Important Unless these 3 buttons are pressed at the same time the lamp operation time isn t reset Make sure that the STATUS indicator blinks twice and the lamp operation time ...

Page 44: ...n cleaning the projector body and lens Flammable substances may ignite causing fire or breakdown while the lamp is illuminating Caution Be sure to turn off the lamp and unplug the power cord from the wall outlet before you perform any maintenance on the projector Cleaning of the projector and the ventilation slots Use a soft cloth to clean the projector and the ventilation grilles When the grilles...

Page 45: ...ay take about 1 minute for the lamp to light up The lamp fails to light up on rare occasions In such a case wait for a few minutes and then try again If the projector was turned off before the lamp was cooled down sufficiently last time the fan may start rotating and the POWER button may not work after the main power switch is turned on After the fan stops rotating press the POWER button to turn b...

Page 46: ...ss the or button on the remote control to eliminate flicker Adjust TRACKING and FINE SYNC in the SIGNAL menu See page 36 Adjust BRIGHTNESS and CONTRAST in the QUICK MENU or IMAGE menu See page 33 Adjust the projector and the screen so that they are perpendicular to each other See page 11 White dots are seen on projected images Black dots are seen on projected images This symptom is normal for a DL...

Page 47: ...ou may feel hot but this is not a malfunction No audio is output Check that the volume isn t set to low When the external device is connected with an HDMI cable set the audio output of the device to PCM output The menu can t be used The microcomputers inside the projector may be wrongly operating because of noise Turn off the main power wait about 10 minutes and turn on the main power again TEMPER...

Page 48: ...inks Reset the lamp operating time See page 43 Kensington Lock This projector has a Kensington Security Standard connector for use with Kensington MicroSaver Security System Refer to the information that came with the Kensington System for instructions on how to use it to secure the projector Please contact Kensington Technology Group below Kensington Technology Group 2855 Campus Drive San Mateo C...

Page 49: ... Stereo mini jack ø3 5 1 Speaker 10 W Mono Round type ø4 5 cm x 1 Control terminal others RS 232C D SUB 9 pin USB LAN RJ 45 REMOTE IN OUT Operating temperatures 41 F 5 C to 95 F 35 C Rated voltage AC 100 240 V 50 60 Hz Power consumption 4 5 A 430 W During standby AC 100 120 V 2 W when STANDBY MODE is STANDARD 0 4 W when STANDBY MODE is LOW AC 220 240 V 2 W when STANDBY MODE is STANDARD 0 6 W when ...

Page 50: ...2 x 864 67 50 75 00 1066 x 800 1152 x 800 SXGA85a 1152 x 864 77 49 85 06 1066 x 800 1152 x 800 WXGA60 1280 x 768 47 78 59 87 1280 x 768 1280 x 768 2 WXGA60a 1280 x 800 49 70 59 81 1280 x 800 1280 x 800 2 WXGA60b 1360 x 768 47 71 60 02 1280 x 720 1280 x 768 WXGA60c 1366 x 768 47 50 59 75 1280 x 720 1280 x 768 WXGA 60 1440 x 900 55 94 59 89 1280 x 800 1280 x 800 SXGA60b 1280 x 960 60 00 60 00 1066 x...

Page 51: ...SPECT of the QUICK MENU or the FEATURE menu to REAL See page 26 for menu setting For signals that are larger than the panel resolution only their center part is displayed in the REAL mode The area exceeding the panel resolution isn t displayed In the REAL mode images are black framed when the image resolution is lower than the panel resolution 468 450 187 101 Without terminal cover With terminal c...

Page 52: ...1 Zusho Baba Nagaokakyo City Kyoto Japan MITSUBISHIELECTRICCORPORATION A http www pureglare com au ...

Reviews: