OPERATING PROCEDURE
PHOTOS
6.
Removing the pipe temperature thermistor
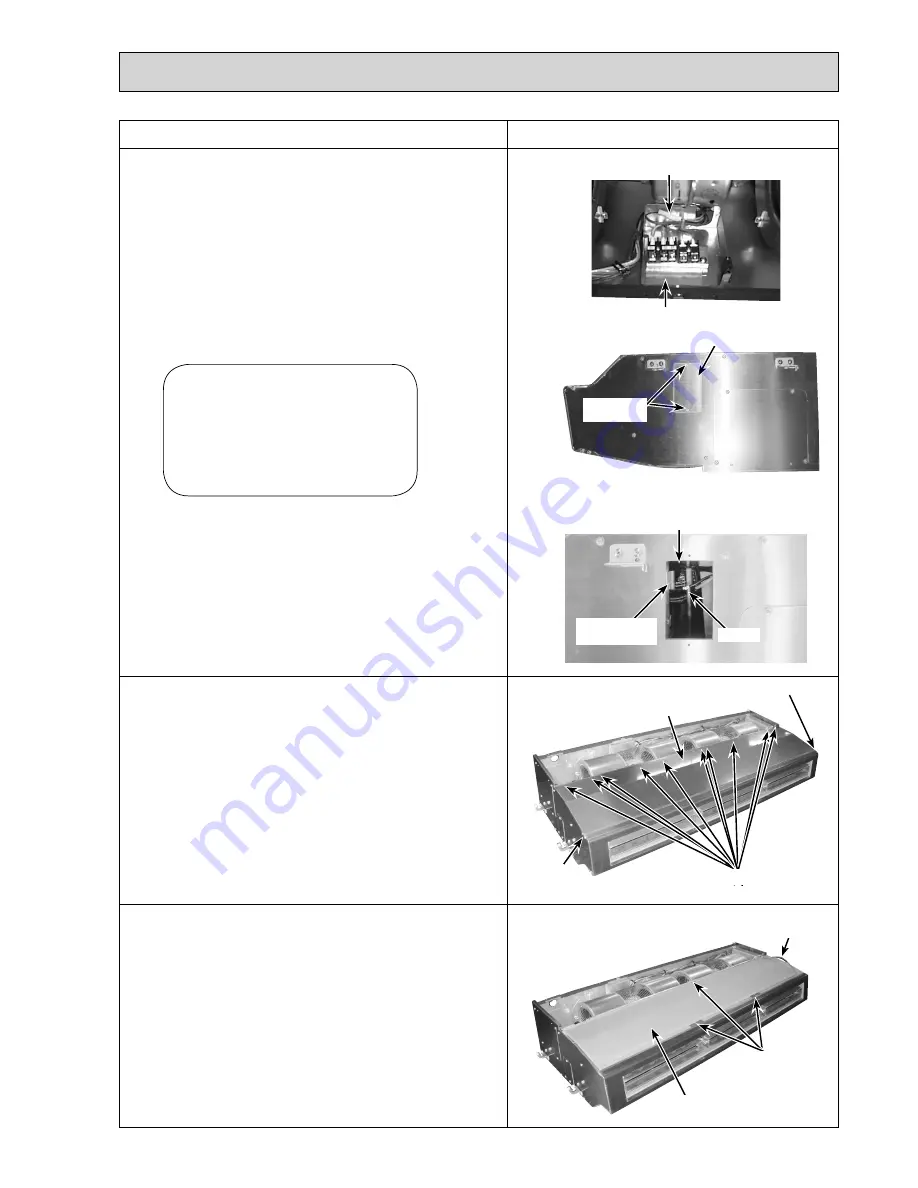
(1) Remove the oil filter. (See figure 1.)
(2) Remove the fan guard. (See photo 1.)
(3) Remove the terminal block box cover.
(4) Remove the white relay connector (2P) in the terminal
block box. (See photo 8.)
(5) Remove the service panel. (See photo 9.)
(6) Remove the pipe temperature thermistor from the holder.
(See photo 10.)
8. Removing the drain pan
(1) Remove the oil filter. (See Figure 1)
(2) Remove the 3 filter rails. (See photo 1, 4.)
(3) Remove the under panel. (See photo 11.)
(4) Pull the blue lead wire for cord heater towards you to
slack off. (See photo 12.)
(5) Remove the 3 screws at the center of the drain pan, and
remove the drain pan.
(Note) Remove the drain pan carefully since the drain could
remain in it.
7. Removing the under panel
(1) Remove the oil filter. (See figure 1.)
(2) Remove the 3 filter rails. (See photo 1, 4.)
(3) Remove the 12 screws (left: 1, right: 1, Bottom: 10) for
under panel, and remove the under panel.
(See photo 11.)
Photo 8
Photo 9
Photo 11
Photo 12
Caution for installation
When installing the pipe temperature
thermistor, slack off its lead wire as
shown in the photo. Otherwise, water
trickled down the lead wire may splash
on the connector and this could cause a
short circuit of the connector.
Photo 10
Terminal block box
Relay connector
Screw for
service panel
Service panel
Inspection port
Pipe temperature
thermistor
Slack off
Screws for
drain pan
Lead wire for
cord heater
Drain pan
Screws for under panel (Bottom:10)
Screw for
under panel
(left:1)
Screw for under panel
(right:1)
Under panel
31
Summary of Contents for Mr.SLIM PCA-RP125HA
Page 39: ...39 ...


