


32
33
NetCommand
®
Initial Setup
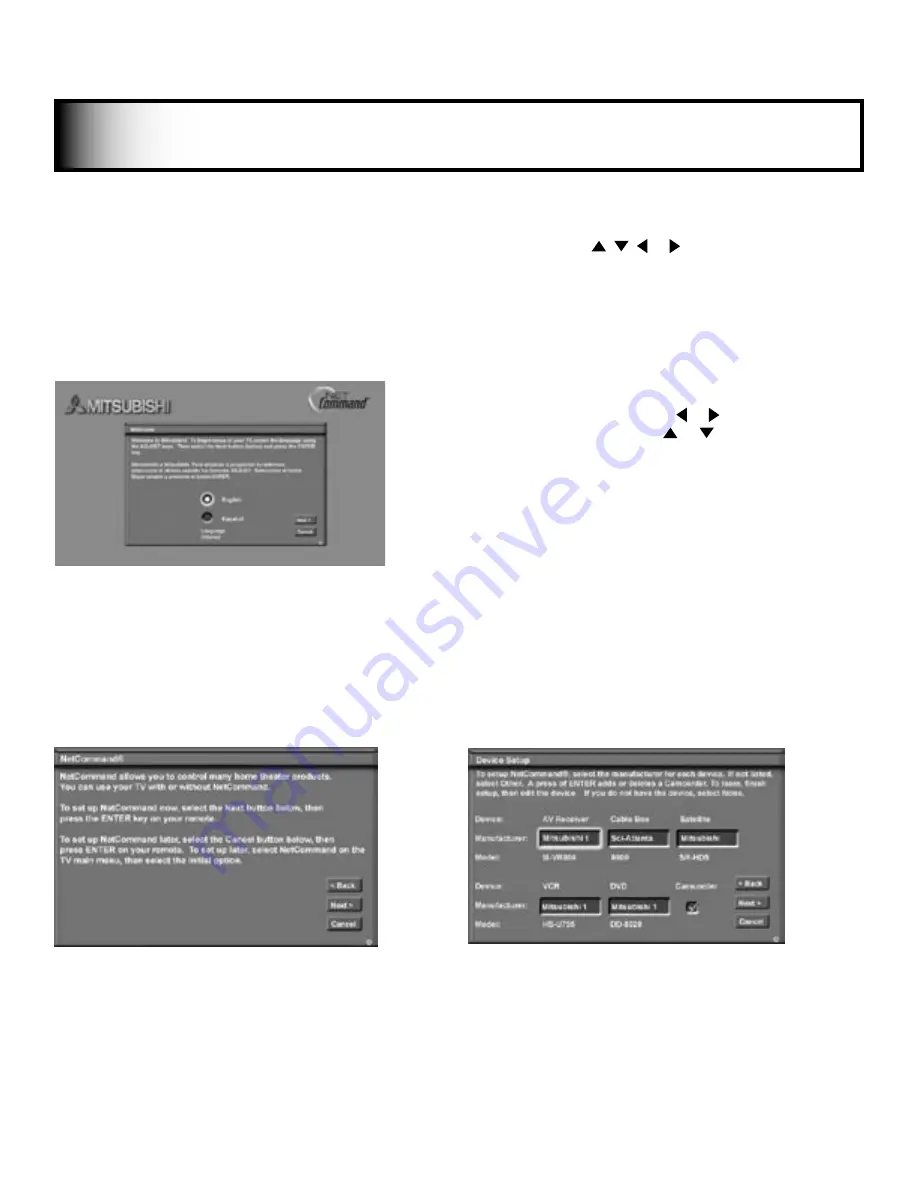
Welcome Screen
Figure 1
When you first turn on your TV, the Welcome screen
displays and asks you to select either English or
Spanish as the language for the on-screen menus. The
default language is English. To change Language later,
use Setup in the Main Menu. Selecting
Cancel
at
this screen will cause the default language (English) to
appear.
NetCommand (Information) Screen
Figure 2
The NetCommand (Information) Screen describes how
to start or delay the initial NetCommand Setup. This
screen displays automatically the first time you power
On your new TV, after the Welcome screen.
IMPORTANT
You may use your TV without setting up NetCommand. You may also set up NetCommand at a later
time by choosing NetCommand from the Main menu, then selecting Initial.
Figure 2. Information screen
Figure 1. Welcome screen
Figure 3. Device Setup screen
If the NetCommand Setup is cancelled before it’s
completed, you can restart the NetCommand setup by:
1. A press of TV MENU on the remote control to
display the TV Main menu.
2. Select NetCommand. The available options will be:
Add, Review or Initial. Change and Delete will be
grayed out.
Device Setup Screen
Figure 3
If the devices connected to the TV are already in
NetCommand memory, you can quickly select them
at this screen. Press ADJUST or to move to each
device type. Press ADJUST or to select the
manufacturer. Select “Other” if the manufacturer is not
listed. Later, you can use the Change setting in the Edit
NetCommand option of the Setup menu to learn the
remote control signals for this device. Select “None”
for device types that are not connected.
For the A/V Receiver, if the manufacturer is not
listed, you cannot select “Other”. Instead, select
“None”. Later, you can use the “Add” feature in the
NetCommand menu to have the TV add and learn the
remote control signals for this device.
If you have a camcorder connected, check the
Camcorder box. NetCommand will not be able to
control it, but will reserve the front input to use with
the camcorder. After completing your choices, select
Next>
and press ENTER.
Note:
If you selected “Other” for any of the
device names, this chapter describes how the TV
can “Learn” the connected device by following
the Edit NetCommand instructions. Most IR
remote control signal formats can be learned by
NetCommand.
3. Press ADJUST , , or to select Initial.
4. Press ENTER. The Device Setup screen displays.


