7
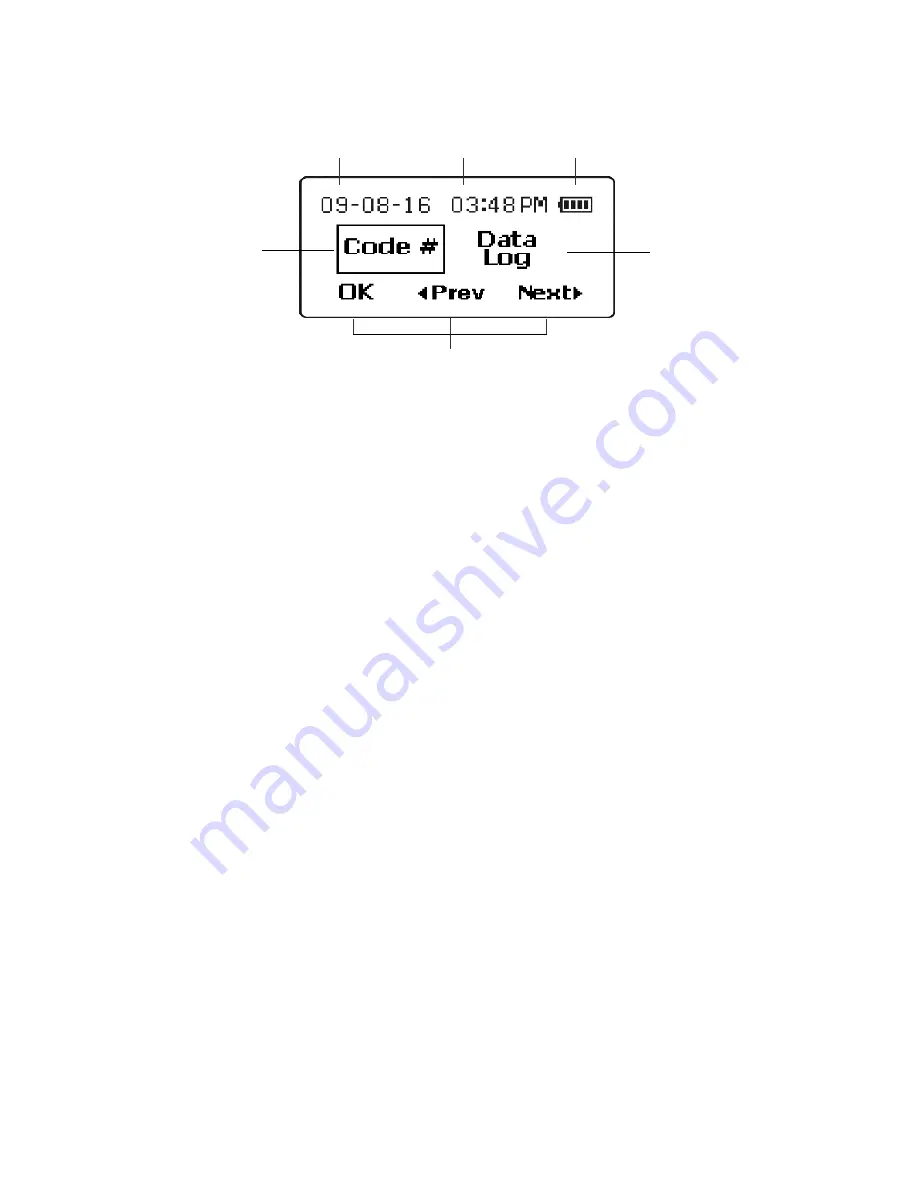
Meter Display
1. Date:
Shows the current date
2. Time:
Shows the current time
3. Battery:
Shows battery status or AC Adapter connection
4. Function
Labels:
Helps navigate between functions and confirm selections
5. Selection
Box:
Indicates which function is selected
6. Menu
Selection:
Lists setup options and functions
During testing, the
Mission
®
PT/INR meter will display icons showing the
status, options available, and prompts for testing. At the bottom of the
display are three function labels representing options which can be selected
by pressing one of the three keys directly below each of the display labels
(programmable key functions). These three programmable keys are used to
move through the meter menus for setting and selecting options for the
operation of the meter. Each key represents the function indicated by the
label at the bottom of the display, directly above the button.
All display functions are represented by English labels, icons, or numbers.
The “Icons” function is an alternative setting from the setup menu showing
all display items as icons, with minimal use of English labeling.
Throughout this User’s Manual, the label shown on the display will be used
to indicate the button to press to set or implement a function.
When the meter is turned on by pressing the power button (far-right button),
the first screen will show the available setup options. From this screen, all
meter settings can be changed, with their functions described below.
Pressing
◄
Prev
or
Next
►
will move the selection box to the previous or
next function, indicating which function is selected. In the example above,
Code #
is selected and the next function is
Data Log
. As
◄
Prev
or
Next
►
is pressed, the labels will shift to the left or right, revealing additional
functions. The selected function will be shown with a box around it.
1 2 3
5
6
4


