NV9607 Control Panel • User’s Guide
13
3. Installation
Initialization
Initialization
Before your NV9000 system controller can communicate with an NV9607, you must give it a panel
ID. Follow these steps for each NV9607 you are installing:
1 Power up the NV9607. Do
not
connect its Ethernet cable. (Disconnect it if it is connected.)
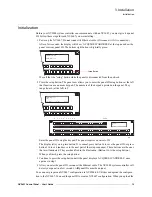
After a few seconds, the display will show ‘ACQUIRE IP ADDRESS’ at the top and show the
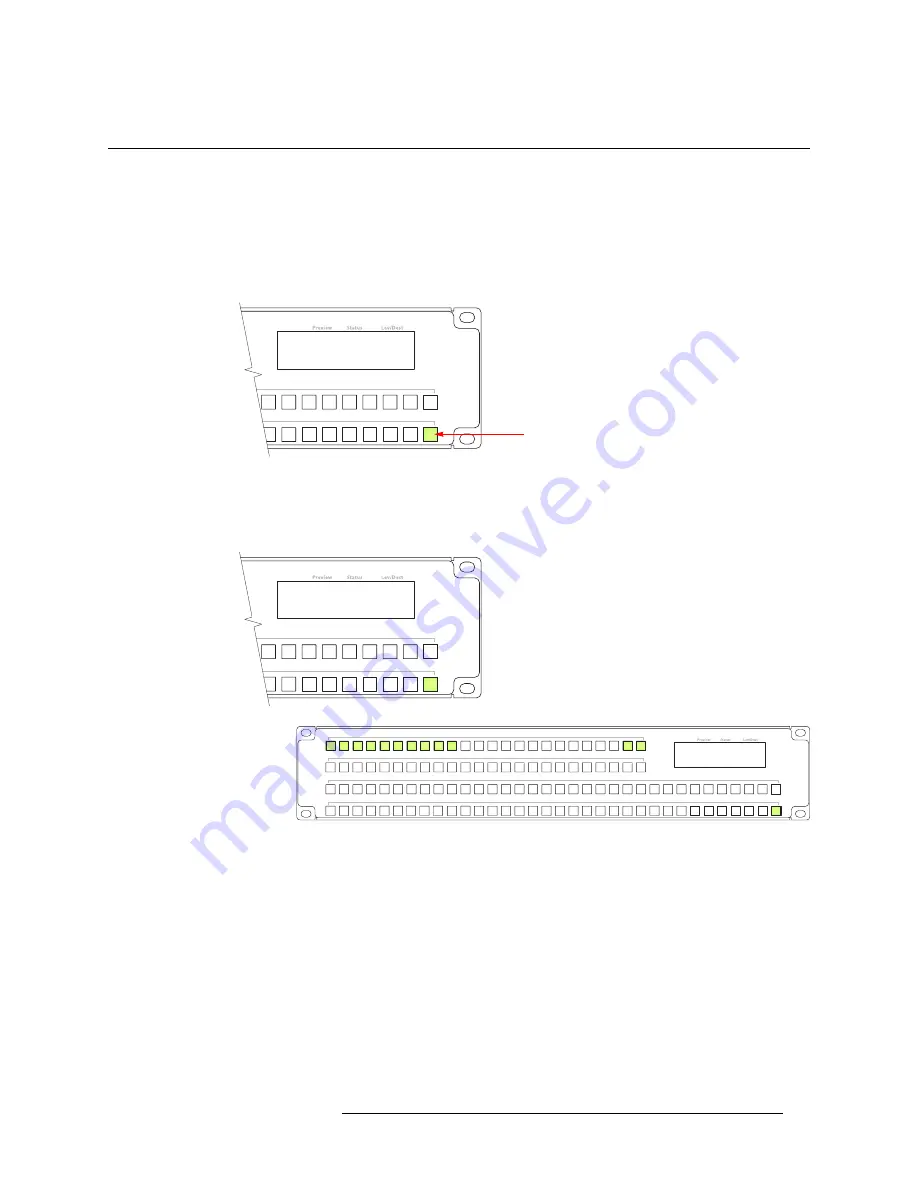
panel’s current panel ID. The bottom right button is high-tally green:
We call that the “setup” button while the panel is disconnected from the network.
2 Press the setup button. The panel now allows you to enter the panel ID using buttons at the left
that function as a numeric keypad. The numbers of the keypad a printed on the panel. They
range from 0 (at the left) to 9:
Enter the panel ID using the keypad. The panel requires a non-zero ID.
The display tells you to press button 23 to cancel, press button 24 to save the panel ID, or press
button 116 to exit (and move to the next part of the setup sequence). These buttons are the ones
that are illuminated. They are identified in the illustration. (Button 116 is the setup button.)
When you finish, press the setup button.
3 Continue to press the setup button until the panel displays ‘ACQUIRE IP ADDRESS’ once
again as in step 1.
4 After you enter the panel ID, reconnect the Ethernet cable. The NV9000 system controller will
detect your panel in a few seconds. (
All
panel IDs must be unique.)
You can now prepare an NV9607 configuration in NV9000-SE Utilities and upload the configura-
tion to the NV9607. You need the panel ID to create a NV9607 configuration. When you upload the
ACQUIRE IP ADDRESS
NV9607 PANEL ID 0
Setup Button
NV9607 Panel ID
6071
23: Cancel 24: Save 116: Exit
0 1 2 3 4 5 6 7 8 9
23 24
116
NV9607 Panel ID
6071
23: Cancel 24: save 116: Exit
Summary of Contents for NV9606
Page 10: ...x Rev 1 0 21 May 10 Table of Contents ...
Page 20: ...10 Rev 1 0 21 May 10 2 Introduction Other NV9607 Functions ...
Page 40: ...30 Rev 1 0 21 May 10 4 Configuration Multi Destination Configuration ...
Page 66: ...56 Rev 1 0 25 May 10 5 Operation Setup Mode ...
Page 72: ...62 Rev 1 1 21 May 10 6 GPIO Configuring Inputs ...
Page 82: ...72 Rev 1 0 21 May 10 8 Misc Topics Power Cord Retention ...
Page 90: ...80 Rev 1 0 18 Aug 10 Index ...


