


GUIDE TO INSTALLATION AND OPERATION
4
| AAP-1741
2 Installation
2.1 Unpacking
Make sure you have ordered and received the AAP-1741 and its associated rear panel. If any of the
following items are missing, contact your distributor or Miranda Technologies Inc.
•
AAP-1741 4-Channel Analog Audio Processor
•
One of the AAP-1741 Rear Panels (see figure)
•
An ABUS flat cable
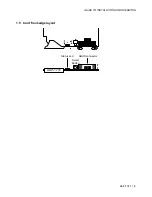
2.2 Installation in the Densité frame
The AAP-1741 must be mounted in a DENSITÉ frame. The installation includes both the AAP-1741
module, and the rear panel module. It is not necessary to switch off the frame’s power when installing or
removing the card.
When the AAP-1741 is used in conjunction with a video module such as FRS-1101 and/or another audio
module like AAP-1741 or UAP-1783, the ABUS flat cable must be installed between the ABUS
connectors.
•
Note
:
for a two card installation, use the two end connectors of the flat cable and leave the
middle one unplugged.
Detailed instructions for installing cards and their associated rear panels in the Densité frame are given in
the Densité Frame manual.
2.2.1 Rear Panel Options
AA
P-17
41-
D
RP
ANA
LOG OU
T
+
G
-
+
G
-
+
G
-
+
G
-
2 RIGHT
2A
ANA
LOG
I
N
1A
+
G
-
1R
+
G
-
1L
2R
2L
N.
C
.
+
G
-
+
G
-
N.C
.
N.
C
.
N.
C.
AA
P-
1741
-I-
S
RP
+
G -
+
G
-
AN
A
LO
G
I
N
1A
+ G
-
1R
+ G
-
1L
2R
2L
N.
C
.
N.C
.
AA
P
-17
41-
O
-SR
P
+
G -
+
G
-
A
N
ALOG OUT
1A
+ G
-
1R
+ G
-
1L
2R
2L
N
.C.
N.
C
.
A
AP-17
41-
S
RP
+
G -
+
G
-
1A
+ G
-
1R
+ G
-
1L
1R
1L
AN
A
LOG
OU
T
A
N
ALOG I
N


