background image

8

Setting the date and time

To make sure of the correct date and time for your recordings, please check the 

date and time settings before you begin recording.
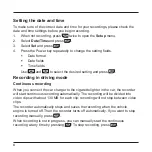
1.  When not recording, press 

 twice to open the 

Setup

 menu.

2.  Select 

Date/Time

 and press 

.

3.  Select 

Set

 and press 

.

4. 

Press the Power key repeatedly to change the setting fields.


ƒ

Date format


ƒ

Date fields


ƒ

Time fields

Use 

 and 

 to select the desired setting and press 

.

Recording in driving mode

Continuous recording

When you connect the car charger to the cigarette lighter in the car, the recorder 

will start continuous recording automatically. The recording will be divided into 

video clips with about 130 MB for each clip; recording will not stop between video 

clips.
The recorder automatically stops and saves the recording when the vehicle 

engine is turned off. Then the recorder turns off automatically. If you want to stop 

recording manually, press 

.

When recording is not in progress, you can manually start the continuous 

recording at any time by pressing 

. To stop recording, press 

.

Summary of Contents for MiVue C310

Page 1: ...User Manual MiVue TM C310...

Page 2: ...der in a vehicle 6 Operating basics 7 Setting the date and time 8 Recording in driving mode 8 Continuous recording 8 Event recording 9 Capture mode 9 Playback mode 10 File management 11 Protecting fil...

Page 3: ...2 About charging 16 About the charger 16 About the battery 17...

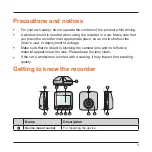
Page 4: ...er in an appropriate place so as not to obstruct the driver s view or deployment of airbags Make sure that no object is blocking the camera lens and no reflective material appears near the lens Please...

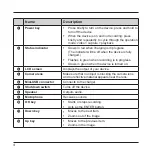
Page 5: ...d Flashes in green when recording is in progress Glows in green when the device is turned on LCD screen Displays the output of your device Camera lens Make sure that no object is blocking the camera l...

Page 6: ...rding Your device supports Class 10 memory cards with up to 32 GB capacity Hold the card MicroSD by the edges and gently insert it into the slot as shown in the illustration To remove a card gently pu...

Page 7: ...vision is blocked DO NOT insert or remove the memory card when operating the recorder To ensure the optimal recording angle pay attention to the following 1 Make sure that your car is parked on a leve...

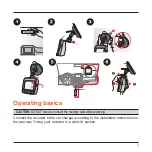
Page 8: ...basics CAUTION DO NOT remove or insert the memory card while recording Connect the recorder to the car charger according to the installation instructions in the previous Using your recorder in a vehi...

Page 9: ...Recording in driving mode Continuous recording When you connect the car charger to the cigarette lighter in the car the recorder will start continuous recording automatically The recording will be di...

Page 10: ...Video menu by pressing Event recording By default if an event happens such as sudden impact high speed driving an overdone turn or an accidental crash the G sensor will prompt the recorder to start a...

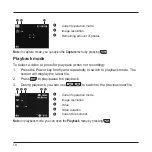
Page 11: ...back when not recording 1 Press the Power key briefly and repeatedly to switch to playback mode The screen will display the latest file 2 Press to play pause the playback 3 During playback you can use...

Page 12: ...ect Set and press To add protection to all files select All and press Select Set and press To add protection to a certain file select Select and press Select the desired file and press A lock icon wil...

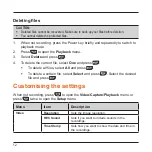
Page 13: ...o delete the current file select One and press To delete all files select All and press To delete a certain file select Select and press Select the desired file and press Customising the settings When...

Page 14: ...ction of the file s Thumbnail Switches to the thumbnail view Volume Adjusts the volume level Setup Format Formats a memory card All data will be erased Language Sets the language Sys Reset Restores sy...

Page 15: ...of moisture condensation allow the device to dry out completely before use The screen surface can easily be scratched Avoid touching it with sharp objects Non adhesive generic screen protectors desig...

Page 16: ...fication purposes MiVue C310 Series is assigned a model number of N526 CE Products with the CE marking comply with the Electromagnetic Compatibility Directive 2014 30 EU issued by the Commission of th...

Page 17: ...EU Instead it should be disposed of by returning it to the point of sale or to a municipal recycling collection point Safety precautions About charging Use only the charger supplied with your device U...

Page 18: ...if it is damaged or exposed to excess moisture About the battery Use a specified battery in the equipment CAUTION This unit contains a non replaceable internal Lithium Ion battery The battery can bur...

Page 19: ...otice MiTAC does not warrant this document is error free MiTAC assumes no liability for damage incurred directly or indirectly from errors omissions or discrepancies between the device and the documen...

Page 20: ...MiTAC Europe Ltd www mio com...

Reviews: