background image

33

32

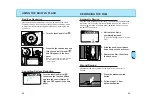
SUBJECT PROGRAM SELECTION

Press the subject-program
button until the subject-program
pointer is under 

.

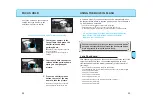
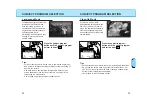
Close-Up Mode

Set Close-Up mode when
photographing small objects like
flowers or jewelry. In Close-Up
mode, the camera automatically
sets the best possible aperture
and shutter speed for the picture
you are taking.

Tips

• For best results use a macro lens or a macro capable zoom lens.
• Do not use the built-in flash if your subject is closer than 1.0m

(3.3 ft.). The lens may block the flash, creating a shadow at the
bottom of your image (lens shadowing).

• Use a tripod to reduce camera shake.

SUBJECT PROGRAM SELECTION

Press the subject-program
button until the subject-program
pointer is under 

.

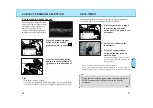
Landscape photography requires
a large depth-of-field to make
sure everything is in focus. In
Landscape mode, the camera is
set to obtain the greatest depth-
of-field possible, while
maintaining a shutter speed fast
enough to prevent blur due to
camera shake.

Tips

• For best results zoom to a wide view or use a wide angle lens

and include a foreground subject or detail to create a feeling of
depth in the picture.

• Use flash when a subject in the foreground is backlit or has

strong shadows across the face. If there is no subject in the
foreground, do not use flash.

• Use a tripod, especially at slower shutter speeds.

Landscape Mode

Summary of Contents for DYNAX 505 SI SUPER - PART 1

Page 1: ...INSTRUCTION MANUAL E QUICK OPERATION GETTING STARTED FULL AUTO OPERATION SUBJECT PROGRAM SELECTION CREATIVE EXPOSURE MODES ADDITIONAL FEATURES APPENDIX...

Page 2: ...munications However there is no guarantee that interference will not occur in a particular installation If this equipment does cause harmful interference to radio or television reception which can be...

Page 3: ...5 Replacing the Battery 76 CUSTOM FUNCTIONS Setting 77 Details 78 ADDITIONAL FEATURES NAMES OF PARTS 4 QUICK OPERATION 8 Taking Pictures in Full Auto 21 Focus Signals 22 Special Focus Situations 23 Fo...

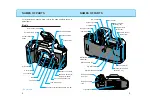
Page 4: ...lock Tripod socket Battery chamber door 12 Built in flash 25 28 Accessory shoe Flash mode button Exposure compensation button 46 58 Function button Function dial Panorama switch 73 not on all models...

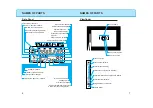
Page 5: ...indicator Multiple exposure indicator Red eye reduction indicator Flash mode indicators High speed flash sync indicator Wireless flash indicator Battery condition indicator Self timer indicator Expos...

Page 6: ...ilm Align the film tip with the red mark then close the back cover 5 Set Full Auto operation Press the program reset button to set the camera to fully automatic operation 6 If using a zoom lens rotate...

Page 7: ...hing and Removing the Lens Loading the Film Camera Handling Fully Automatic Camera Operation Special Focus Situations Basic Flash Operation Rewinding the Film Once you fully understand the instruction...

Page 8: ...time the main switch is set to ON a battery symbol appears in the data panel indicating the power status of the batteries Checking Battery Power Full battery symbol Power is sufficient for all camera...

Page 9: ...ition Do not insert the lens at an angle Do not press the lens release when attaching the lens Attaching the Lens 1 Press the lens release and turn the lens counter clockwise until it stops 2 Gently r...

Page 10: ...a s frame counter sensor will fog infrared film 3 Extend the leader between the guide rails to the index mark If the film tip extends beyond the index mark push the excess film back into the cartridge...

Page 11: ...hutter speeds or a telephoto lens Pressing the Shutter Release Button Eye start automatically activates the camera s focus and exposure systems as you bring the camera to your eye Sliding the main and...

Page 12: ...the viewfinder press the shutter release button partway down to pop up the built in flash will disappear then reappear when the flash is charged 1 Slide the main and eye start switches to ON Full Auto...

Page 13: ...e Use focus hold p24 if your subject is outside the focus frame Focus Signals The following signals appear in the viewfinder to indicate the focus status when focus is activated If the subject within...

Page 14: ...elease until the flash is charged Select flash cancel when you don t want the flash to fire Pressing the program reset button P resets the flash to autoflash mode Do not use the built in flash with fo...

Page 15: ...charged Previous exposure was correct Press the flash mode button and turn the control dial until appears in the data panel Press the flash mode button and turn the control dial until appears to retur...

Page 16: ...d eye reduction mode to produce more natural looking photographs by reducing the red eye effect Cancelling Red eye Reduction 1 Wait until the film is completely rewound will appear and will blink in t...

Page 17: ...ION Now that you are comfortable with the operation of the camera take more control of the creative process by telling the camera what kind of picture you want to take The subject program modes let yo...

Page 18: ...tripod to reduce camera shake SUBJECT PROGRAM SELECTION Press the subject program button until the subject program pointer is under Landscape photography requires a large depth of field to make sure...

Page 19: ...er film and a tripod Focus on the main part of your subject Warn your subject not to move while the picture is taken SUBJECT PROGRAM SELECTION Press the subject program button until the subject progra...

Page 20: ...de is cancelled after the shutter is released Do not press the shutter release button while standing in front of the camera Attach the eyepiece cap if there is a bright light source behind the camera...

Page 21: ...re 40 S Mode Manually select shutter speed 43 M Mode Manually select the shutter speed 46 and the aperture Each exposure mode can be explored independently LEVEL III CONTINUOUS ADVANCE MODE 1 Press th...

Page 22: ...oo bright for the selected aperture Turn the control dial until the blinking stops or cancel the flash Push the built in flash down or turn the accessory flash off will be displayed in the data panel...

Page 23: ...RE PRIORITY The size of the aperture lens opening determines the depth of field in the final image as well as the intensity of the light falling on the film Depth of field is the range in front of and...

Page 24: ...slow shutter speed to blur the motion of your subject Shutter Control Fast Shutter Speed Slow Shutter Speed S MODE SHUTTER PRIORITY 1 Press the flash mode button to pop up the built in flash will app...

Page 25: ...not appear your settings agree with the exposure determined by the camera M MODE MANUAL 1 Turn the function dial to 3 Turn the control dial to select the shutter speed 4 Press the exposure compensatio...

Reviews: