131
Once the camera is connected to the computer, image files can be accessed by simply
double clicking on icons. Copying images can be done by dragging and dropping the
image-file icon into a location in the computer. Files and folders on the CompactFlash
card can be deleted using the computer. Never format the CompactFlash card from the
computer; always use the camera to format the card.
The index number on the image file may not correspond to the frame number of the
image. As images are deleted on the camera, the frame counter will adjust itself to
show the number of images in the folder and reassign the frame numbers accordingly.
The index numbers on the image files will not change when an image is deleted. When
a new image is recorded, it will be assigned a number one greater than the largest
index number in the folder. File numbers can be controlled with the file-number-memory
function in the Custom 1 section of the setup menu (p. 118).
When the index number in the image file name exceeds 9,999, a new folder will be cre-
ated with a number one greater than the greatest folder number on the CompactFlash
card: e.g. from 100MLTXX to 101MLTXX. The last two digits in the folder name indi-
cates the camera with which the images were recorded. New folders can be created in
the Custom 1 section of the setup menu (p. 119). When a DPOF file is created for a
print order (p. 108), a misc. folder is automatically made for the file.
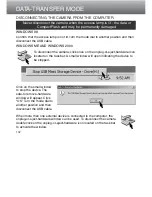
AUTO POWER SAVE (DATA-TRANSFER MODE)
If the camera does not receive a read or write command within ten minutes, it will shut
down to save power. When the camera shuts down, an unsafe-removal-of-device warn-
ing may appear on the computer monitor. Click “OK.” Neither the camera or computer
will be damaged in this operation.
Pressing the shutter-release button will reactivate the camera. Remake the USB con-
nection with the data-transfer menu (steps 6 and 7 on page 125).
Summary of Contents for Dimage 5
Page 1: ...9224 2773 11 H A106 INSTRUCTION MANUAL E ...
Page 149: ......


