


Replacing Consumables
59
5
Dispose of the used waste toner bottle.
WARNING!
Dispose of the used waste toner bottle properly according to your local
regulations (do not dispose of it by burning).
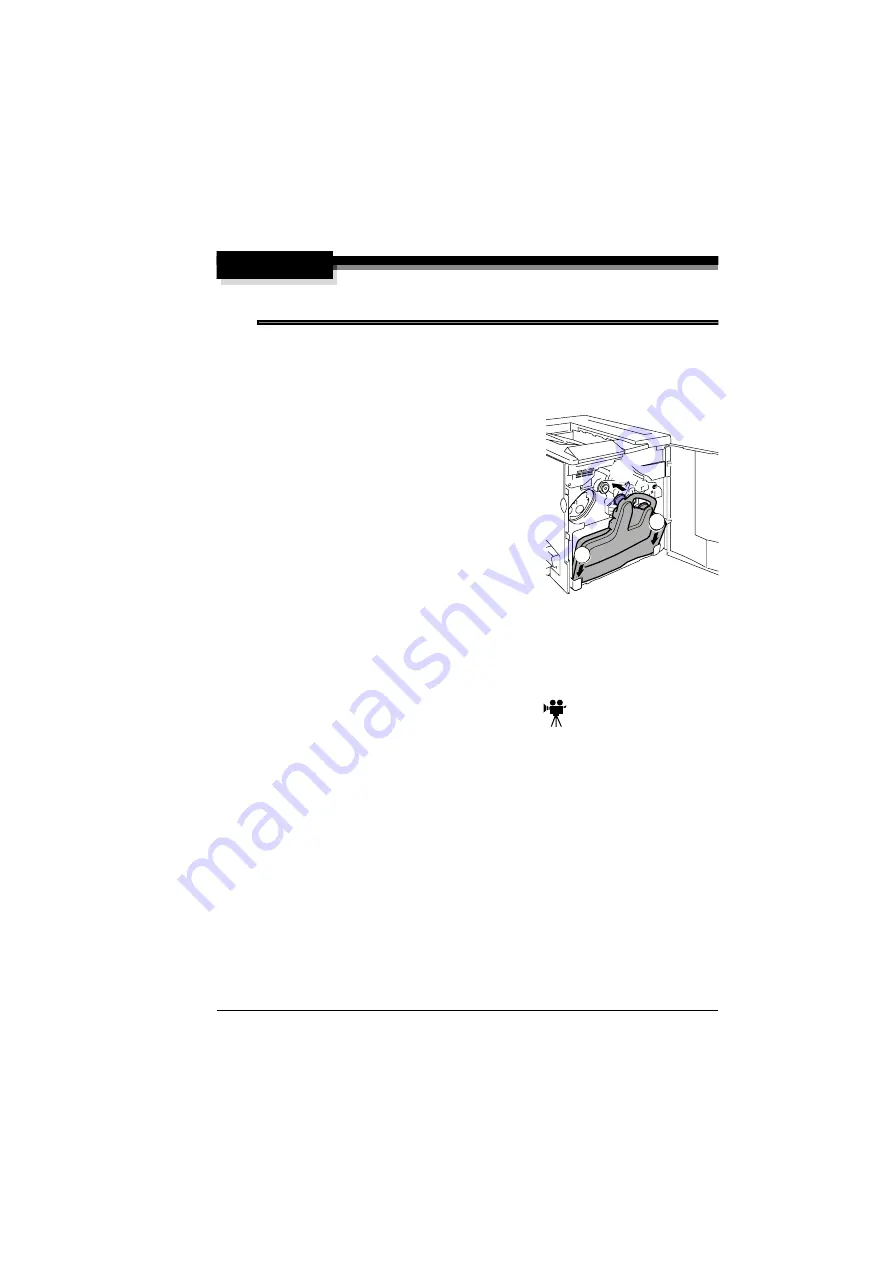
Installing the New Waste Toner Bottle
1
Remove the new waste toner bottle from its carton.
2
Insert the bottom of the waste toner bottle
$
into its installation position in the printer.
3
Push the top of the waste toner bottle
%
into position until it is firmly seated.
4
Close the printer’s front door.
If the waste toner bottle is not correctly
installed or the transfer belt release lever is
at its top position (11 o’clock), the front
door cannot be closed.
"#
The printer must complete a 150-second calibration cycle after any
consumable has been replaced. If you open the door before the
message window reads
IDLE/MAGICOLOR
2300DL
, the printer
stops and repeats the calibration cycle.
Replacing the OPC Drum Cartridge
When the OPC drum is worn out, the message
DRUM
CARTRIDGE
END
OF
LIFE
appears. Printing can continue even after this message appears;
however, since print quality is reduced, the OPC drum cartridge and waste
toner bottle should be replaced immediately.
"#
The OPC drum life is directly related to the number of rotations of the
drum. Longest drum life is achieved with continuous printing.
Intermittent printing with small job sizes requires cleaning rotations
before and after each job, and subsequently will impact OPC life.
You can also access the OPC drum cartridge supplies status using the Status
Display (refer to “Working with the Status Display” on page 46).
$
$
$
$
%
%
%
%
$
$
$
$
$
$
$
$
Summary of Contents for magicolor 2300 DL
Page 1: ...magicolor 2300 DL User s Guide 1800687 001B ...
Page 7: ...Contents v Meaning of Symbols 156 Working Safely with Your Laser Printer 159 Index 161 ...
Page 8: ...Contents vi ...
Page 9: ...1 Software Installation ...
Page 16: ......
Page 17: ...2 Using Media ...
Page 36: ......
Page 37: ...3 Working with the Printer ...
Page 45: ...4 Working with the Printer Driver ...
Page 53: ...5 Working with the Status Display ...
Page 57: ...6 Replacing Consumables ...
Page 71: ...7 Maintaining the Printer ...
Page 83: ...8 Troubleshooting ...
Page 116: ......
Page 117: ...9 Installing Accessories ...
Page 131: ...10 Repacking the Printer ...
Page 145: ...A Technical Specifications ...
Page 172: ......


