SAFETY WARNINGS
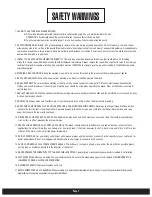
1. LEARN TO USE YOUR MILE MARKER WINCH:
A) After winch has been installed, take some time and practice using it so you will be familiar with ALL
OPERATIONS. Periodically check the winch installation to ensure that all bolts are tight.
B) To ensure proper operation, carefully inspect for any damaged parts before operating the winch.
2. KEEP WINCHING AREA CLEAR: Do not allow people to remain in the area during winching operations. Do not step over a taut wire rope or
allow anyone else to do so. Due to the possibility of cable failure, direct all personnel to stand clear of any possible pathway. A snapped cable
could cause winch failure, injury or death. Keep proper footing and balance at all times. Do not reach over or across the winch and/or pulling
cable while the winch is in operation.
3. INSPECT WIRE ROPE AND EQUIPMENT FREQUENTLY: The wire rope should be inspected for damage that could reduce it’s breaking
strength. A frayed rope with broken strands should be replaced immediately. Always replace the rope with a rope that is rated to sustain any
load that the winch is capable of pulling. Any substitute must be IDENTICAL in strength, quality, lay and stranding to the Mile Marker cable
originally supplied.
4. WORKING AREA CONDITIONS: Keep the working area well lit. Do not use this winch in the presence of flammable gases or liquids.
5. KEEP CHILDREN AWAY: Keep children away from working area. Never let children operate the winch.
6. DRESS PROPERLY: Do not wear loose clothing or jewelry as they can be caught in moving parts. Protective, electrically non-conductive
clothes and non-skid footwear is the only type of clothing you should be using when operating the winch. Wear restrictive hair covering to
contain long hair.
7. USE LEATHER GLOVES: When handling or rewinding wire rope always use hand protection to eliminate the possibility of cuts caused by burrs
& slivers from broken strands.
8. DRUM ROPE: Always make sure that there are at least 5 complete turns of rope left on the drum before winching.
9. KEEP HANDS AND FINGERS CLEAR OF WIRE ROPE AND HOOK WHEN OPERATING WINCH: Never put your finger through the hook when
reeling in the last few feet. If your finger should become trapped in the hook or rope, you could lose your finger. Never guide a wire rope
under tension onto the drum with your hand.
10. NEVER HOOK THE ROPE BACK ONTO ITSELF: Hooking the rope back onto itself creates an excessive strain that could break individual
strands; this, in effect, weakens the entire wire rope.
11. KEEP PULLING DURATIONS AS SHORT AS POSSIBLE: The winch is designed for intermittent use and cannot be used in constant duty
applications. Do not pull more than one minute at or near rated load. If the motor becomes too hot to touch, stop and let it cool off for a few
minutes. If the motor stalls, cut off the power immediately.
12. DO NOT OVERLOAD: For your safety and efficient performance, always use this winch at or under its rated capacity for your safety and for
better performance. Do not use inappropriate attachments in an attempt to exceed its rated capacity.
13. AVOID CONTINUOUS PULLS FROM EXTREME ANGLES: This will cause the rope to pile up at one end of the drum. When possible, please
get the rope as straight as possible to the direction of the object.
14. NEVER OPERATE THE WINCH WITHOUT THE ROPE FAIRLEAD FITTED: Operator injury or winch damage can result if a fairlead is not installed.
15. STAY ALERT: Watch what you are doing. Use your common sense. Do not use this winch when you are tired, stressed or WHEN UNDER THE
INFLUENCE OF DRUGS, ALCOHOL OR MEDICATION.
16. DISCONNECT SWITCH: Unplug switch when not in use.
17. REPLACEMENT PARTS & ACCESSORIES: When servicing, use only identical replacement parts. Usage of any other parts will void the warranty.
Approved accessories are available from your local distributor.
Page 2
Summary of Contents for 76-50115BW
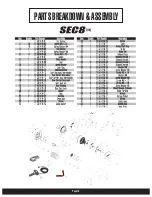
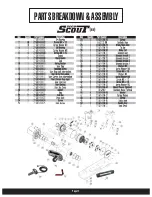
Page 17: ...PARTS BREAKDOWN ASSEMBLY Page 16...
Page 18: ...PARTS BREAKDOWN ASSEMBLY Page 17...
Page 19: ...PARTS BREAKDOWN ASSEMBLY Page 18...
Page 20: ...PARTS BREAKDOWN ASSEMBLY Page 19...
Page 21: ...PARTS BREAKDOWN ASSEMBLY Page 20...


