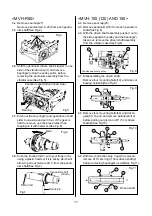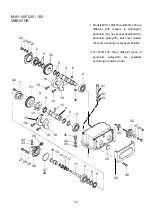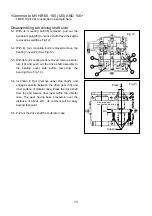
1.
2.
3.
4.
5.
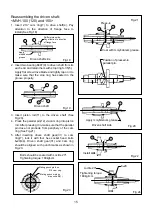
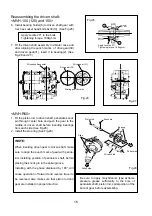
Insert 210
o
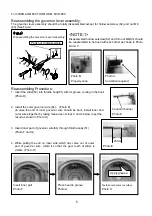
cam ring(7) to drive shaft(4). Pay
attention to the direction of flange face to
install.(See Fig.18)
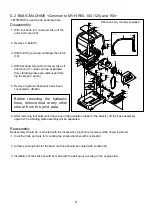
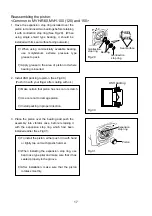
Insert two bearing 6807(9) to driven shaft from its
each end and retain them with stop ring S-35(5).
Apply flat screw drive blade and lightly tap on it to
make sure that the stop ring has seated in the
groove properly.
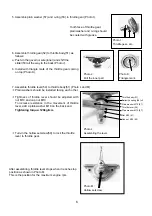
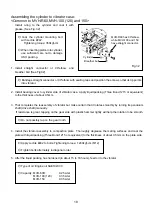
Insert piston rod(11) to the driven shaft (See
Fig.20).
Press the parallel pin(12) via cam ring into piston
rod. After pressing it in,make sure that the parallel
pin dose not protrude from periphery of the cam
ring.(See Fig.21)
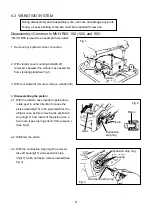
After inserting driven shaft gear(31) to cam
ring(7), lock it with four hex socket head bolts
6
x
20(44). Driven shaft gear(31) and cam ring
should be aligned with punch marks as shown in
Fig.23.
Bolts should be coated with Loctite 271.
Tightening torque: 180kgf-cm
Reassembling the driven shaft:
<MVH-100 (120) and 150>
15
Fig.20
Fig.22
Fig.24
Fig.23
Fig.21
Driven shaft side
Mating punch mark on
210
o
cam ring
Mating punch mark on
driven shaft(31)
Loctite 271
Tightening torque:
180kgf-cm
6
x
20
Install
Apply molybdenum grease.
Press-in
4
7
12
4
11
Shifter piston side.
Pay attention to direction
of flange face.
Fig.18
Driven shaft side
Apply
molybdenum
grease
4
7
Coat with molybdenum grease.
Position of pressed-in
parallel pin.
Fig.19
Driven shaft
4
5
5
7
9
9
31
7

