background image

Manual 

GLOGO 690 

- ©Mikado Model Helicopters GmbH - Page 13

4x 

     M2,5x12

4x 

M2,5x18

8x  

        M2,5 Stop

M2,5x12

M2,5x18

M2,5

M2,5

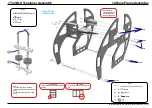
11 Throttle/ Tail Servo Mounting                                                                 13 RC Equipment Mounting

12 Fuel Tank Mounting                                

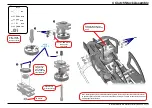
It is required to glue the 
fuel tank edge grommet 
to the frame with super 
glue to avoid premature 
wearing

To Mount Vent Fitting, before insta-
ling the main nipple and grommet 
thread a piece of wire through the 
vent fitting and string it through 
the main opening and through the 
vent openeing. Then slide the vent 
nipple up and secure with the nut 
on the outside.

-Wire Length from Front of frame to Vbar Neo in 
  rear = 17.5”- 18” (445mm - 460mm) 
-Use extensions, or customize wires to this length for,
  Throttle  Servo,  Power  Input  Cables,  Remote  Glow  (Optional),          
 Back Up Guard (Optional). 

Large RX Pack Recomended for proper CG. 
Example = OptiPower 2s 5000mah

Backup Guard 

(Optional)

RX Pack mounted 

on its side

Remote Glow 

Driver (Optional)

Bag 9

Bag 10

2 x Frame Grommets

Bag 10

Summary of Contents for GLOGO 690

Page 1: ...heli de Mikado Model Helicopters GmbH 2019 V1 0000 GLOGO 690 Manual Mikado Model Helicopters GmbH Graf von Schwerin Str 40 14469 Potsdam Germany phone 49 0 331 23749 0 fax 49 0 331 23749 11 www mikad...

Page 2: ...away from the helicopter Novice R C helicopter pilots should always seek advice from experienced pilots to obtain hints with assem bly and for pre flight adjustments Note that a badly assembled or ins...

Page 3: ...ner Assembly 1 2 Main Frame Assembly Bag 1 Bag 1 Notes Put Blue Loctite into the Nuts Tighten till snug but not overly tight which would cause the pulleys to not spin freely Vertical Plate Longer Carb...

Page 4: ...towards rear Ensure Boom Mounts are mounted with the Clamping Tabs to the left Insert M2 5x10mm Bolt before installing in frame BLUE LOCTITE EVERYTHING BLUE LOCTITE EVERYTHING Bag 1 Bag 1 1 3 Front Fr...

Page 5: ...2 Motor Assembly 3 Engine Landing Gear Mounting Slide the Engine Assembly in from the bottom at an angle Stock Engine Spacer Note You Must Block the Cranksahft from twisting with a crank locking tool...

Page 6: ...not included Note When tightening the 8 x Clutch Stack Mounting Bolts you must spin the start shaft counter clockwi se against engine compression in order to lock the one way bearing in the clutch to...

Page 7: ...3x5x27 M3x35 5x M3x8 5x8x3 7 27mm 3x5x0 5 3x5x10 3x7x3 2x 6x8x0 5 2x M3x8 4x 5x8x3 2x M3x16 2x 4x8x3 5 2x M3 1x M3x3 1 5x M3 1x M2 5x6 1x 3x5x27 2x M3x8 5x M3x35 M3 Stop 5x 2x 3x5x10 2x 3x7x3 2x 5x13...

Page 8: ...3 M3x16 2x 4x731 mm 7x570 mm 25x805mm M3 Stop M3x14 M3 6 Tail Boom Bag 6 Bag 5 Bag 6 11 Bag 6 11 Ball 6 mm Ball 6 mm Attach the ball links so that the engraved number is on the outer surface pointing...

Page 9: ...h belt Pull tail rotor backwards and tighten screws 6 Tail Boom Assembly Push in tail boom until flush with front of front boom mount Use red Loctite on the right nut to affix it to the treaded rod th...

Page 10: ...is on the outer surface pointing towards you Throttle Linkage First mount Bearing Block Sup port Plate then slide Main Sahft through the Bearing Blocks to align everything before mounting servos Slid...

Page 11: ...g apply grease Slide Main Gear in from side then raise 3rd bearing block to engage the bottom of the one way bea ring Loosely tighten the bolts until the bearig block assembly is in place then tighten...

Page 12: ...x3 3x5x2 3x6x2 5 M3x20 3x5x0 5 7x5 2x M5x12 M5x12 8x16x5 11 5x15 8x0 3 6x 7x5 O Ring 2x 11 5x15 8x0 3 8x15x2 6 5x15x1 4x 2x 4x 4x 8x16x5 M2 5x40 8x15x2 6 10 Rotor Head Assembly Bag 7 Bag 7 Large inner...

Page 13: ...read a piece of wire through the vent fitting and string it through the main opening and through the vent openeing Then slide the vent nipple up and secure with the nut on the outside Wire Length from...

Page 14: ...14 Exhaust Box Mounting 15 Fan Shroud Modification Depends on engine muffler choice Required to fit in frame properly 4mm Likely needed for easier glow plug access For convinient ground wire access w...

Page 15: ...Model Helicopters GmbH Page 15 5244 4064 4868 5248 4876 4621 4871 4089 930 5242 5245 5235 5239 5237 5241 5240 5238 5231 5234 5232 5247 5233 5246 5236 4291 5236 5249 5247 1915 5243 4873 4594 5230 5230...

Page 16: ...Manual GLOGO 690 Mikado Model Helicopters GmbH Page 16 5256 5255 5254 5254 5263 5263 5263 5260 5263 5261 5262 5263 16 Engine Glutch Fan Overviews...

Page 17: ...ikado Model Helicopters GmbH Page 17 4634 4235 3077 2447 1961 4273 4626 4627 4625 4107 04074 4874 4354 4355 4878 4879 SET 4145 4630 4630 2462 727 2074 1956 4846 105 3069 4615 2074 4096 4634 5264 17 Ov...

Page 18: ...elicopters GmbH Page 18 www mikado heli de 930 2330 1980 4867 840 4707 954 4866 845 04050 1574 4617 1961 1565 1586 60mm 1579 65mm 4049 4133 4618 1588 40mm 2074 18 Overview V Bar Head 4619 for mainshaf...

Reviews: