Device Installation:
Special Note:
3640 contains an internal battery and thus should be oriented with
the barcode facing upwards towards the sky. Devices with internal
antennas should be placed directly under a thick panel to maximize
their performance and protect from external elements.
1. Make sure your vehicle is outdoors.
2. Locate the vehicles device connection port, this is usually located
under the dash close to the front windshield.
(Fig.1)
3. Continue with plugging the MiFleet device into port. Typical
connection sequence:
• Connect any peripherals to the device.
• Plug in power harness, complete.
(Fig. 2)
4. Ensure the vehicle ignition is on.
OBDII Connection Diagram:
Fig. 2
Fig. 1
5. Communication verification is critical for proper functionality
of device. First verify that the device has been acquired and has
registered to the wireless network. This may be verified in one of
two ways.
1. First, installers may look at the communication LED (i.e., the
one closest to the SMC antenna connector).
2. If this LED is solid, then the device has registered to the
network and established a data session. If no connection
please contact MiFleet support at 1.866.643.5338 opt 2.
Device Installation 2-Wire:
Special Note:
3640 contains an internal battery and thus should be oriented with
the barcode facing upwards towards the sky. Devices with internal
antennas should be placed directly under a thick panel to maximize
their performance and protect from external elements.
1. Make sure your vehicle is outdoors.
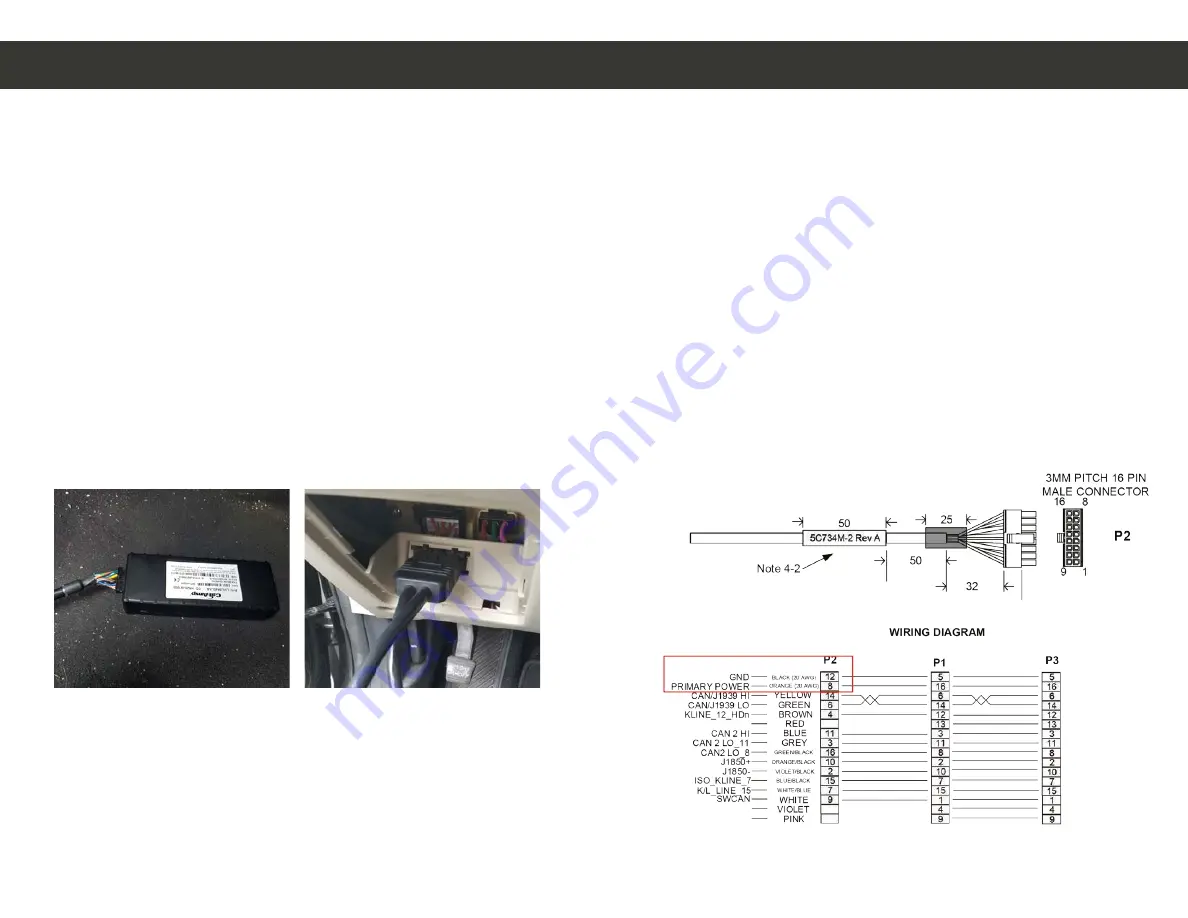
2. Locate
the Power (orange) and Ground (black) connections on the
cable.
(Fig.3)
3. Connect vehicles 12v constant power to orange cable
4. Connect vehicles ground black cable to ground connection, we
suggest using the battery.
5. Turn vehicle on, let vehicle run for 10 minutes to ensure proper
connection to platform.
Diagram:
Fig. 3


