background image

Start

The appliance has be set at the factory so that the
programme will start automatically a few seconds after the
last entry is made. You can alter this setting so that the
programme has to be started manually.

Steam reduction

This function can be activated or deactivated. It is best to
deactivate it when you are cooking different types of food at
the same time, e.g. when cooking a whole meal and the
dishes need to be put into the steam combi oven at different
times.
Please note that when steam reduction is deactivated a lot of
steam will escape when you open the door and that the
keeping warm function cannot be used.

Keeping warm

This function can be activated or deactivated.

Pre-heat

This function can be activated or deactivated.

Recommended temperatures

If you frequently change a recommended temperature it may
be a good idea to change it permanently. You can change
the temperatures within the permitted range.

Settings

36

Summary of Contents for DG 5070

Page 1: ...ion instructions Steam oven DG 5070 DG 5080 DG 5088 To avoid the risk of accidents or damage to the appliance it is essential to read these instructions before it is installed and used for the first time M Nr 07 207 620 en GB ...

Page 2: ...me 16 Noises 16 Heating up phase 17 Cooking phase 17 Steam reduction 17 Keeping warm 17 Before using for the first time 18 Setting up the appliance for using for the first time 18 Cleaning for the first time 20 Setting the correct boiling point for water 21 Functions 22 Brief operating instructions 23 Preparing the appliance for use 23 Selecting a function 23 Setting the temperature 23 Setting a c...

Page 3: ...tional functions 31 Start time Finish 31 Pre heat 31 Minute minder time 33 System lock 34 Settings 35 Language J 35 Time of day 35 Start 36 Steam reduction 36 Keeping warm 36 Pre heat 36 Recommended temperatures 36 Water hardness 37 Display 37 Volume 37 Safety 37 Units 38 Showroom programme 38 Factory default 38 Cleaning and care 39 General notes 39 Appliance front 40 Oven interior 41 Contents 3 ...

Page 4: ...al accessories 50 Cooking containers 50 Cleaning and care products 52 Other accessories 53 Safety instructions for installation 54 Appliance and building in dimensions 55 Installation in a tall unit 55 Installation in a base unit 56 Installation in a tall unit in combination with an oven 57 Installing the appliance 58 Electrical connection 59 After sales service data plate 61 Contents 4 ...

Page 5: ...households and for use in similar working and residential environments such as Shops Offices and showrooms and by residents in establishments such as Hostels and guest houses The steam oven is intended for domestic use only as described in the operating and installation instructions and the user instructions Any other use is not supported by the manufacturer and could be dangerous Miele cannot be ...

Page 6: ...t of the reach of babies and young children Danger of suffocation Dispose of or recycle all packaging safely as soon as possible Technical safety Before installation check the steam oven for visible signs of damage Do not install and use a damaged appliance A damaged appliance is dangerous Before connecting the appliance to the mains supply ensure that the connection data on the data plate voltage...

Page 7: ...ersons could be dangerous The manufacturer cannot be held liable for unauthorised work If the connection cable is damaged it must be replaced with a special connection cable of type H 05 V V F pvc insulated available from the Miele Spare Parts Department Faulty components must only be replaced by genuine Miele original spare parts The manufacturer can only guarantee the safety of the appliance whe...

Page 8: ...sms which are only destroyed by thorough cooking at a sufficiently high temperature for long enough Therefore when cooking or reheating food such as poultry it is particularly important that the food is completely cooked through If in doubt select a longer cooking or reheating time Do not leave cooked food in the oven and do not use any cooking containers which are susceptible to corrosion as this...

Page 9: ...lectric shock hazard Do not place heavy objects on the open door The door can support a maximum weight of 8 kg If the appliance is installed behind a kitchen furniture door it may only be used with the furniture door open Only close the door when the appliance is not in use and is completely dry inside The manufacturer cannot be held liable for damage caused by non compliance with these Warning an...

Page 10: ...ppliance Electrical and electronic appliances often contain materials which if handled or disposed of incorrectly could be potentially hazardous to human health and to the environment They are however essential for the correct functioning of your appliance Please do not therefore dispose of it with your household waste Please dispose of it at your local community waste collection recycling centre ...

Page 11: ... cVentilation outlet dDoor seal eSteam channel fCompartment for water container gWater container with insert hContact point for water container iShelf levels jSteam inlet kDrip channel in the oven lFloor heater mTemperature sensor nSteam outlet Guide to the appliance 11 ...

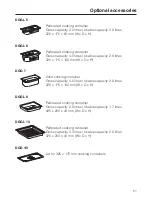
Page 12: ... DGGL 8 1 perforated cooking container Gross capacity 2 0 litres Usable capacity 1 7 litres 325 x 265 x 40 mm W x D x H DGGL 1 2 perforated cooking containers Gross capacity 1 5 litres Usable capacity 0 9 litres 325 x 175 x 40 mm W x D x H Rack For placing your own cooking containers on Silicone grease For lubricating the coupling seal on the water container Descaling tablets For descaling the wat...

Page 13: ...Control panel aOn Off sensor bSelector sensors cNumerical key pad dMinute minder e Clear fDisplay Guide to the appliance 13 ...

Page 14: ...ng through the menus For selecting the option or value shown in the display next to the sensor The sensors light up when it is possible to make a selection 0 1 2 For entering temperatures For entering times The sensors light up when an entry is possible or necessary For reverting to the previous menu For deleting the previous entry l For activating and deactivating the minute minder For selecting ...

Page 15: ... available The beginning of the list will appear under the dotted line For entering temperatures For entering times These only appear when an entry is possible or necessary L A tick will appear beside the option which is currently selected K Information about operating the oven and tips are shown in the display You can delete the information window by confirming OK or by following the instructions...

Page 16: ...gramme at 100 C for approx 30 minutes providing the door is not opened The water level in the water container is represented by a symbol in the display Temperature Some of the functions are allocated with a recommended temperature You can alter the recommended temperature for an individual cooking process or permanently see Settings Recommended temperature Cooking duration time A duration of betwe...

Page 17: ...be shown in the display Steam reduction The steam oven is delivered with this function activated It reduces the amount of steam which escapes from the appliance when the door is opened at the end of the cooking duration You can deactivate the steam reduction function see Settings Steam reduction Keeping warm The steam oven is set at the factory so that if it is not switched off at the end of a coo...

Page 18: ... next to the arrows until the language you want appears in the display Touch the sensor to the left hand side of the language you want A tick L will appear beside the language selected If you have chosen the wrong language by mistake you can follow the flag symbol J to return to the Language sub menu Confirm your selection by touching the sensor next to OK the lowest of the three sensors beside th...

Page 19: ...e display will always show the time of day On for 60 seconds the display will show the time for 60 seconds after the appliance is switched off Do not display the display will only show the time when the appliance is switched on Select the option you want After you have confirmed your selection with OK the display will show messages to tell you that your appliance is set up ready to take the Miele ...

Page 20: ... thoroughly by hand using hot water Do not use any washing up liquid or detergent Do not clean the water container or the insert in a dishwasher Do not immerse the water container in water Accessories Oven interior Take all accessories out of the oven Wash them in a mild solution of washing up liquid and hot water or in the dishwasher The interior of the steam oven has been treated at the factory ...

Page 21: ...se and then run the Steam cooking Universal 100 C programme for 15 minutes Proceed as described in Brief operating instructions This procedure sets the correct boiling point for water for the altitude in your area and also flushes out the waterways Warning A lot of steam will be emitted from the appliance If you move house the appliance will need to be re set for the new altitude if this differs f...

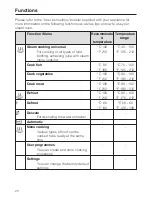
Page 22: ...d bottling extracting juice with steam menu cooking Cook fish C 85 F 185 C 75 100 F 165 212 Cook vegetables C 100 F 212 C 90 100 F 195 212 Cook meat C 100 F 212 C 90 100 F 195 212 Reheat C 100 F 212 C 80 100 F 175 212 Defrost C 60 F 140 C 50 60 F 120 140 F Descale For descaling the water container c Automatic 2 Menu cooking Various types of food can be cooked to be ready at the same time User prog...

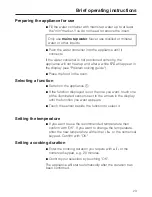
Page 23: ...itch on the appliance s If the function displayed is not the one you want touch one of the illuminated sensors next to the arrows in the display until the function you want appears Touch the sensor beside the function to select it Setting the temperature If you want to use the recommended temperature then confirm with OK If you want to change the temperature enter the new temperature with either o...

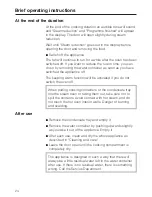
Page 24: ... switch the oven off When putting cooking containers or the condensate tray into the steam oven or taking them out take care not to spill the contents Avoid contact with hot steam and do not touch the hot oven interior walls Danger of burning and scalding After use Remove the condensate tray and empty it Remove the water container by pushing upwards slightly as you take it out of the appliance Emp...

Page 25: ...s Avoid contact with hot steam and do not touch the hot oven interior walls Danger of burning and scalding Operation will resume when the door is closed When the door is closed the pressure has to equalise which can cause a whistling sound The oven will heat up again and the display will show the temperature of the cooking compartment as it rises Once the set temperature has been reached the displ...

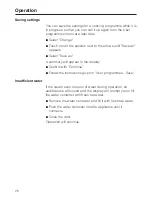
Page 26: ...A summary will appear in the display Confirm with Continue Follow the instructions given in User programmes Save Insufficient water If the steam oven runs out of water during operation an audible tone will sound and the display will prompt you to fill the water container with fresh tap water Remove the water container and fill it with fresh tap water Push the water container into the appliance unt...

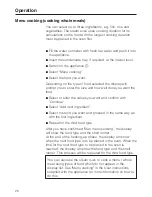
Page 27: ...n the appliance s Select the programme you want Select the food you want Depending on the programme and the type of food selected the display will prompt you to enter the size and how well done you want the food The factory default setting is medium for how well done you want the food It is best to use the preset value to start with If food is not cooked sufficiently it can be put back in the oven...

Page 28: ...t and confirm with Continue Select Add next ingredient Select the food you want and proceed in the same way as with the first ingredient Repeat for the third food type After you have confirmed Start menu cooking the display will show the food type and the shelf runner At the end of the heating up phase the display will show when the next food type is to be placed in the oven When the time for the ...

Page 29: ...create user programmes Change Existing programmes will be shown in the display and can be altered Delete Existing programmes can be deleted Use in main menu You can place up to three existing programmes in the main menu When doing this you can allocate the programme to a specific position at the end of the Main menu Create Select User programmes Select Create Select the function you want Enter the...

Page 30: ... or a combination of both e g Dish 1 Minestrone Use the sensors on the left and right hand side of the alphabet to highlight the letters you want and confirm them with Select character The appliance will enter the letters as lower or upper case automatically Complete the process with Confirm name Operation 30 ...

Page 31: ...e is a long delay between the food being placed in the oven and the start of cooking Fresh food can change its colour and even deteriorate Select the function temperature and duration in the normal way Then select Start time or Finish and enter the time you want the cooking programme to begin or end at Confirm with OK Pre heat Your appliance has a pre heating function This heats the oven interior ...

Page 32: ...sing pre heat Switch on the appliance The main menu will appear in the display Do not select a function The display will change afer a few seconds and the appliance will start heating up When the heating up process has finished Programme finished will appear in the display Place the food in the oven The main menu will appear in the display Select the settings as normal Not using pre heat Place the...

Page 33: ... and seconds or hours minutes and seconds Example 8 minutes 8 00 At the end of the minute minder time you will hear an audible tone Switch the minute minder time off by touching If you do not switch the minute minder off the time will carry on counting in seconds and the l symbol will flash in the display This will tell you how much time has passed since the minute minder time elapsed Setting the ...

Page 34: ...ted factory default setting Before this feature can be activated you will need to change the factory default setting to Permitted this only needs to be done once see Settings Safety To activate the system lock Select the symbol Select On and confirm with OK To deactivate the system lock Select the symbol Select Off and confirm with OK Additional functions 34 ...

Page 35: ... 5 seconds the display will revert to the Settings menu Language J You can set the display to show the language of your choice You do this via the Languages J sub menu If you have selected the wrong language by mistake you can follow the flag symbol J to return to the Language sub menu Time of day Display You can choose whether you want the time of day to be displayed all the time when the applian...

Page 36: ...e g when cooking a whole meal and the dishes need to be put into the steam combi oven at different times Please note that when steam reduction is deactivated a lot of steam will escape when you open the door and that the keeping warm function cannot be used Keeping warm This function can be activated or deactivated Pre heat This function can be activated or deactivated Recommended temperatures If ...

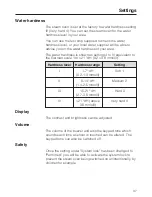
Page 37: ... 0 2 3 8 mmol l Hardness level Hardness range Setting I 1 7 dH 0 2 1 3 mmol l Soft 1 II 8 14 dH 1 4 2 5 mmol l Medium 2 III 15 21 dH 2 7 3 8 mmol l Hard 3 IV 21 dH above 3 8 mmol l Very hard 4 Display The contrast and brightness can be adjusted Volume The volume of the buzzer and also the keypad tone which sounds each time a sensor is touched can be altered The keypad tone can also be switched off...

Page 38: ...t the Off option and follow the instructions in the display Continuous loop Demo mode Touch one of the sensors next to the display and follow the instructions in the display Factory default All settings any changes you have made to settings in the Settings menu will be reset to the factory default setting Saved user programmes will be kept User programmes all saved user programmes will be deleted ...

Page 39: ...d after each use Make sure the appliance is completely dry before closing the door Do not use a steam cleaning appliance to clean this appliance The steam could reach the electrical components and cause a short circuit Do not use commercial cleaning agents Only use agents designed for domestic use Do not use cleaning agents or washing up liquids containing aliphatic hydrocarbons as these could cau...

Page 40: ... scratching Scratches on glass surfaces could even cause a breakage Contact with unsuitable cleaning agents can alter or discolour surfaces To avoid damaging your appliance do not use cleaning agents containing soda alkalines ammonia acids or chlorides cleaning agents containing descaling agents abrasive cleaning agents e g powder cleaners and cream cleaners solvent based cleaning agents stainless...

Page 41: ...d stainless steel hob cleaner see Optional accessories After cleaning wipe the surface with a damp cloth to remove any cleaning agent residues Replace the door seal with a new one if it becomes porous or brittle Door seals can be ordered from the Miele Spare Parts Department Condensate tray rack and cooking containers Wash and dry the condensate tray rack and cooking containers after each use They...

Page 42: ...ert thoroughly before replacing it in the water container When replacing the insert guide it in at an angle a and then push it downwards b as illustrated Do not immerse the water container in water or clean it in a dishwasher It is important to empty the water container after each use for hygiene reasons and also to prevent condensate building up in the appliance Do not use scouring pads or hard b...

Page 43: ...r skin either by wiping it off or by washing it off If the grease gets into the eyes it must be rinsed out with plenty of clean water If it is swallowed seek medical advice The coupling seal should be replaced with a new one if it becomes brittle or porous or if an unusually large amount of water collects on the floor of the water container compartment Coupling seals can be ordered from the Miele ...

Page 44: ...pliance will lock out after you have run the tenth programme However we recommend that you descale the appliance before it locks out Fill the water container with 1 litre of descaling solution Follow the instructions on the descaling agent packaging carefully Push the water container into the appliance until it connects Switch the appliance on and select Descale Confirm with Continue The descaling...

Page 45: ...water Push the water container into the appliance until it connects The descaling process will continue automatically when the water container is pushed back into the appliance After descaling Switch off the appliance Open the door Remove the water container and empty it Dry the appliance thoroughly Make sure the appliance is completely dry before closing the door Cleaning and care 45 ...

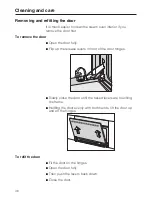
Page 46: ...door fully Flip up the release levers in front of the door hinges Slowly close the door until the raised levers are touching the frame Holding the door evenly with both hands lift the door up and off the hinges To refit the door Fit the door on the hinges Open the door fully Then push the levers back down Close the door Cleaning and care 46 ...

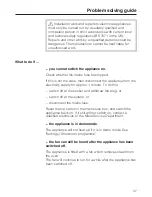
Page 47: ...the electricity supply for approx 1 minute To do this switch off at the socket and withdraw the plug or switch off at the isolator or disconnect the mains fuse Reset the trip switch in the mains fuse box and switch the appliance back on If it still will not switch on contact a qualified electrician or the Miele Service Department the appliance is in demo mode The appliance will not heat up if it i...

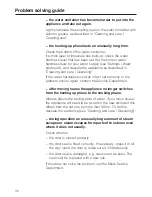
Page 48: ...act the Service Department after moving house the appliance no longer switches from the heating up phase to the cooking phase Altitude affects the boiling point of water If you move house the appliance will need to be re set for the new altitude if this differs from the old one by more than 300 m To do this descale the appliance see Cleaning and care Descaling during operation an unusually large a...

Page 49: ...the appliance off and then back on again A fault message will appear if the temperature of the oven compartment has not risen by at least 2 C within 5 minutes of the start of the heating up phase This can occur if for example a large quantity of frozen food is being prepared Lightly lubricate the coupling seal on the water container with silicone grease as described in Cleaning and care Water cont...

Page 50: ...ers available in different sizes DGGL 1 Perforated cooking container Gross capacity 1 5 litres Usable capacity 0 9 litres 325 x 175 x 40 mm W x D x H DGG 2 Solid cooking container Gross capacity 2 5 litres Usable capacity 2 0 litres 325 x 175 x 65 mm W x D x H DGG 3 Solid cooking container Gross capacity 4 0 litres Usable capacity 3 1 litres 325 x 265 x 65 mm W x D x H DGGL 4 Perforated cooking co...

Page 51: ... x D x H DGG 7 Solid cooking container Gross capacity 4 0 litres Usable capacity 2 8 litres 325 x 175 x 100 mm W x D x H DGGL 8 Perforated cooking container Gross capacity 2 0 litres Usable capacity 1 7 litres 325 x 265 x 40 mm W x D x H DGGL 13 Perforated cooking container Gross capacity 3 3 litres Usable capacity 2 0 litres 325 x 350 x 40 mm W x D x H DGD 1 3 Lid for 325 x 175 mm cooking contain...

Page 52: ...k For placing your own cooking containers on Cleaning and care products Miele descaling tablets 6 tablets For descaling the water container Ceramic and stainless steel hob cleaner 250 ml Removes discolouration from the floor heater caused by drops of liquid Removes discolouration from cooking containers Optional accessories 52 ...

Page 53: ...r accessories Multi purpose casserole dish KMB 5000 S Die cast aluminium casserole dish with anti stick surface and stainless steel lid Also suitable for use on induction hobs and in all Miele ovens Not suitable for use on gas hobs Maximum capacity 2 5 kg Dimensions 325 x 260 x 65 mm W x D x H Miele home system See Miele home system for more information Optional accessories 53 ...

Page 54: ...sible after the appliance has been installed This appliance may only be used in mobile installations if a risk assessment of the installation has been carried out by a suitably qualified engineer The appliance must be positioned so that you can see the contents of a cooking container placed on the top runner Otherwise you may risk scalding or burning yourself with hot water and food when taking co...

Page 55: ...iances with metal front aSteam oven bBuilding in recess cInlet for mains connection cable to the appliance dRecommended position for electrical socket Important Do not position behind the appliance eMains connection cable Appliance and building in dimensions 55 ...

Page 56: ...g in recess cInlet for mains connection cable to the appliance dRecommended position for electrical socket Important Do not position behind the appliance eMains connection cable N B Undercounter installation is not recommended if there are young children in the home Appliance and building in dimensions 56 ...

Page 57: ... oven bBuilding in recess cInlet for mains connection cable to the appliance dRecommended position for electrical socket Important Do not position behind the appliance eMains connection cable fVent cut out for when appliance is installed in combination with a pyrolytic oven gOven Appliance and building in dimensions 57 ...

Page 58: ...ppliance into the recess and align it Secure the appliance by screwing the two wood screws 3 5 x 25 mm i supplied into the vertical trim on either side of the appliance see illustration Installing the appliance 58 ...

Page 59: ...e appliance Please ensure that the connection data quoted on the data plate match the household mains supply This appliance is supplied with a cable and moulded plug for connection to a single phase 230 240 V 50 Hz supply via a suitable switched socket which should be easily accessible after installation It can if necessary be connected to a suitable isolator or a double pole fused spur connection...

Page 60: ... fuses should be ASTA approved to BS 1362 and have the correct rating Replacement fuses and fuse covers may be purchased from your local electrical supplier Important The electrical safety of this appliance can only be guaranteed when continuity is complete between the appliance and an effective earthing system which complies with local and national regulations It is most important that this basic...

Page 61: ...improve our service When contacting Miele please quote the model and serial number of your appliance which are given on the data plate N B A call out charge will be applied for service visits where the problem could have been resolved as described in these instructions Space in which to stick the extra data plate supplied with the appliance Ensure that the model number is the same as the one on th...

Page 62: ...62 ...

Page 63: ...63 ...

Page 64: ...Alteration rights reserved 4810 M Nr 07 207 620 05 ...

Reviews: