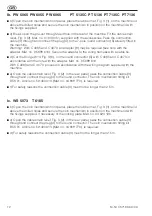
Ib. PW 5065 PW 6055 PW 6065 PT 5135C PT 5136 PT 7135C PT 7136
^
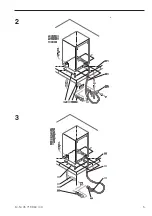
b) Open the coin mechanism front panel, place the rubber mat, Fig. 3 (1), on the machine lid
above the drilled holes and secure the coin mechanism in position on the machine lid with
the fixings supplied.
^
c) Break open the pre-cut through-feed hole in the rear of the machine. Fit the cable strain
relief, Fig. 3 (2), Mat. no. 01 636 051, supplied with the accessories. Pass the connection
cable (3) through and connect the plug (4) to the 7-pole round connector (5) already fitted in
the machine.
Warning!: With C 4065 and C 4070, an adapter (8) may be required (see note with the
adapter, Mat. no. 05 688 610). Secure the adapter to the wiring harness with a cable tie.
^
d) Cut the bridge W14, Fig. 3 (6), on the round connector (5) with C 4065 and C 4070 in
accordance with the note with the adapter, Mat. no. 05 688 610.
With C 4060 and C 4070, proceed in accordance with the wiring diagram supplied with the
machine.
^
e) Open the cable strain relief, Fig. 3 (2), in the rear panel, pass the connection cable (3)
through and connect the plug (4) to the round connector. The coin mechanism fitting kit
BSK 01, Article no. 59.4000.13 (Mat. no. 04 808 770), is required.
^
f) For safety reasons the connection cable (3) must not be longer than 2.5 m.
Ic. WS 5073 T 6185
^
b) Open the coin mechanism front panel, place the rubber mat, Fig. 3 (1), on the machine lid
above the drilled holes and secure the coin mechanism in position on the machine lid with
the fixings supplied. If necessary fit the locking plate, Mat. no. 04 623 190.
^
c) Open the cable strain relief, Fig. 3 (2), in the rear panel, pass the connection cable (3)
through and connect the plug (4) to the round connector. The coin mechanism fitting kit
BSK 01, Article no. 59.4000.13 (Mat. no. 04 808 770), is required.
^
d) For safety reasons the connection cable (3) must not be longer than 2.5 m.
12
M.-Nr. 05 719 360 / 03
Summary of Contents for C 4060
Page 4: ...4 M Nr 05 719 360 03 1 ...
Page 5: ...M Nr 05 719 360 03 5 2 3 ...
Page 6: ...6 M Nr 05 719 360 03 4 5 ...
Page 7: ...M Nr 05 719 360 03 7 6 ...
Page 8: ...8 M Nr 05 719 360 03 7 ...
Page 9: ...M Nr 05 719 360 03 9 9 8 ...
Page 10: ...10 M Nr 05 719 360 03 11 10 ...


