background image

IMPORTANT INFORMATION

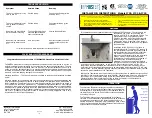
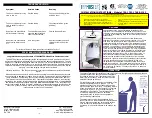
PARTS IDENTIFICATION

Assembly Instructions for Model Number 1 82

A

Door Panel (2) - 

Large rectangular panel with (2) doors

and latch knobs

B

Back Panel (2) - 

Large rectangular panel without doors

C

Side Panel (4) - 

Smaller rectangular panel with          

protruding locking tabs at the top

D

Top Panel Grid -

Large rectangular panel with cone 

shape connecting pins on all 4 corners

E

Bottom Shelf Grid - 

Large rectangular mesh panel with

wider spacing between the wires

F

Bottom Floor Panel Grid - 

Large rectangular mesh 

panel

G

Middle Floor Panel Grid - 

Large rectangular mesh 

panel with a cut-out opening in corner

H

Bottom Pan - 

Plastic tray that fits in the bottom of the 

cage

I

Middle Pan - 

Plastic tray that fits in the middle of the 

cage

J

Ramp (3), Clips (4), and Cover (3) -  

Wire ramp for 

access from one level to the other. (Note: There is a slight
bend in the middle. This is intentional.) Clips attach Ramp
to Shelf and reversible Cover slips over the ramp

K

Base: Side Supports (2) -

Main structural components

for the base

L

Base: Base Supports (4) - 

Two with multiple holes, 

Two without holes

E

F

G

H

L

K

J

Ramp, with Cover,

Shown in Cage

Ramp Clips

I

A

B

C

D

Unwrap and remove all parts from the box. Keep the box and packing material until the product is assembled.  In case of return 
or exchange, failure to return product in similar condition as received could result in limited reimbursement. Please save sales 
receipt as proof of purchase for warranty purposes.  Check to ensure you have all the parts below.  If you discover any parts 
are missing, immediately call our toll-free service helpline at 1-800-428-8560 (Monday - Friday 9 a.m. to 4 p.m. EST) or at
[email protected]

To protect the finish of your Pet Home and the bottom pan, use only mild, non-abrasive

cleaners and water. Any course scrubbing or abrasive materials could damage the finish.

800-428-8560

midwesthomes4pets.com

P.O. Box 1031

Muncie, Indiana 47308

Ho

les

No

 H

ole

s

Summary of Contents for Ferret Nation 182

Page 1: ...his is intentional Clips attach Ramp to Shelf and reversible Cover slips over the ramp K Base Side Supports 2 Main structural components for the base L Base Base Supports 4 Two with multiple holes Two...

Page 2: ...bottom of the Side Supports and attach the Base Support without holes to the top by screwing a Phillips Head Bolt with Washer to outside of each Side Support Slightly separate the open ends of the bas...

Page 3: ...Grid F and insert the protruding wires into the corresponding holes of the Door Panel Be sure the wires that run front to back on the grid are on the top Locate the Back Panel B and insert one peg in...

Page 4: ...e remaining two Side Panels C two Swivel Locks Q and two Flat Head Screws P Using the Phillips Head Screwdriver R and flat head screws attach one Swivel Lock to each of the Side Panels Do not tighten...

Page 5: ...e next Attach the hooks on the end of the ramp to the back wire in the opening of the Middle Panel Grid This ramp has the ability to be secured in the up position to section off the top level from the...

Page 6: ...for shipping Replacement parts are warranted for the remainder of the original period 2 THIS WARRANTY DOES NOT COVER defects in the furniture caused by any animal any physical abuse to or misuse of th...

Page 7: ...tre Ceci est intentionnel Se glissent facilement mais solidement par dessus la rampe K Base Supports lat raux 2 l ments de structure principaux pour la base RENSEIGNEMENTS IMPORTANTS IDENTIFICATION DE...

Page 8: ...e la base trous multiples au bas des supports lat raux et fixez le support de la base sans trou au haut en vissant un boulon Phillips et une rondelle l ext rieur de chaque support lat ral S parez l g...

Page 9: ...illants dans les trous correspondants du Panneau de porte Les fils m talliques allant de l avant vers l arri re de la grille doivent se trouver sur le dessus Localisez le Panneau arri re B et ins rez...

Page 10: ...urn es vers l int rieur En soulevant l g rement le Panneau de la grille de l tage du milieu faites pivoter l autre extr mit du panneau arri re en alignant les fils m talliques saillants de la Grille a...

Page 11: ...dre l ouverture du Panneau du milieu du plancher de la grille Remarque Les tag res conjointement avec les Panneaux lat raux peuvent tre positionn es 3 niveaux diff rents de chaque c t de la cage Local...

Page 12: ...us de porte fiables Les verrous pointe pin able sont faciles faire fonctionner pour les humains mais impossibles pour les animaux En fermant et verrouillant les portes veillez ce que tringles ressort...

Page 13: ...r de l acheteur qu il pr sente son re u de caisse ou une autre preuve d achat avant d autoriser le retour de la cage ou son remplacement Tout retour ou remplacement doit tre d ment autoris Si l autori...

Page 14: ...irmemente por encima de la rampa K Base Soportes laterales 2 Componentes estructurales principales para la base INFORMACI N IMPORTANTE IDENTIFICACI N DE LAS PIEZAS Instrucciones de armado para los Mod...

Page 15: ...rtes frontales L a los soportes laterales mediante un tornillo Phillips con arandela a la parte exterior de cada soporte lateral El apoyo de la base con m ltiples agujeros se alinea con la rejilla del...

Page 16: ...ntro de los orificios correspondientes en el panel de puerta Asegure que los alambres que van de adelante para atr s en la rejilla se encuentran en la parte superior Localice el panel trasero B e inse...

Page 17: ...panel de rejilla del piso inferior d vuelta al otro extremo del panel trasero alineando los alambres protuberantes de la rejilla con los orificios en el panel trasero Una vez que todos est n alineado...

Page 18: ...segure que el recorte est posicionado para ajustarse a la abertura en el panel de rejilla del piso central Nota Los anaqueles junto con los paneles laterales pueden colocarse a 3 niveles diferentes a...

Page 19: ...bres en la parte superior Cerrojos de puerta No Doubt Cerrojos de pellizcar que son f ciles de utilizar para los humanos pero imposible para las mascotas Al cerrar las puertas y echar el cerrojo asegu...

Page 20: ...ecto a c mo corregir el defecto C MidWest puede solicitar al comprador que presente el recibo de venta u otra prueba de la adquisici n antes de autorizar cualquiera devoluci n o reemplazo No se permit...

Reviews: