background image

8

8

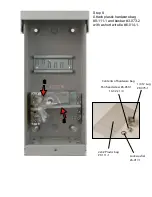
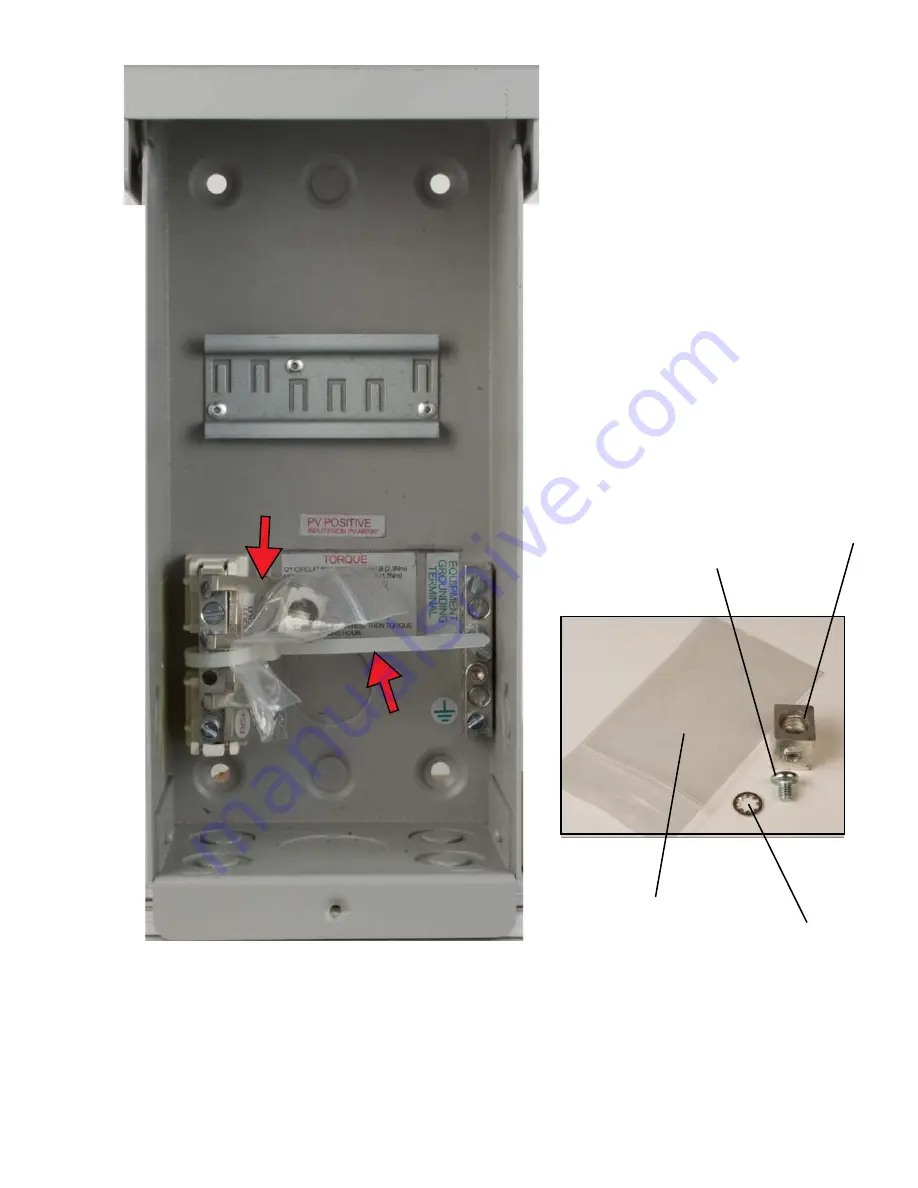
Step 8.
Attach plastic hardware bag 
#9-111-1 and busbar #3-073-2 
with a short wire tie #6-014-1.

1/0 12 Lug
#9-075-1

Pan head screw #6-059-1

10-32 x 1/4

Lock washer
#6-017-1

Contents of hardware bag

2x3.2 Plastic bag
#9-111-1

Summary of Contents for MNPV3

Page 1: ...6 1 screws Aluminum chassis strips easily Don t over tighten Step 4 Attach left busbar 9 037 1 to busbar insulators Step 5 Attach right side busbar 9 037 1 using 6 034 1 screw and lock nut 6 016 1 Step 6 Apply inside labels 10 008 1 to box MNPV3 Procedure May 30 2011 10 32 Lock nut 6 016 1 Socket head cap screw 10 32 x 7 8 6 034 1 Pan head screw 10 32 x 3 8 6 036 1 Pan head screw 10 x 3 8 6 007 1 ...

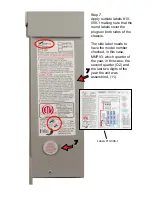
Page 2: ...nd labels cover the plugs on both sides of the chassis The side label needs to have the model number checked in this case MNPV3 which quarter of the year in this case the second quarter Q2 and the last two digits of the year the unit was assembled 11 Labels 10 008 1 ...

Page 3: ...8 Attach plastic hardware bag 9 111 1 and busbar 3 073 2 with a short wire tie 6 014 1 1 0 12 Lug 9 075 1 Pan head screw 6 059 1 10 32 x 1 4 Lock washer 6 017 1 Contents of hardware bag 2x3 2 Plastic bag 9 111 1 ...

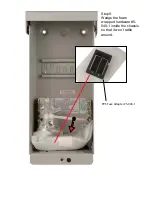
Page 4: ...Step 9 Wedge the foam wrapped hardware 5 040 1 inside the chassis so that it won t rattle around 9 PV3 Fuse Adapter 5 040 1 ...

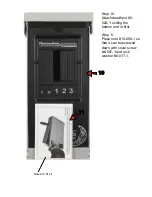
Page 5: ...10 10 11 11 Step 10 Attach deadfront 5 020 1 sliding the bottom end in first Step 11 Place note 10 008 1 so that it can be screwed down with cover screw 6 007 1 and lock washer 6 017 1 Note 10 012 1 ...

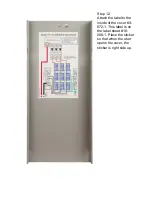
Page 6: ...Step 12 Attach the label to the inside of the cover 3 072 1 This label is on the label sheet 10 008 1 Place the sticker so that when the user opens the cover the sticker is right side up ...

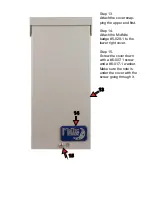
Page 7: ...upper end first Step 14 Attach the MidNite badge 5 029 1 to the lower right cover Step 15 Screw the cover down with a 6 007 1 screw and a 6 017 1 washer Make sure the note is under the cover with the screw going through it 13 13 14 14 15 15 ...

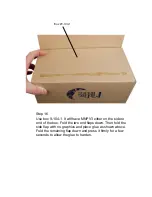
Page 8: ... either on the side or end of the box Fold the two end flaps down Then fold the side flap with no graphics and place glue as shown above Fold the remaining flap down and press it firmly for a few seconds to allow the glue to harden Box 9 104 1 ...

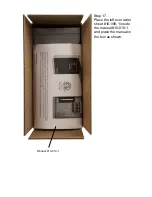
Page 9: ...Step 17 Place the left over label sheet 10 008 1 inside the manual 10 010 1 and place the manual in the box as shown Manual 10 010 1 ...

Page 10: ...8 Glue the top of the box closed Fold the two end flaps down Then fold a side flap and place glue as shown above Fold the remaining flap down and press it firmly for a few sec onds to allow the glue to harden ...

Reviews: