4. Mute Rail Adjustment after Installation (Important)
It’s the final process of mute rail installation for all hammers to be stopped at the same distance
from the mute rail and from the strings when it’s muted. The same distance from the mute rail
cause in the same distance of let off for all hammers. If the distance is not even to each
hammer, mute rail cannot work perfectly.
When the hammer head and shank stops too far from the strings, it means the let-off points are
too far from the strings too. And then, the whole acoustic piano mechanism would become
un-balanced, So, the careful adjustment is required.
Adjusting Process Summery
①
After the mute rail installation, install the action back to the piano, and clarify the 4 sections
of bass part, middle part, second treble part and treble part.
②
Pulling the rail rod in left, put the hammer shank close against the rail cushion, And softly
push the hammer heads in 4 sections to be touched to strings one by one.
③
Comparing with the other sections, the first hammer head touching slope is the basic gradient
of the mute rail.
(Normally, the second treble part or middle part can be the basic gradient, this basic section
doesn’t need the spacer put in)
④
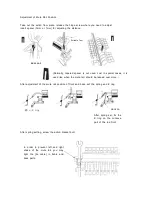
After the basic section is decided, keep that hammer head touching, using the other hand,
check the other hammer head how far(mm) the distance is from the string.
⑤
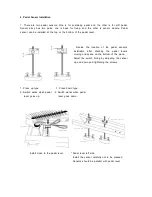
Keep this distance in mind, and add the spacer in between the stopper hinge and bracket to
adjust the distance.
⑥
Take the action out and add the adequate spacers, and take the action back to the piano...
and repeat checking again.
⑦
In every section, when every hammer head reach to the strings (with every hammer shank
touches the rail felt), it is proved that the mute rail is perfectly parallel with strings.
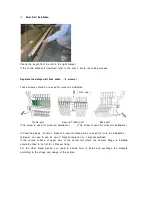
Top view of parallel strings and mute rail
Strings
Mute Rail
Strings
and
mute
rail are parallel.
Bass
Middle
Second Treble
Treble


