


4
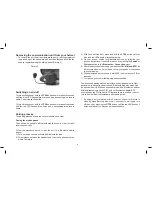
Removing the communication unit from your helmet
• To remove the unit from the clamp press gently your finger against
the arched tip of the back-plate and use the other hand to slide the
headset upwards along the sliding-panel (Picture 5).
Switching on and off
To turn on the headset,
hold the
CTRL
button down for about 6 seconds
until the blue LED flashes three times and an ascending alert tone is
heard. Then release the button.
To turn off the headset,
hold the
CTRL
button down for about 3 seconds
until the red LED flashes three times and a descending alert tone is
heard.
Pairing process
The pairing process allows the units to identify each other.
Pairing the mobile phone
The unit can be paired to a Bluetooth mobile phone in order to make/
receive phone calls.
Follow the procedure below to pair the unit to a Bluetooth mobile
phone:
1) Turn on the phone and activate its Bluetooth function.
2) The distance between the headset and the mobile phone must be
within 10 meters.
3) With the unit turned off, press and hold the
CTRL
button until the
blue and red LEDs begin alternating rapidly.
4) On your phone, search for Bluetooth devices by following your
phone’s instructions. Usually this is done by selecting the
Search
or
Discover
option in the
Bluetooth
or
Connection
menu.
5) After a few seconds of searching, your phone will list
“Midland-BTR”
as
a discovered device. Select it and follow your phone’s instructions
to accept pairing.
6) When prompted by your phone, enter 0000 (4 zeros) as your PIN or
passkey.
7) Your phone will confirm that pairing has succeeded.
The described pairing method is similar with navigational units. Navi-
gational units have often dual channel Bluetooth modules which can
be paired with a GSM phone and separately with a Bluetooth headset.
Midland transceivers like 445 BT and our Bluetooth Adapter BPA
know already the PIN code of BT Rider and there is no need to enter
this codes- it will pair automatically after pairing start.
2
If pairing is not completed within 2 minutes, the unit will return to
stand-by mode (flashing blue every 3 seconds). To pair again, turn
off the unit by pressing the
CTRL
button until the red LED flashes 3
times and repeat the process as indicated above.
Picture 5


