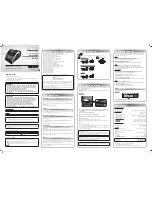
INSTALLATION
Safety and convenience are the primary consideration for mounting any piece of
mobile equipment. All controls must be readily available to the operator without
interfering with the movements necessary for safe operation of the vehicle. Be sure
all cables are clear of the brake, clutch and accelerator. Also, thought must be given
to the convenience and comfort of passengers.
Another extremely important requirement is the ease of installation and removal for
those occasions when you might want to remove the unit for service and mainte-
nance.
The most common mounting position for a transceiver is under the dashboard
directly over the drive shaft hump. Do not mount the transceiver in the path of the
heater or air conditioning air stream. Take your time and plan your installation care-
fully. When you have determined the best location for mounting, use the mounting
bracket as a template to mark mounting holes. Take care when you drill the holes
that you do not drill into wiring, trim or other accessories.
Mount in position with bolts, lock washers and nuts or self-threading screws. You
can install this transceiver in any location where 12-13.8 V DC power is available. It
3
ENGLISH
Washers
Washers
Washers
Washers
Screws
Screws
Screws
Bracket
Nuts
Nuts
Screws and
washers
ANT
EXT
SPKR
+RED
-BLK
ISTR.199-A 3-12-2002 14:24 Pagina 3
Summary of Contents for ALAN 199-A
Page 10: ......
Page 26: ......
Page 44: ...SCHEMA ELETTRICO ELECTRICAL DIAGRAM SCH MA ELECTRIQUE SCHALTPLAN CIRCUITO ELECTRICO...
Page 45: ......
Page 46: ...CIRCUITO STAMPATO PRINTED CIRCUIT CIRCUIT IMPRIM PLATINENLAYOUT CIRCUITO IMPRESO...


