


4
Click the
"Flatbed"
button
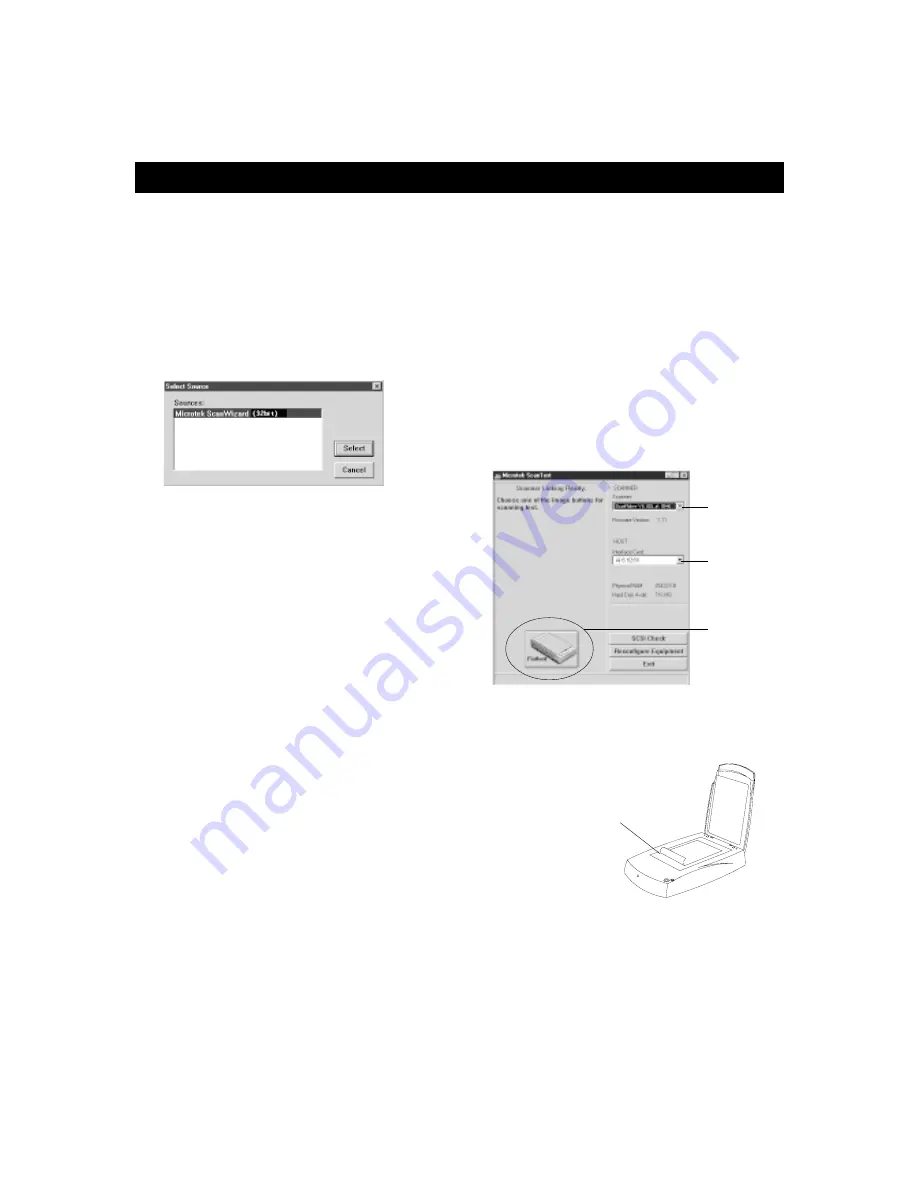
Detected
scanner
Detected
Interface
A
6. A preview of your image will be displayed in the
Microtek ScanTest window. Click OK, and exit
Microtek ScanTest; you are now ready to scan.
1. Click Start, Settings, and select
Control Panel
.
Double-click the
System
icon in Control Panel,
then select
Device Manager
from the top.
2. Double-click
Imaging Device
or
Microtek
scanner
. Verify that your scanner is listed here.
Click “OK” to close all dialog boxes.
3. In Windows, go to "Start, Programs, Microtek
ScanWizard', and select
Scanner Test
. When
started successfully, the screen below appears.
Click the Flatbed button.
4. Test your scanner
Top of document faces
front of the scanner.
4. Place your document face down on the scanner
glass, and click OK in the dialog box.
SCSI Installation on the PC
5. After all the software has been installed, click
Exit
at the bottom left of the Microtek Software
Installer screen.
6. Install
Adobe Photoshop LE
. Insert the Adobe
Photoshop LE CD-ROM into your CD-ROM
drive. Double-click the following in successive
order: "My Computer" in your Windows
desktop, the "Photosle" CD-ROM icon, the folder
named "English", the folder called "Photosle", the
folder called "Disk 1", and finally the "Setup.exe"
icon to start installation. Follow the on-screen
instructions until Photoshop LE is installed.
7. Restart your computer at the end of all software
installation.
e)
Adobe Acrobat Reader
. This is your
documentation reader for reading and printing
the manuals on the CD-ROM.
d)
Caere OmniPage Limited Edition
, your OCR
text-scanning software: During installation of
OmniPage Limited Edition, you will be asked to
select your "Source". Make sure
Microtek
ScanWizard (32bit)
is selected. At the end of
installing OmniPage Limited Edition, select
"Return to Windows" (not "Restart your
computer").


