background image

3

English

Deutsch

Fran

ç

ais

Italiano

Nederlands

Espa

ñ

ol

SCSI Installation on the PC

3. Connect scanner

1. Turn off your computer.

Note: Before performing the next step, you must have
an ASPI-compliant SCSI interface card already
installed in your computer and working properly. If
you need help in setting up the ASPI-compliant SCSI
interface card in your computer, please view the
digital file SCSI_card_PC.pdf in the SCSI Card
Installation Guide folder on your Microtek CD-
ROM.

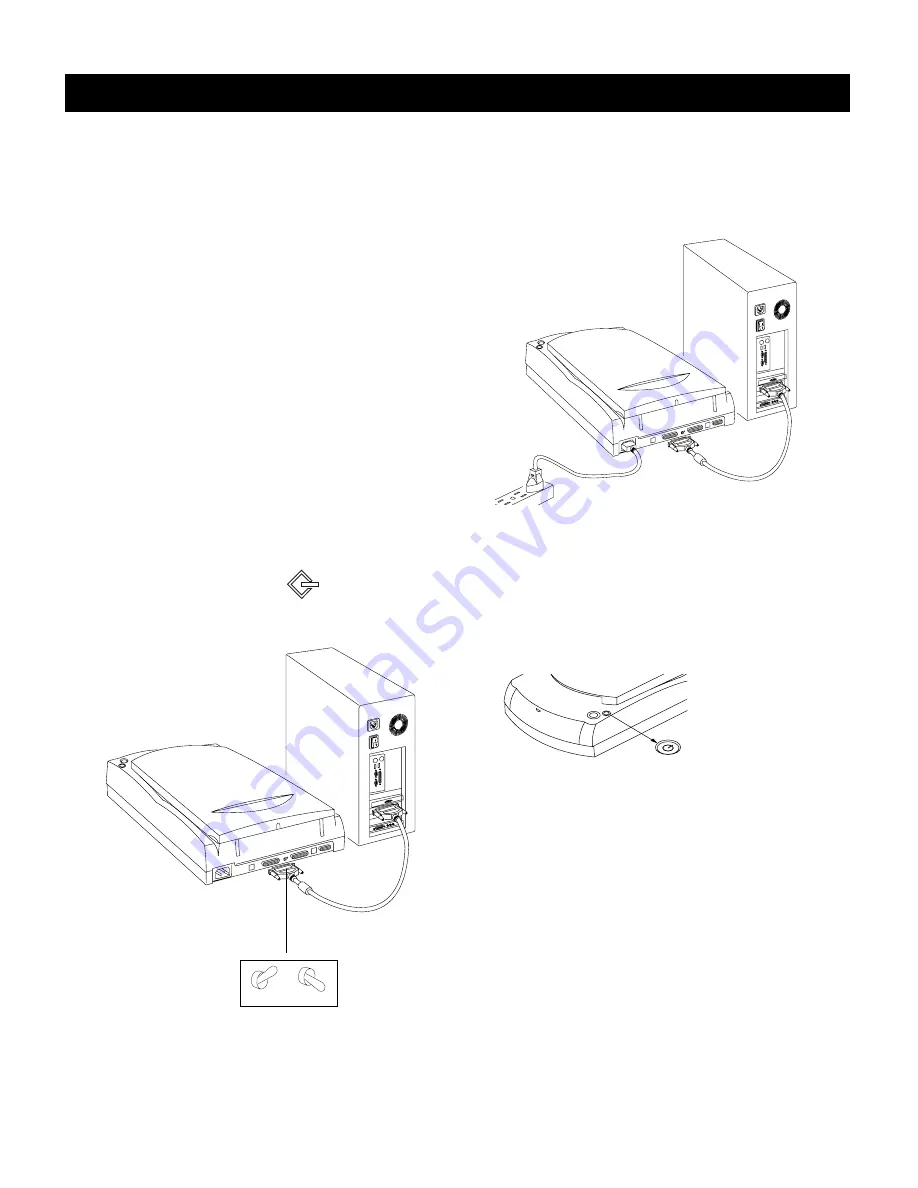
2. Connect the SCSI cable from one of the

scanner’s SCSI ports to the SCSI interface card
on the back of your computer. Then set the
terminator switch to the “ON” position.

Important

Make sure you connect to the SCSI

card on the back of your computer — not to the
parallel printer port. The SCSI port may be
indicated by this symbol:

ON

OFF

3. Plug the power cord into the back of the

scanner, and plug the other end into a wall
outlet or power source.

Power button

Press the scanner’s
power button to turn
the scanner on/off.

4. Press the scanner’s power button; this will turn

on the scanner. The green light on the front of
the scanner will blink for a few seconds and
then stay on solid.

Terminator

Switch

5. Turn on your computer. The system will find

your scanner automatically.

Summary of Contents for ScanMaker series

Page 1: ...Installation on the PC Note MakesuretheSCSIIDnumberforyourscanner which is preset to 6 does not conflict with the SCSI IDs of the other devices on your SCSI chain If you need to change the SCSI ID on...

Page 2: ...finishes installing Simply click the X close box at the upper right corner of the displayed window to return to the Microtek Software Installer Do not restart your computer until all the software has...

Page 3: ...r s SCSI ports to the SCSI interface card on the back of your computer Then set the terminator switch to the ON position Important Make sure you connect to the SCSI card on the back of your computer n...

Page 4: ...o close all dialog boxes 3 In Windows go to Start Programs Microtek ScanWizard 5 for Windows and select Scanner Test When started successfully the screen below appears Top of document faces front of t...

Page 5: ...nWizard 5 icon on the desktop to launch ScanWizard 5 3 When ScanWizard 5 launches it automatically performs a fast preview of the material on your scan bed and displays it in the preview area 4 In the...

Page 6: ...hen it appears on your Macintosh desktop to open it 4 Install the software on your Microtek CD ROM including the following Caere OmniPage Limited Edition This is your OCR text scanning software Microt...

Page 7: ...ing up the SCSI interface card in your computer please view the digital file SCSI_card_MAC pdf in the SCSI Card Installation Guide folder on your Microtek CD ROM SCSI Installation on the Macintosh 3 P...

Page 8: ...n to launch ScanWizard 5 Go button 3 When ScanWizard 5 launches it automatically performs a fast preview of the material on your scan bed and displays it in the preview area 4 In the preview window yo...

Reviews: