Quick Ceph
®
Systems
Doc ID# 1033ScanMaker8700_Setup - Revision 4/23/02
Microtek ScanMaker 8700 Setup
http://www.quickceph.com/docs/1033ScanMaker8700_Setup.pdf
Page 3
Scanning with the ScanMaker 8700
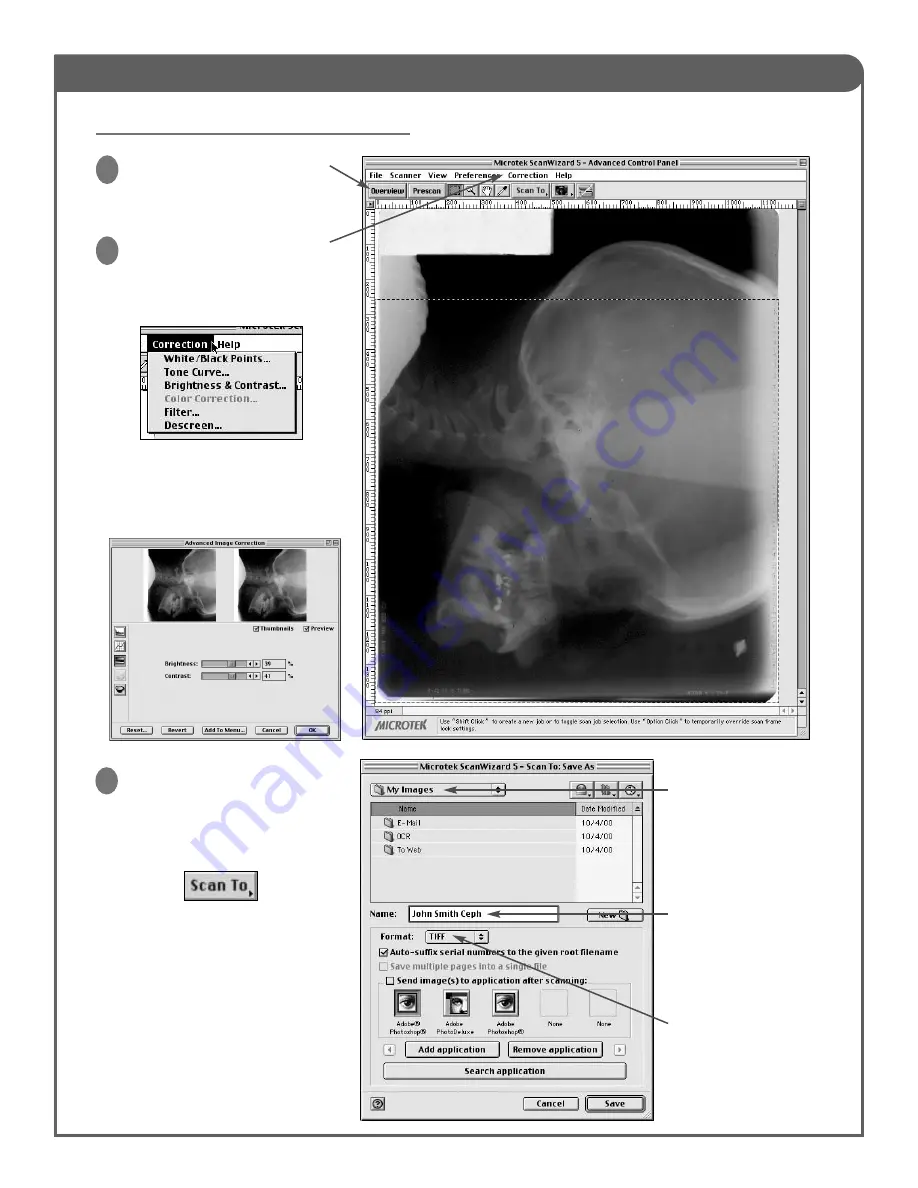
Overview Button:
Click this button once the scanner
settings have been entered to pre-
view the x-ray.
1
Image Correction:
If the image requires adjustment,
click on the Correction menu and
select the “Brightness and Contrast”
option to lighten or darken the x-ray,
The “Brightness and Contrast”
menu is shown below. The images
preview the effect of the changes.
To apply the changes, click on “OK”.
2
Saving the File:
Once the desired corrections have
been made to the image, you can
save the file. Click once on the
“Scan To” icon at the top of the pre-
view window.
By default, the image will be
scanned to a file, and the window
shown to the right will appear.
Hold down the Scan To button
brings up an option menu to allow
you to send the scanned image to
a different location, such as the
printer, for example.
Click on “Save” to save the image.
2
This window displays
where the scanned files
will be saved to. By
default, it saves it to the
My Images folder,
which has a shortcut on
the desktop.
We recommend naming
the files with the name
of the patient, followed
by the type of x-ray.
This allows for easier
identification.
The file format should
be set to TIFF for high-
er image quality.